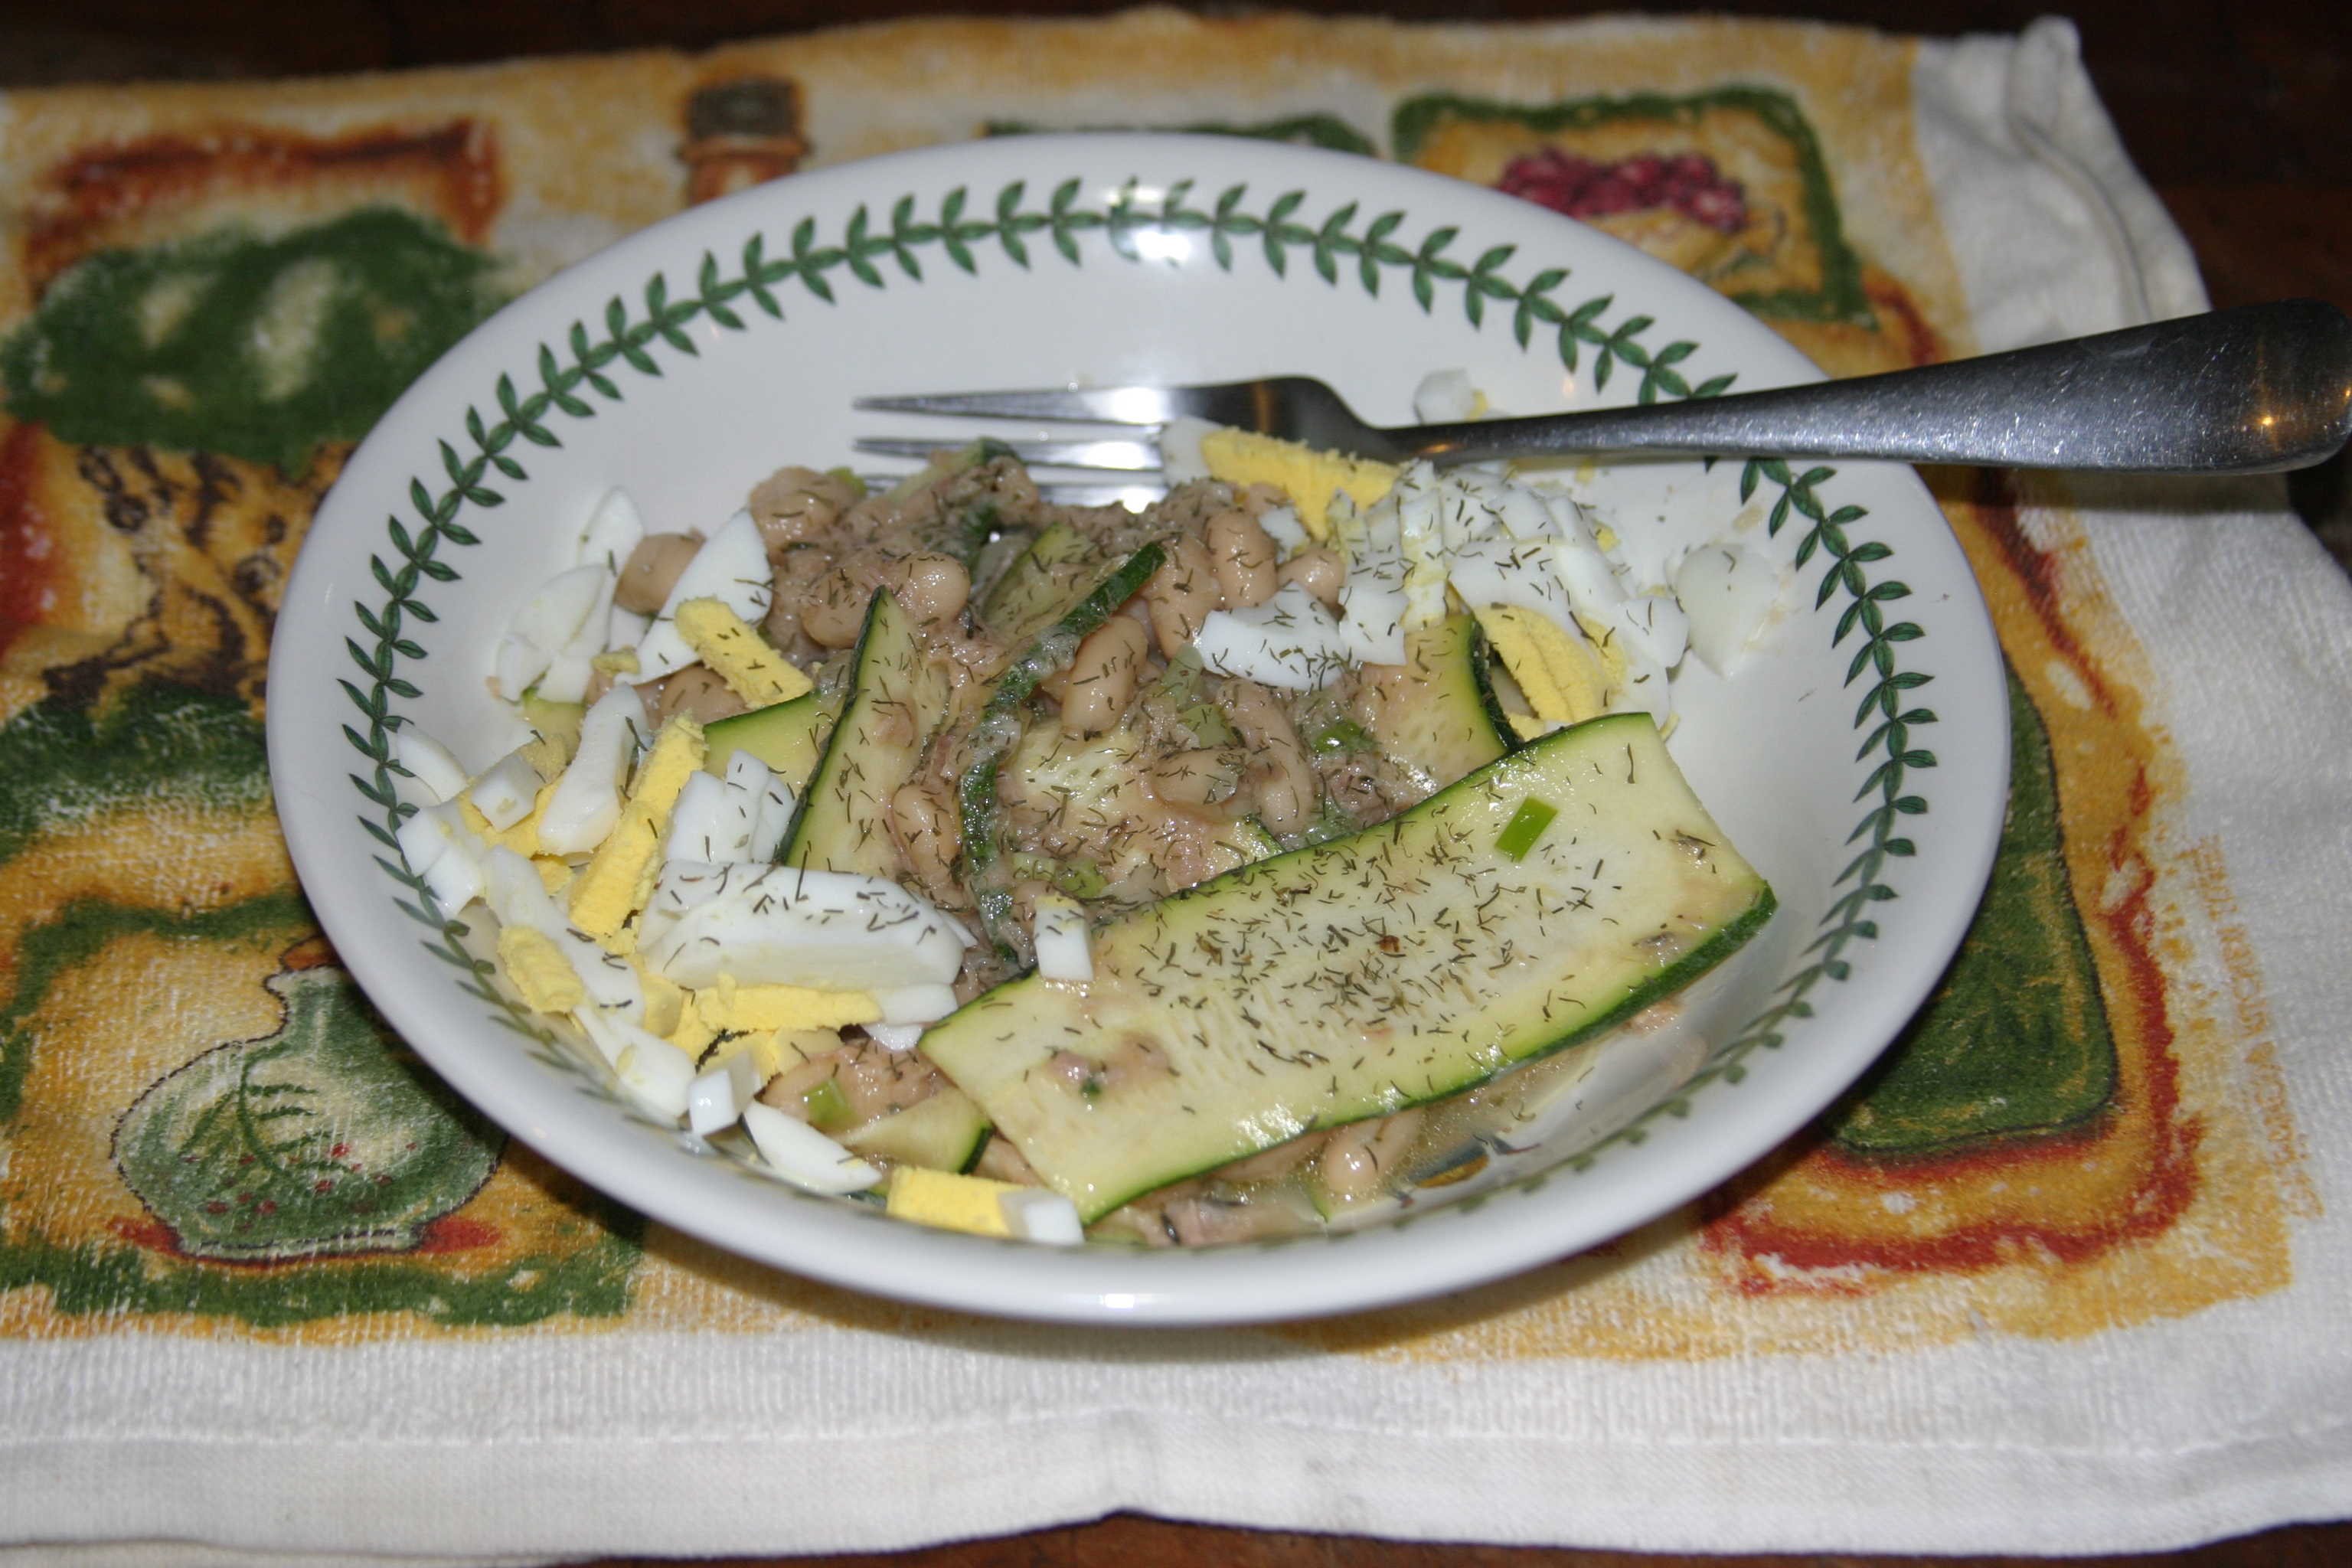
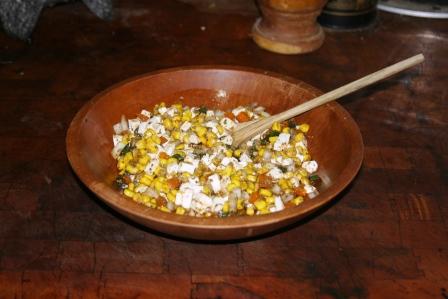
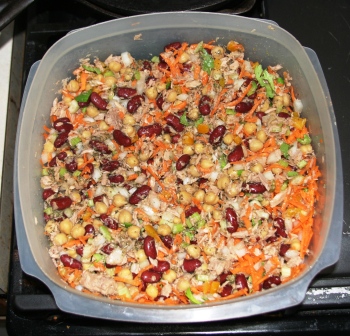
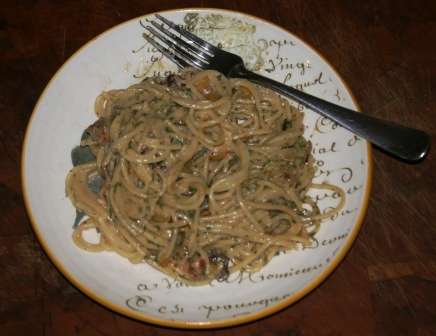
This is a great lunch or dinner dish when you don’t want to cook or heat up the kitchen. And it is wonderful for Shabbat prep. It has proteins, carbs and fat in a nice ratio and it is a great way to use all that zucchini that is busting loose in your garden right now. Yup, I said your garden because my garden is a hot mess. I need to reclaim it so I can plant in the spring. A bit of advice for this recipe, I would caution not to increase the quantity of garlic and lemon juice. The first time I made this I doubled the amount. The flavor was not enjoyable. I ate most of it and gave the rest to the barncats. I hope you like this. In the photo you can see I added a chopped hardboiled egg and some dill weed to garnish. That’s totally optional. Let me know if you make it. Be well and be blessed.
1/3 c Extra Virgin Olive Oil
¼ c Lemon Juice (about 2 lemons if using fresh)
3 Tbsp minced Onion
2 Tsp dried Thyme and some to garnish
1 Garlic Clove, fine grated or peeled and pressed
1 Tsp Kosher Salt
¾ Tsp Black Pepper
1 (14 oz) can White Cannellini Beans, drained
1 (6 oz) can Tuna in Oil, drained
1 small Zucchini, cut longways into planks or shaved on a mandolin
1 small Yellow Squash, cut longways into planks or shaved on a mandolin
Whisk together the first seven ingredients in a medium size bowl. Next mix in the beans and tuna. Cover and let marinate at room temp for 20 minutes. Next add in and mix the zucchini and squash. Cover and let sit for about 20 minutes until the veggies soften. The time depends on how thick the planks are. Serve at room temperature. Store leftovers in fridge but allow to get to room temp before serving again
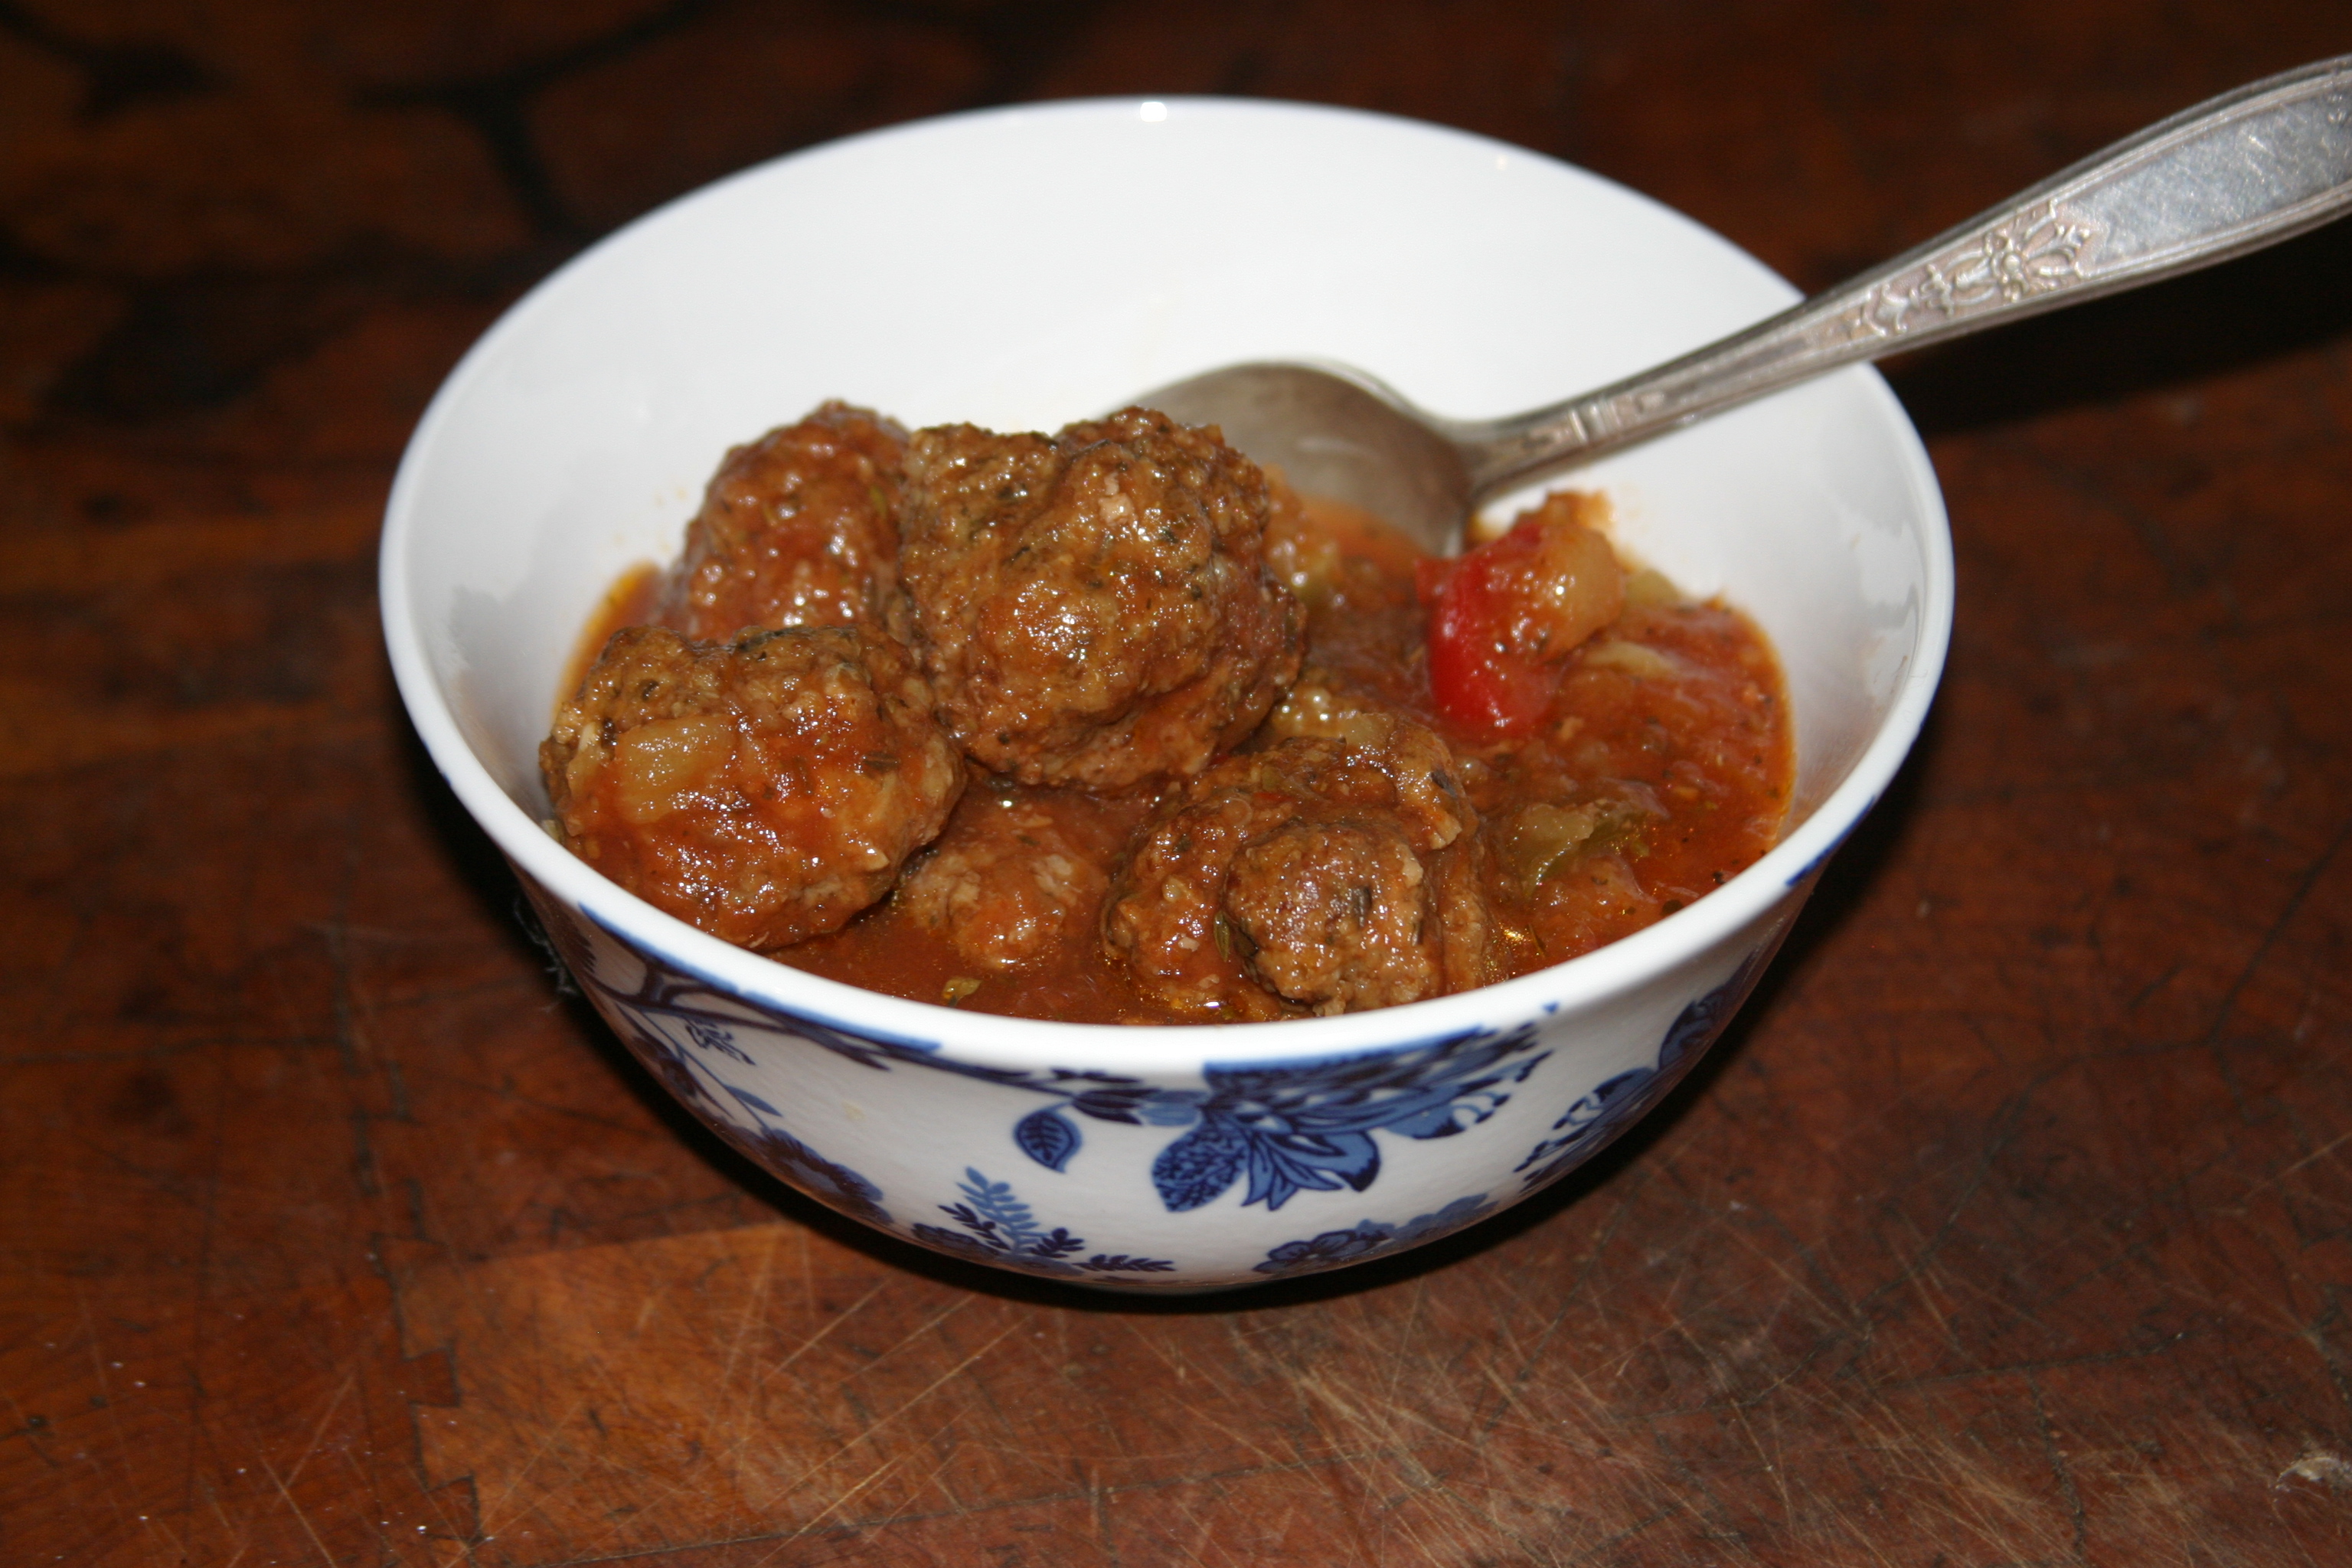
I found this recipe in the latest issue of my electric co-op magazine. It was posted by the MIO organization, Made in Oklahoma, the ingredients listed are Oklahoma companies. I have not listed the brand names. This is a great recipe for a prep day Friday so you don’t have to cook on Saturday. Be well and be blessed.
2 large Eggs, beaten
1/3 cup seasoned Breadcrumbs
3 Garlic cloves, minced or peeled and pressed
2 teaspoons BBQ seasoning (I used a mesquite seasoning blend)
2 pounds Ground Beef
1 (15oz) can Tomato Sauce
1 cup Chicken Broth
½ cup Tomato Jam (I used my home canned Tuscan Tomato Jam)
½ cup Jalapeño Jam ( I used my home canned Hot Pepper Jelly)
½ cup Brown Sugar
½ cup Bragg’s Apple Cider Vinegar
½ cup Pineapple Chunks
1 Green Pepper, chopped
1 Red Pepper, chopped
Preheat oven 375 degrees. In a large bowl combine eggs, breadcrumbs, garlic, and seasoning. Add the ground beef and mix until the ingredients are combined. Form into 1 inch balls.
Place on a cooking rack in a rimmed baking pan. This helps the meatballs from being soggy. Bake for 20 minutes.
While the meatballs are baking mix the sauce. In a slow cooker combine tomato sauce, chicken broth, tomato jam, jalapeno jam, and apple cider vinegar.
Transfer the meatballs into the slow cooker. Cook for two hours. Add the pineapple and red and green peppers. Can be served over rice.
This is a requested post on how to make magnesium lotion. Bottom line up front, this is not an original recipe of mine. I saw it in a well done YouTube video. The video link and the website link will be listed below. Lea and James who are the owners of the channel are a wonderful couple. Please support them by subscribing and liking their videos if you watch YouTube. The recipe and technique is Lea’s but the explanation, photo and other information is mine alone.
BUT FIRST:
THE DISCLAIMER: The following is not to be considered “Medical Advice”. The author is not a “Medical Doctor” or “Health Care Professional”. Any use of this information is solely the responsibility of the Reader. (Words in quotations are legal words used by the US Federal Government.)
Okay enough of the blah, blah, blah. Back to the good stuff.
Many people are unaware about the importance of adequate magnesium levels in your body. And sadly many people are very deficient in magnesium and that leads to health problems. Some are life threatening. I start with my personal story about a deficiency. Going back to 2016 I started to hear my voice quavering. It sounded like I was afraid and stuttering at the same. I could not control it. Next I had severe muscle cramps. Keep this symptom in mind. I felt tired. A lot. I like to do crafts. I noticed that my fingers weren’t as sensitive anymore. And for the biggie. My chest felt like it was getting tighter and tighter. That’s the one that scared me. Remember that the heart is muscle. Maybe the most important muscle that maintains your life. I have been into alternative therapies since the early 1990’s. I pulled out several of my reference books and started reading.
And I read about magnesium. I believe my main two reasons for my deficiency in magnesium was from food. Almost all food produced in the US is deficient because minerals are not added back into the soils. I have an article saved from 30 years ago where a small holding in England, I believe, started to add pulverized rock dust to the fields in addition to their own organic compost. They had their produce tested and the nutrient value was off the charts. If I can find the article I update and repost the article link. So the second and probably the primary reason I was deficient was my choice of daily soft drink. I don’t drink soda, pop, or whatever it is called in different regions of the country. I drink plain old seltzer water. It doesn’t have sugar or other excito-toxins in it. However it does have the fizz. The carbonation. That fizz will leach magnesium and potassium out of your body. So I was doing a good thing by getting away from the sugar and high fructose corn syrup but I drank too much of it without adding minerals back into my diet. Now I enjoy a two liter bottle of seltzer only once a month. I was lucky that I had a bottle of CRAMP 911 in my medicine cabinet. A good friend gave it to me when I had some bad leg cramps and they were visiting from the un-named state in the North-east. Wow. What a difference. Almost immediately.
I have read research articles pointing the fact that 80% of people who present at the hospital with heart attack symptoms are magnesium deficient. Hmmm. Do the heart doctors tell patients that? Future doctors in medical school are not taught about nutrition, they are trained to give a pill for that ill. Remember healthy people are not a source of income for the medical industry.
In addition to the magnesium lotion I make I also take baths with a cup of magnesium sulfate, Epsom Salts. I also have a magnesium oil spray I use if I am out of my home made magnesium lotion. It’s in the photo below. Also the coconut oil jar is hiding behind the storage jar lid.
An excellent book of which I have the Kindle version is “The Magnesium Miracle” by Dr. Carolyn Dean, MD and ND, edition 2014. It is packed full of information that she as a medical doctor can cite where I as civilian cannot.
These are the links to the YouTube video and the website.
This recipe makes 1 personal use batch of magnesium lotion.
½ C Pure Magnesium Flakes (Epsom Salts will not work as well in this recipe but you can use them) ½ C Hot Water, I use my Berkey Filter Water (Okie)
Mix the magnesium flakes into the hot water. Set aside and allow the flakes to dissolve.
3 Tbsp Beeswax Pastilles 2 Tbsp Shea or Cocoa Butter ¼ C fat of choice (Okie used Coconut Oil)
Place these ingredients into the top section of a double boiler. Heat a couple inches of water into the bottom section of double boiler. Place the top section on and heat until the ingredients have completely mixed together into a liquid.
10 drops of Essential Oils of your choice (Okie used Lavender and Rosemary)
Remove the boiler from the heat, and add your desired essential oils.
Pour the magnesium flake water into the beeswax, shea butter, and fat mixture. Blend the mixture together with an immersion blender, regular blender, or a spinning whisk, until you get a fluffy lotion consistency. Spoon your lotion into your jars, allow to cool, and store with the lid on. This lasts 2-3 months. You can also store in the fridge. The clean up is a little messy but worth it.
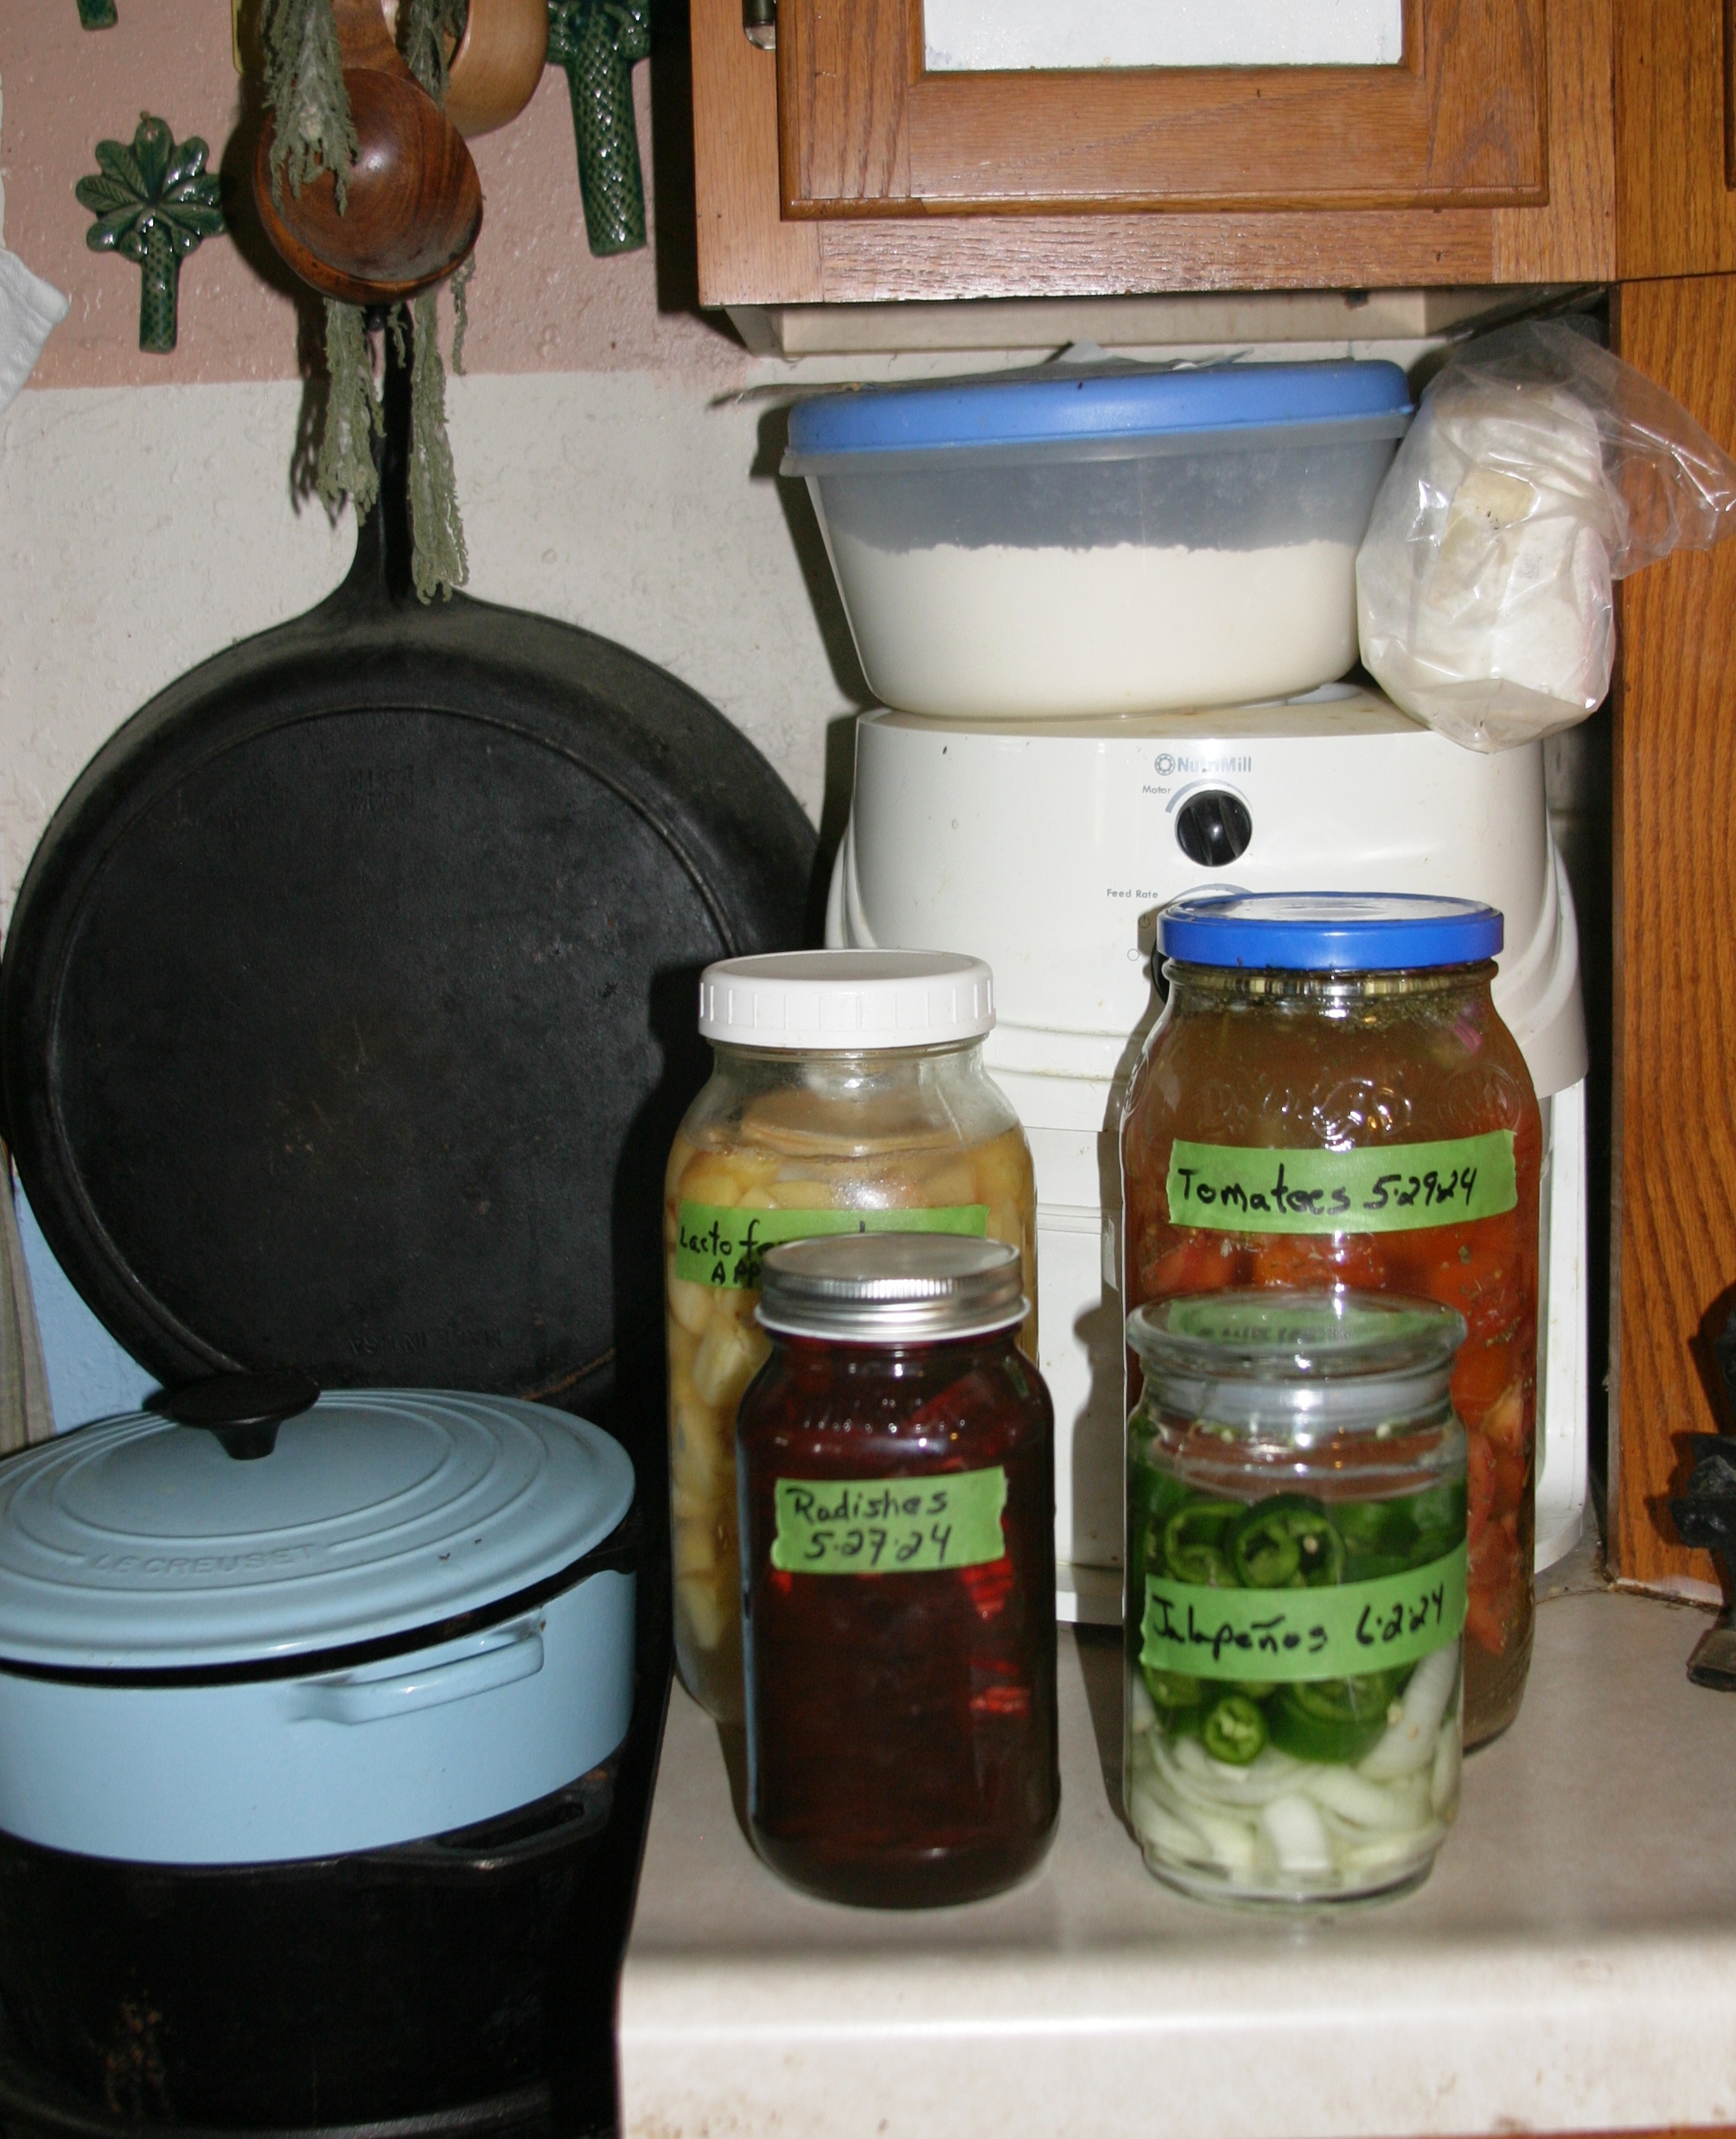
So we are having a bad rainstorm today with marble size hail. Since I can’t be in the garden I decided to do this post I have been thinking about for a while. I have been experimenting with fermenting for many years. At first I only made kimchi. I cleared out the lunchroom one time with a particularly great ferment. LOL. I would only do one jar at time of different produce to see if I really liked the taste. I found out that I really do like the taste of lacto fermented produce. The past week and a half I have done four different jars. So far I’ve used the cinnamon apples in oatmeal. So good! The tomatoes I have used as a topping for a salad. I only used oil and vinegar to keep the taste of the tomatoes prominent. I hope you try these recipes. If you would like to see other recipes, an excellent book on fermenting is “Can it and ferment it” by Stephanie Thurow. Another one is “Ferment, A Guide to the Ancient Art of Culturing Foods, from Kombucha to Sourdough” by Holly Davis.
Lacto Fermented Apples
1 to 2 lbs Apple cubes 1 Tbsp Sea salt or Kosher Salt 1 Tsp Lemon Juice 1 Cinnamon stick 5 whole Cloves (optional) 1 quart approximately filtered Water
Wash and core the apples. Cut them into cubes and put into a half gallon jar. Add the salt, lemon juice, cinnamon stick and cloves (if using). Add filtered water until the apples are covered. Cover with a lid. Tighten the lid and shake the jar. Remove the lid. Place a fermenting weight on top of the apple cubes. Replace with a fermenting lid if you have one. If you don’t replace the lid and let it loose to allow any fermentation gases to escape. Label. Let seat on your counter out of direct sunlight at least 5 days. Taste and place in the fridge.
Lacto Fermented Tomatoes
1 lb Tomatoes, large cubes 1 package Cherry Tomatoes 1/3 c fresh Cilantro, chopped or 1 Tbsp dried 1/3 c fresh Parsley, chopped or 1 Tbsp dried 1/3 c fresh dill, chopped or 1 Tbsp dried 4 cloves Garlic sliced 2 Tbsp Sea salt or Kosher Salt 1 quart approximately Filtered Water
Put all ingredients into a half gallon jar. Add filtered water until the tomatoes are covered. Cover with a lid and tighten. Shake the jar. Remove the lid. Place a fermenting weight on top of the tomatoes. Replace with a fermenting lid if you have one. If you don’t replace the lid and let it loose to allow any fermentation gases to escape. Label. Let seat on your counter out of direct sunlight at least 4 days. Taste and keep on the counter for several more days or place in the fridge.
Lacto Fermented Radishes
1 bag, approximately 14 ounces Radishes, thin sliced 2 Tsp Sea Salt or Kosher Salt 2 c approximately Filter Water
Put all ingredients into a quart jar. Add filtered water until the radishes are covered. Cover with a lid and tighten. Shake the jar. Remove the lid. Place a fermenting weight on top of the radishes. Replace with a fermenting lid if you have one. If you don’t replace the lid and let it loose to allow any fermentation gases to escape. Label. Let seat on your counter out of direct sunlight at least 4 days. Taste and keep on the counter for several more days or place in the fridge.
Lacto Fermented Jalapeno’s
1 pound Jalapenos, deseeded and sliced into ¼ “ rings (Keep seeds if you like more heat) 1 small Onion, sliced 1 Tbsp Sea Salt or Kosher Salt 2 cloves Garlic, sliced. 2 c approximately filtered Water
Put all ingredients into a quart jar. Add filtered water until the tomatoes are covered. Cover with a lid and tighten. Shake the jar. Remove the lid. Place a fermenting weight on top of the jalapenos. Replace with a fermenting lid if you have one. If you don’t replace the lid and let it loose to allow any fermentation gases to escape. Label. Let seat on your counter out of direct sunlight at least 4 days. Taste and keep on the counter for several more days or place in the fridge.
I really like making my own fresh cheese. Elsewhere on this blog I have a post on making eastern European Easter cheese. This recipe is an even more simple process and I have made this several times. It is amazing in your favorite manicotti recipe! Try it and see. This recipe is from a book that I use often. It is “The Home Creamery” by Kathy Farrell-Kingsley. Another great book is “Home Cheese Making”, by Ricki Carrol. With simple pantry ingredients an emergency situation doesn’t need to be flavorless.
1 gallon Whole Milk
1/3 c White Vinegar or White Wine Vinegar
1 Tsp fine sea Salt
Gently heat the milk in a heavy bottom pot until it reaches 185 degrees F. Check with a thermometer. Remove from heat and add vinegar and salt. Stir gently just to mix. Cover the pot and allow to sit for two hours to let the curds develop. Don ‘t stir or the ricotta will become grainy and not smooth.
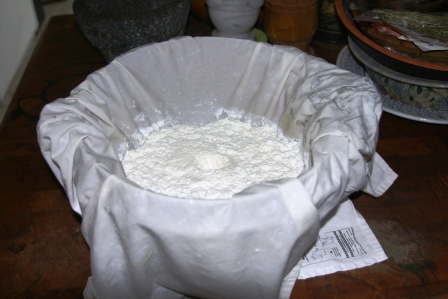
After two hours line a colander with muslin or cheesecloth. Carefully ladle the mixture into the colander. Let the cheese drain for one or two hours depending how dry you want the cheese to be.
When the ricotta has drained, transfer to a bowl, slightly break up the cheese and place in an airtight container.
The whey produced from the separation of the curds is like liquid gold. This whey is the acidic salted kind. It can be frozen and used in soup or it can be used in bread baking. It can also be added in small amounts to animal food.
This such a great side dish. I found it back in 2019 from watching a cooking series on OETA, Oklahoma’s public TV channels. It is a Nick Stellino recipe. While he cooks mostly Italian food, this is a Tex-Mex style side dish. For the ingredients of the Magic Rub, please check my blog post of homemade Herb and Spices Mixes. I would post a link to his recipe but it is now behind a paywall. It was not like that when I printed it in 2019.
Dressing Ingredients
2 Tbsp White Wine Vinegar
¼ c Brown Sugar
1 Jalapeno Pepper, seeded and fine diced
1 Tbsp fresh Parsley chopped (or 1 Tsp dried)
¼ c Tomato Sauce
1 Tsp Nick Stellino’s Magic Rub
Corn Salad Ingredients
½ c Cotija Cheese, Queso Blanco, Queso Fresco or Feta cut into ¼ inch dice
2 c Corn Kernels
½ c fine dice Onion (Red Onion is great in this)
1 Red, Orange or Yellow Bell Pepper seeded and diced
Salt and Black Pepper to taste
¼ c Chopped fresh Parsley or 1 Tbsp dried
Mix all dressing ingredients in a large bowl. Mix well. Set aside.
Add all corn salad ingredients into the large bowl. Stir well and cover all corn ingredients with the dressing.
Cover and chill in fridge for at least 1 hour. Bring to room temperature and serve.
Oh okay. But it is not cooking related. This is in my living room with some of my own photos from traveling through Scotland. That was during my previous life. The photos are the Highlander Monument on Loch Schiel, Glenfinnan viaduct trainline and the ruins of a cathedral. The “table” is my mom’s 1930’s sewing machine on which I learned to sew when I was eight years old. To this day I can only use a sewing machine while not wearing shoes. LOL. I learned to sew bare foot and barefoot sewing is my go to technique.
I have been mixing my own homemade condiments for more than 10 years. I have complied some of most used ones in this post. I also use curry mixes, Asian mixes and North African spice mixes, but rarely.
I started making my own mixes because I once read the back of the seasoning packet. (Shudder!!!!!) I was horrified but I’m glad I read it. Then researched the unpronounceable ingredients. I didn’t even want to eat the ones I could pronounce i.e, (GMO) modified corn starch, mono sodium glutamate (MSG), soy, (the ever concerning) natural flavors, silicon dioxide (anti-caking). Gee thanks big food, I’ll take a knife or fork and break up the clumps, thank you very much. And now we have to be concerned about insect additives. I don’t have a smart phone but I have heard there is an app to identify insect ingredients. And herbs/spices have been irradiated starting almost 30 years ago before packaging.
If you are preparing for hard times you don’t have to eat tasteless food. Using just a little forethought and planning you can eat tasty food when there is an emergency. And many of the single ingredients are used in numerous combinations.
Taco Seasoning
4 Tbsp Chili Powder
2 Tbsp Paprika
2 Tbsp Cumin
4 Tbsp Onion Powder
4 Tbsp Garlic Powder
2 Tsp Sea Salt
1 Tsp Cayenne
Combine all ingredients and store in an airtight jar. Use 2 or 3 tablespoons instead of the taco seasoning packet. I use this mix the most of all. Ground beef is just about the only meat that is still affordable. Buy on quick sale and freeze!
Pumpkin Spice
½ Tsp Nutmeg
1 Tsp ground Cloves
2 Tsp ground Ginger
4 Tsp ground Cinnamon
Combine all ingredients and store in an airtight jar. I use it when I need a little taste of autumn.
Zesty Homemade Ranch Dressing
5 Tbsp dried Minced Onions
2 Tbsp Parsley Flakes
1 Tbsp Dill Weed
1Tbsp dried Chive Flakes
1 Tbsp Sea Salt
1 Tsp Garlic Powder
½ Tsp dried Basil
¼ Tsp Black or White Pepper
Combine all ingredients and store in an airtight jar. To make a salad dressing mix 3 tablespoons with 1 cup of mayonnaise and 1 cup of buttermilk or Sour Cream.
Zesty Italian Dressing Mix
1 ½ Tsp Garlic Powder
1 Tbsp Onion Powder
2 Tsp Oregano
1 Tbsp Parsley Flakes
2 Tsp Sea Salt
1 Tsp Pepper
¼ Tsp Cayenne Pepper
¼ Tsp Thyme
½ Tsp dried Celery Flakes
Combine all ingredients and store in airtight jar. To make a salad dressing put .6 ounces (17 g) of mix in a recycled glass salad dressing bottle. Add ¼ cup white vinegar or white wine vinegar and 3 tablespoons water. Mix well. Add ½ cup of olive oil. Cover mix well. Store in the refrigerator.
Nick Stellino’s Magic Rub
1 Tbsp Sea Salt
1 Tbsp ground Black Pepper
1 Tbsp Onion Powder
1 Tbsp Garlic Powder
1 Tbsp Parsley Flakes
1 Tbsp Brown Sugar
Mix and store in an airtight jar. (I’ll post a spicy corn salad and I use this recipe as part of the dressing)
Turmeric Nepalese Chicken Seasoning
4 Tsp Garlic Powder
2 Tsp ground Ginger
2 Tsp ground Cumin
1 ¼ Tsp ground Turmeric
½ Tsp ground Chili Powder
½ Tsp ground Black Pepper
2 1/1 Tsp Sea Salt
Combine all ingredients and store in an airtight jar. Sprinkle over roasted chicken or fried chicken. So good!
Emeril’s Seasoning Blend
1 Tbsp Paprika
1 Tbsp Sea Salt
1 Tbsp Garlic Powder
1 ½ Tsp Onion Powder
1 ½ Tsp dried Oregano
1 ½ Tsp dried Thyme
1 Tsp ground Black Pepper
1 Tsp Cayenne Powder
Combine all ingredients and store in an airtight jar. This seasoning is great on chicken, fish and even roasted vegetables.
Pickling Spice Mix
2 Tbsp Coriander Seeds
2 Tbsp Mustard Seeds
2 Tbsp Caraway Seeds
1 Tbsp Fennel Seeds
1 Tbsp whole Black Peppercorns
1 Tsp dried Red Pepper Flakes
Combine all ingredients and jar them. Use amounts as stated in pickling recipes.
Tatar Sauce
¾ c Mayonnaise (store bought or homemade)
1 Tbsp Dijon Mustard
3 Tbsp Sweet Gherkin Pickles, chopped
1 Tsp Pickle Brine
1 Tbsp Capers, chopped
¼ Tsp ground Black Pepper
Combine a ingredients in a wide mouth jar. Store in the refrigerator.
Creole Seasoning
1 Tsp Paprika
1 Tsp Garlic Powder
1 Tsp Onion Powder
1 Tsp Sea Salt
1 Tsp Cayenne Powder
Combine all ingredients and store in airtight jar. Use in Creole Mustard recipe below.
Creole Mustard
½ c stone ground Mustard Seeds (you can pound the seeds in a mortar and pestle or whiz in a small food processor)
¼ c Vinegar ( your choice of flavor)
2 Tbsp Prepared Horseradish
1 Tsp Creole Seasoning
½ Tbsp Worchester sauce
¼ Tsp Hot Sauce
¼ Tsp Honey (Dark if you have)
½ Tsp Sea Salt
Mix all ingredients thoroughly and Chill for 24 hours before using.
Cajun Seasoning Recipe
2 ½ Tbsp Paprika
1 Tbsp Garlic Powder
1 Tbsp Onion Powder
1 Tbsp Cayenne Pepper
1 Tbsp dried Oregano
1 Tbsp dried Thyme
½ Tbsp Sea Salt
½ Tbsp ground Black Pepper
Combine all ingredients and store in airtight jar. Use to make Cajun Mustard. Also this is the seasoning mix to use it you are going to make blackened fish or chicken over a high heat grill. SOOOO good. Also if you roast this Cajun mix in a hot skillet, you can use it make blackened roast potatoes.
Stir-Fry Spice Mix
1/4 c Garlic powder
2 Tsp ground Ginger
2 Tsp Sesame Oil (Toasted or unflavored)
1 Tsp Soy Sauce
½ Tsp Fish Sauce
1 Tsp Brown Sugar
1/2 Tsp ground Black Pepper
1/2 Tsp crushed Red Pepper Flakes
Combine all ingredients and store in an airtight jar. To use in a stir fry dish combine .7 ounces with 1/3 cup water. Stir and set aside to add to skillet in last minute of cooking the stir fry.
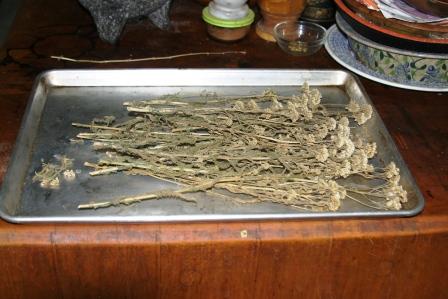
Most people try to eradicate this herb when they find it in their yard. Once again I am not one of those people. I love it’s strong herbaceous scent when I cut it in the yard and hang it in bundles in my pantry.
THE DISCLAIMER: The following is not to be considered “Medical Advice”. The author is not a “Medical Doctor” or “Health Care Professional”. Any use of this information is solely the responsibility of the Reader. (Words in quotations are legal words used by the US Federal Government.) Caution, pregnant woman should not ingest yarrow.
Yarrow also called Soldier’s Woundwort due to its styptic qualities to staunch wound bleeding, can be an invasive plant if you don’t control it. It grows to three feet tall and spreads underground by rhizomes. It’s botanical name Achillea millefolium is derived from Achilles, the ancient Greek warrior. Legends report that he carried yarrow to staunch soldier’s wounds during the Trojan War. The word millefolium describes the many/million fernlike leaves or foliage. Yarrow is found almost every country. It truly is a worldwide herb. To my knowledge the only part of the yarrow plant not used are the roots/rhizomes.
Every year I gather yarrow to hang and dry in my pantry and living room. When I’m ready to process the dried flowers and foliage, I strip them from the thicker stalks. Then I chop/grind the flowers and leaves in a food processor. I don’t use a blender for this step because I can control the fineness of the grind with the food processor. The chopped and cut flower/ leaf mixture is good to make teas and tinctures while a finer ground powder can be used for a poultice for wounds or bruises. A freshly masticated flower/leaf mixture can also be used effectively as a poultice if you don’t have the dried herb mixture. I use the stalks as kindling for starting fires in my fire pit.
The following recipe, Grandma’s Magic Healing Salve, is from “The Wild and Weedy Apothecary” by Doreen Shababy and I am in the process of making it now.
3 cups chopped, shredded or torn herb leaves or flowers.
3 cups olive oil or almond oil (you may need more to cover the herbs)
1-2 ounces of grated or pellets of beeswax
Combine the herbs and oil in a small slow cooker on low heat for 12 hours or overnight until the oil is a dark green color.
Line a strainer with cheesecloth and strain into a small sauce pan. Squeeze out as much oil as you can from the plant material.
Put the saucepan with the oil extract over low heat and add the grated or pellet beeswax.
Once the wax is dissolved put a teaspoon of the mixture onto a plate and allow to cool. Check for texture and hardness. Add more beeswax to the saucepan if needed.
Pour the oil/wax mixture into small jars. Half pint wide mouth canning jars are excellent to use for the salve. Makes approximately 3 cups.
Herbs I used in the oil include:
Yarrow flowers and foliage
Plantain leaf
Chickweed
Birch tree leaves
sage leaves
mint leaves
lemon balm leaves
comfrey (I’ll use in the future since I don’t have this in my garden yet)
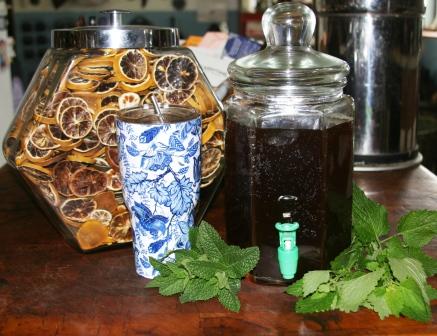
The lemon balm and spearmint in my garden is spreading exponentially. My lemon balm especially has gone feral. This recipe is so refreshing during the hot weather of an Oklahoma summer. But I do like it in the spring when the mint plants are tender. Many times I will make a iced tea pitcher or just the mint and a couple of tea bags but this recipe is a nice change up using the mint as a punch drink. I enjoy it while sitting on my front porch or by my fire pit.
5 6” sprigs Spearmint
7 6” sprigs Lemon Balm
3 family size bags of Black Tea (or 6 bags cup size)
3 cups boiling Water
Allow the tea bags and mint to steep in a large container for about 10 minutes. Remove tea bags and mint/lemon balm sprigs.
½ cup Sugar
1 cup Orange Juice
¼ cup Lemon Juice
3 cups cold Water
Mix sugar, juices and cold water. Add to tea/mint container. Chill in the fridge for about an hour. Serve and garnish with mint or lemon.
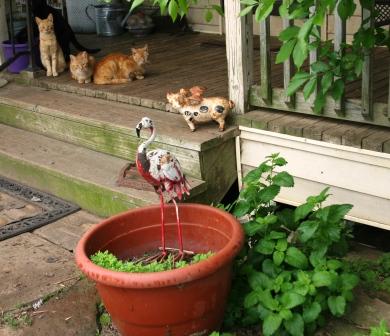
Hello everyone! I am starting this funding campaign, www.givesendgo.com/okieranchwife to get my vehicle (a one ton Ram 3500 diesel) back on the road. You can see some free range foraging by the truck. It has been down for about three weeks and is my only transportation I have to get to town which is 25 miles away. My elderly brother lives with me and depends on me to take him to town for appointments, banking and groceries. I also have animals on my homestead that need feed and other supplies from town. I have an initial estimate of $7K for diesel injector repairs and maintenance. The garage (who I trust) stated it could be more than that if a cylinder is blown or if there is metal pieces in them.
I am an Army veteran, a senior citizen, a widow and am humbly asking for help from my community of YouTube friends, readers of my cooking blog and fellow Believers. I started this cooking blog in 2011 just to share recipes. It is a tiny blog that was never meant to make money for me. I pray that if anyone has enjoyed a recipe, please consider a small donation to my truck repairs. I also started a YouTube channel where I will be posting videos about my homestead.
My country neighbors and local community have been helping to get me to town and I am grateful, however, they have jobs and homestead work also. Some of them are retired and senior citizens like me. I understand the economic hardships people are going through right now and any donation will help. The initial funds will be used to hire a tow truck to trailer my Dodge to the garage.
Thank you so very much for stopping by to learn about my campaign. I give you my pledge and promise that any funds donated to this campaign will only be used for the vehicle repairs. I pray that you are all safe and have a wonderful day. God bless you all.
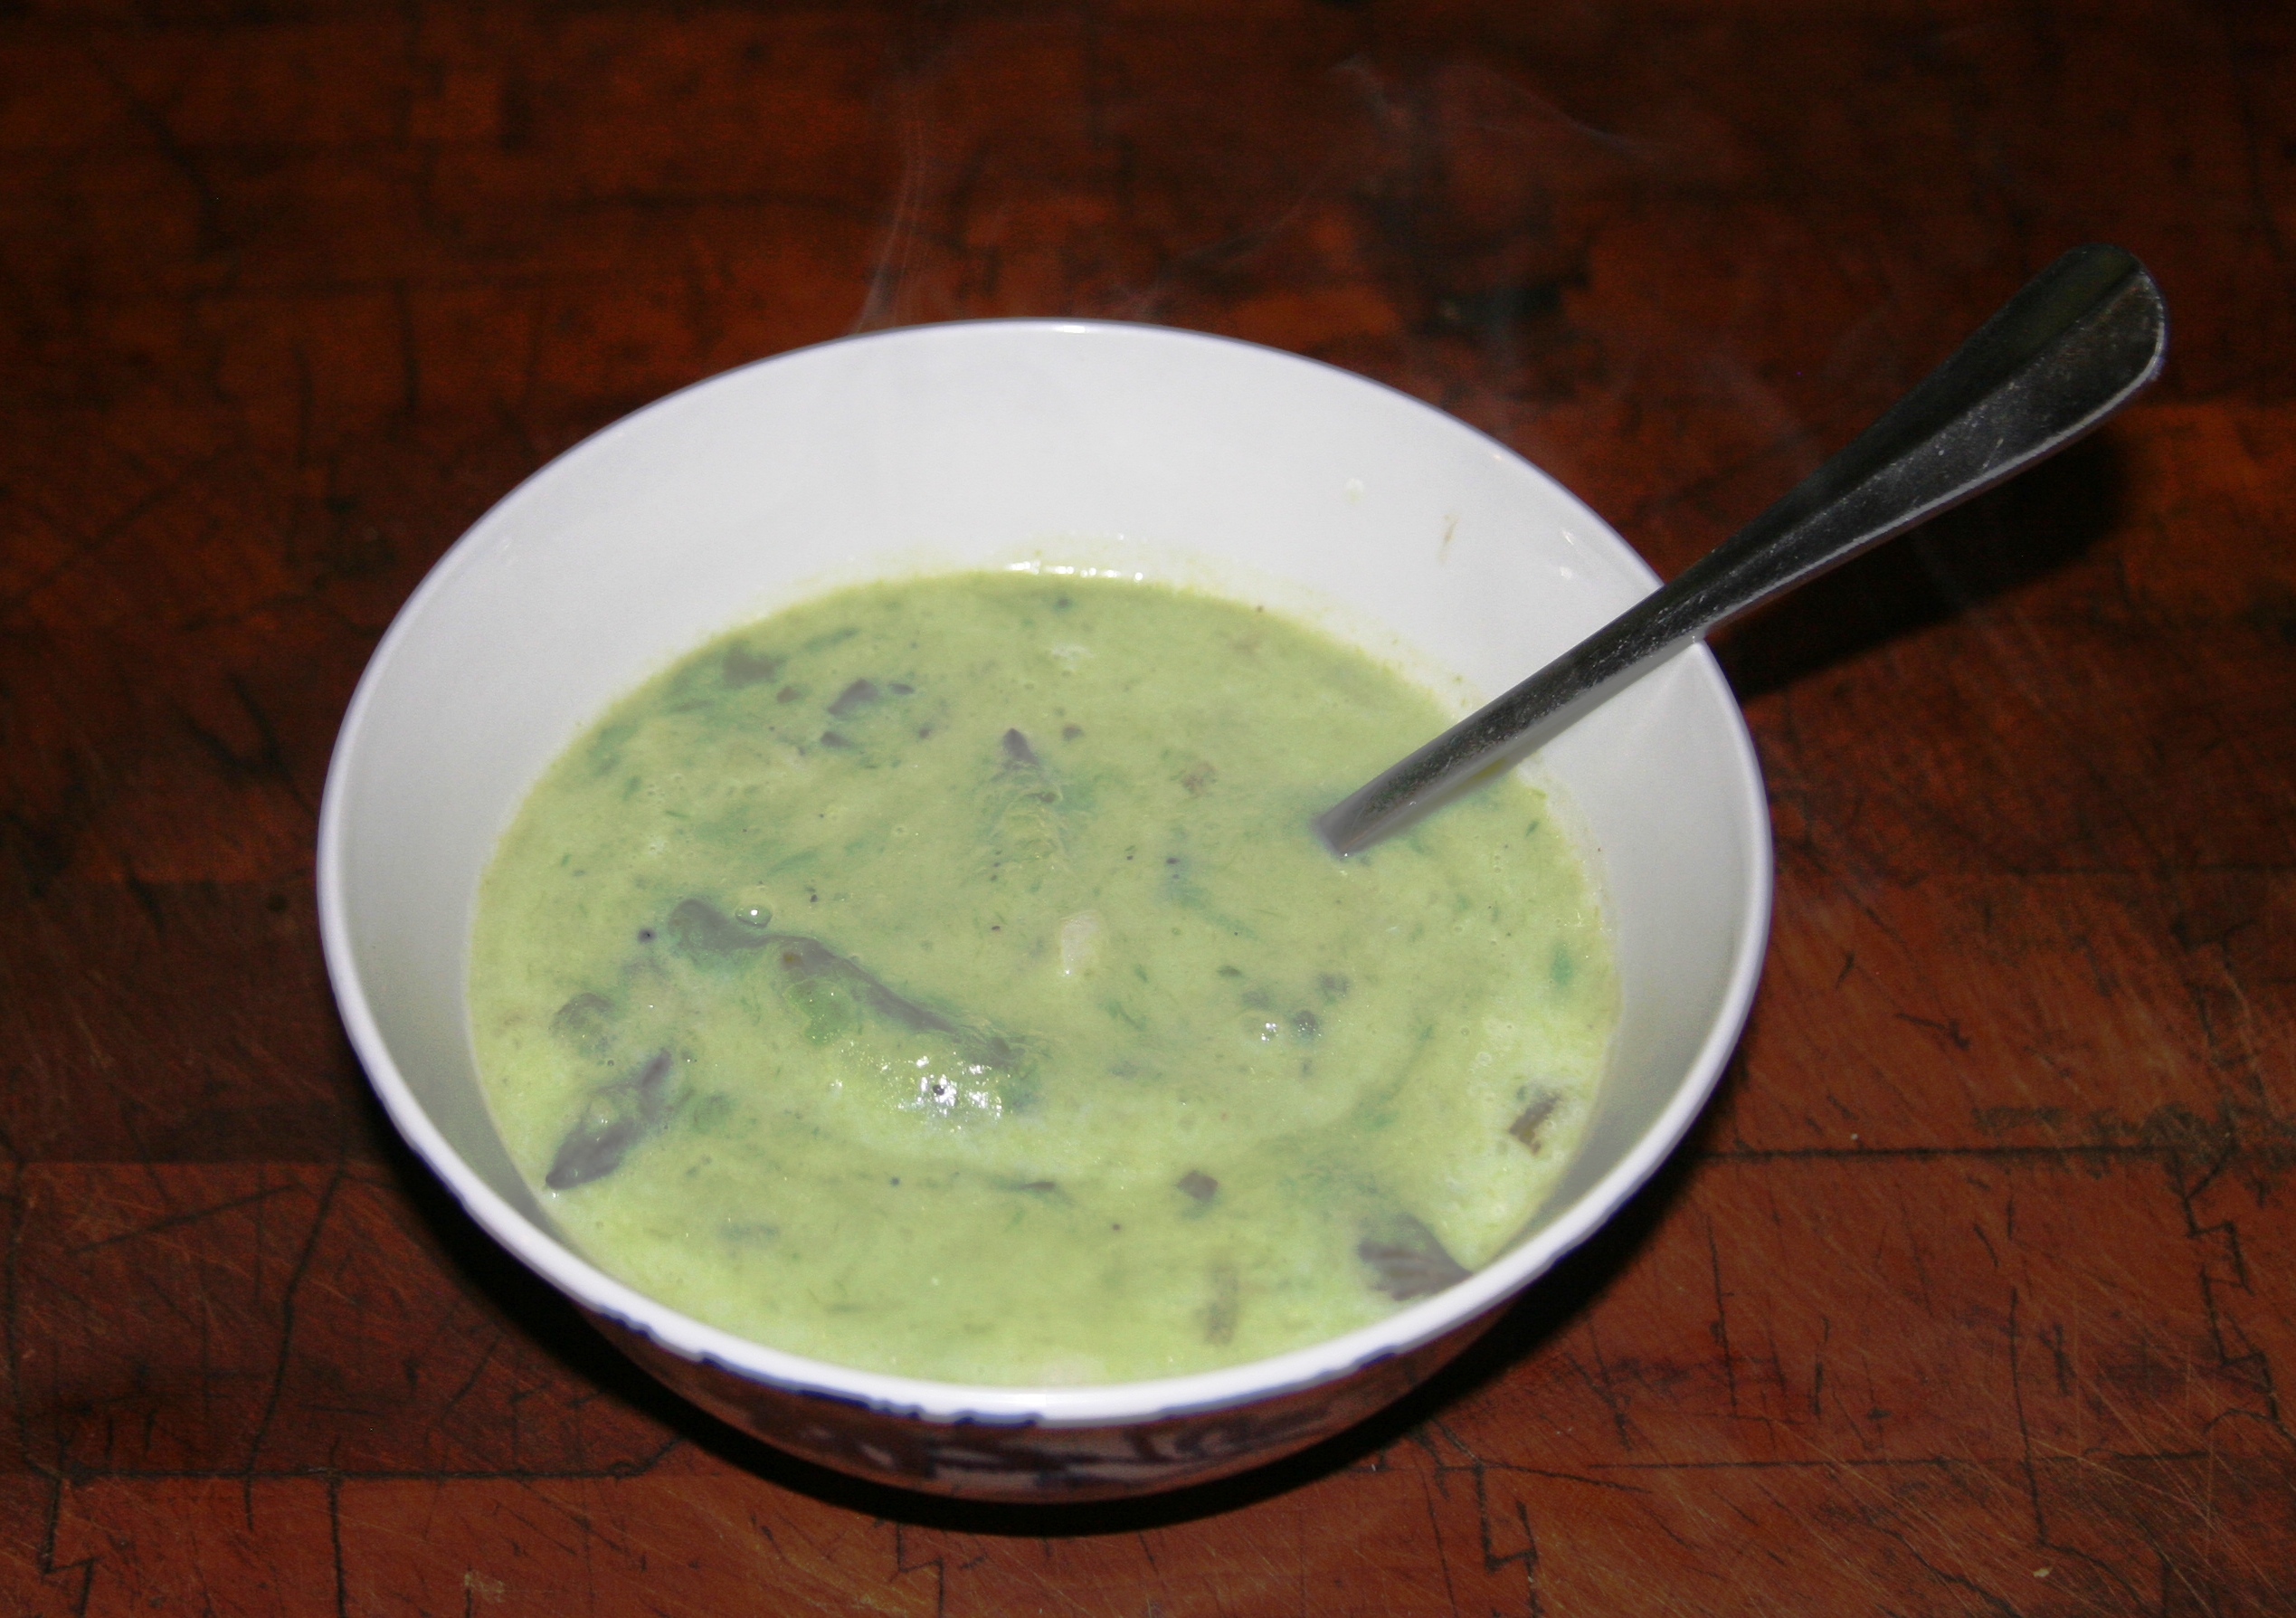
So far I have harvested two pounds of asparagus from my patch. There will be more to gather this week. Last spring I shared a recipe for asparagus and potato soup.
Here is another one. This one has less ingredients and may be better than the first version. This recipe has no chicken broth to dilute the soup. Pairs well with Irish soda bread or sour dough.
4 Tbsp Butter
1 bunch Green Onions, sliced, use both green and white parts
4 Tbsp All Purpose Flour
1 ½ Tsp Sea Salt
¼ Tsp Black or White Pepper
3 cups Milk
2 pounds Asparagus, chopped, reserve the tips for garnish
3 medium Potatoes, peeled and cubed
¼ cup Heavy Cream (optional)
In a medium pot heat water to boiling and reduce to a simmer. Add potato cubes and asparagus pieces. Reserve the tips for garnish. Simmer for about 15 to 20 minutes until potatoes are tender.
In a medium soup pot over medium low heat, melt butter and add green onions. Sauté for about 4 minutes or until soft. Do not brown. Stir in flour, salt and pepper. Reduce heat to low. Add milk, stirring to thoroughly blend. Simmer over low heat until smooth and creamy. Stir frequently.
Drain the cooked asparagus and potatoes and process in a blender or food processor into a puree. Work in batches and add puree to the milk mixture. Season to taste with Salt and pepper. Ladle soup into bowls and garnish with asparagus tips and a dollop of heavy cream if desired.
Hey everyone, I have arrived in social media! If you want to see my recipe for Mexic@n Hot Chocolate you’ll have to search for it on here. I guess WP doesn’t like the country name in the post. I may have to go over to sub stack.
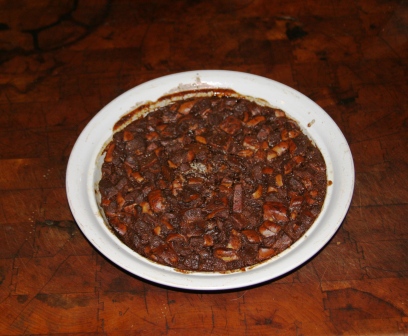
Happy Resurrection Sunday! This is a pantry friendly dessert for this holiday! I found this recipe in my Southern Country Cookbook printed in 1972 by the editors of The Progressive Farmer Magazine. Please ignore the chocolate drips on my pie dish. Hey, it’s real life. And by now you know that the photos are mine. No glossy food designer pix here. Enjoy!
2 squares unsweetened Chocolate (I used Ghirardelli 100% cacao Chocolate)
4 c scalded Whole Milk (I used 2 c milk and 2 c of the whey liquid from my Easter Cheese)
2 c Bread Cubes (I used plain bagel cubes from my pantry)
¼ c Butter, melted
½ tsp Salt
1 tsp Cinnamon, (I used Kirkland Saigon Cinnamon)
½ c Sugar
2 Eggs, slightly beaten
1 tsp Vanilla Extract
½ tsp Allspice
¼ tsp Nutmeg
Preheat oven to 325 degrees F.
Scald the milk. Put the chocolate in the warm milk and heat gently melt the chocolate. Beat thoroughly. Remove from heat. Soak bread cubes in the milk mixture. Allow to cool. Add other ingredients to the bread milk mixture. Mix thoroughly.
Pour into a buttered 2 quart baking dish and bake for 1 hour. Top with whipping cream or ice cream!
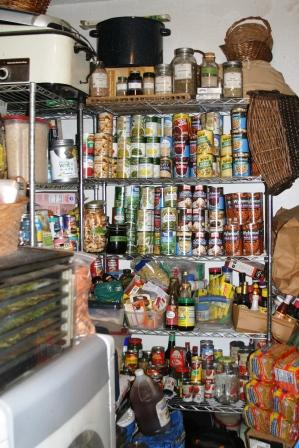
Yes, indeed. I said pantries. Plural. You need a couple different pantries. Daily and long term. This is a photo of my daily go to pantry that is right off my kitchen. You can see that I need to do my seasonal spring stock up on some items. Now don’t judge! Yes, those are ramen noodle packs. You don’t have to use the chemistry experiment that is the “flavor” packet included with the noodles. The noodles can be added casseroles or other dishes as a pasta. And bonus they are inexpensive. I don’t use them a lot, but I like to have some on the shelf.
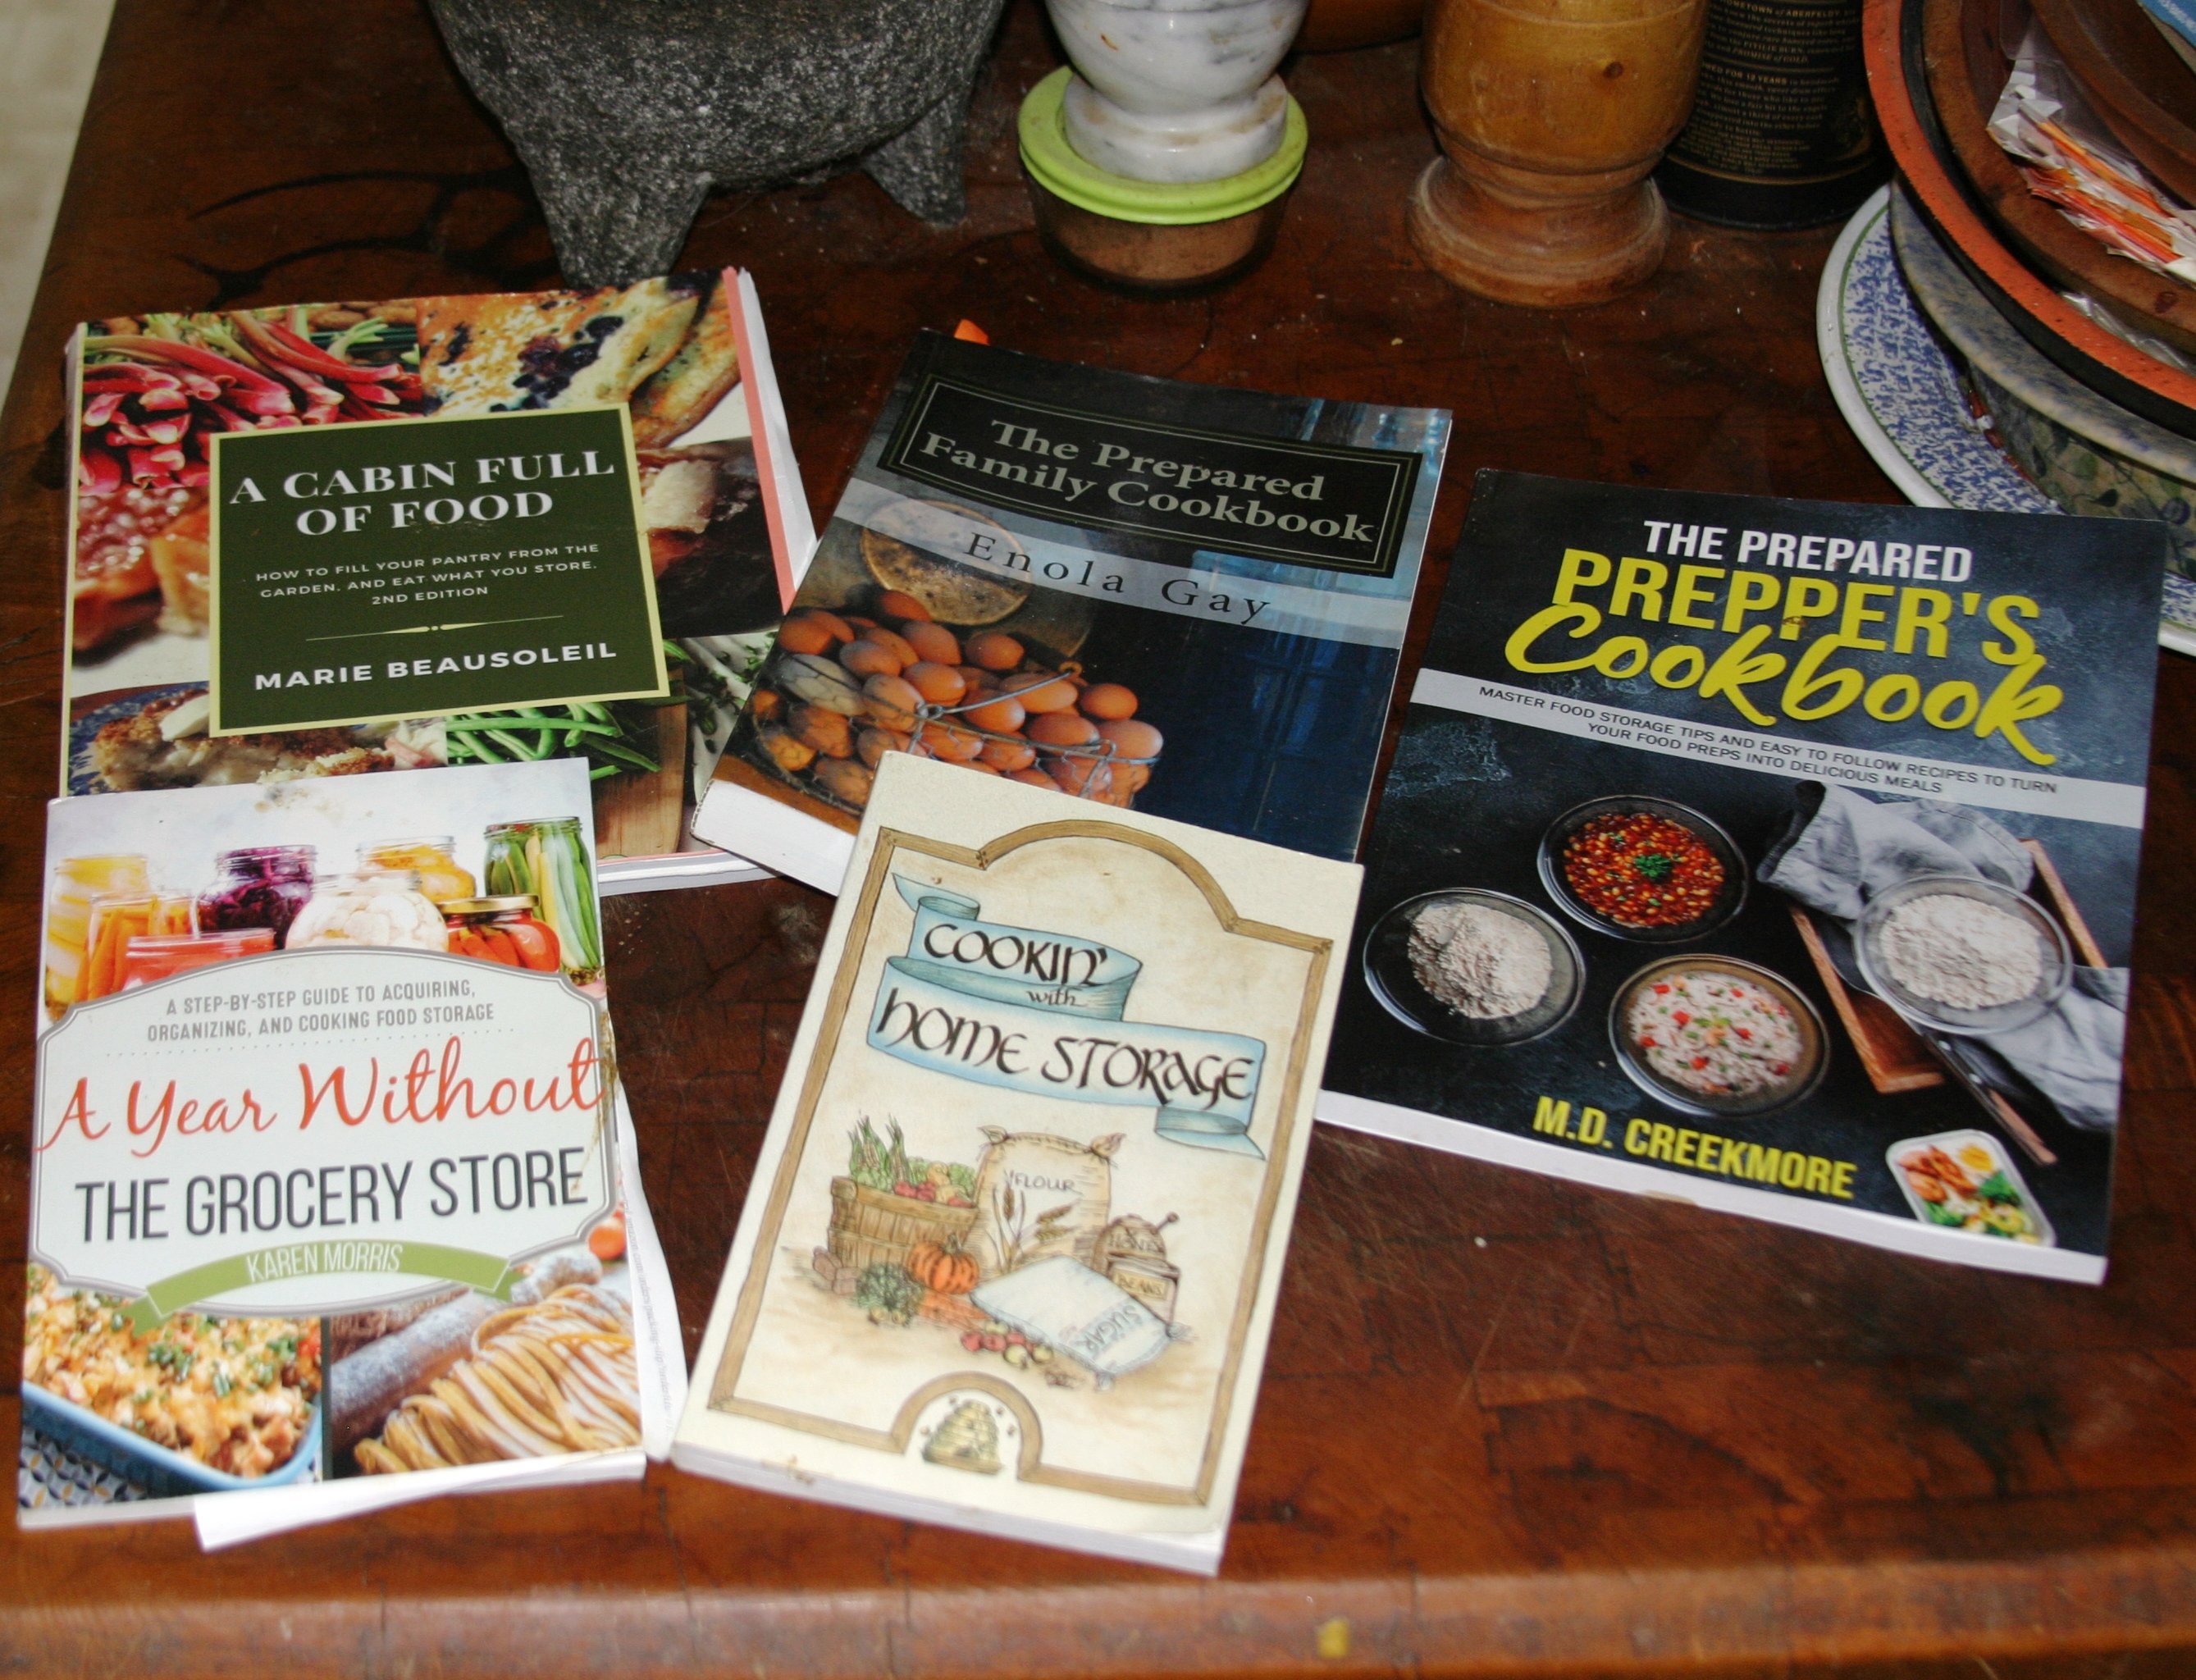
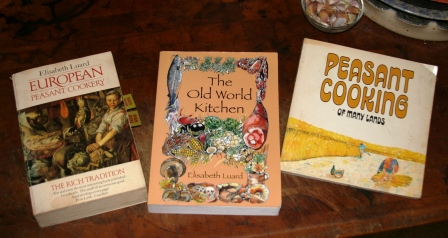
These are several long term pantry cookbooks in my library. There are also many canning and preserving guidebooks that have recipes using the home canned items included. Food prices probably will not drop down to the prices from 2 or 3 years ago. Please do yourself a favor and stockup the next time you go to the grocery store. Even buying just 5 extra cans of food will help.
To all of my Christian readers I wish you a Happy Resurrection Sunday!
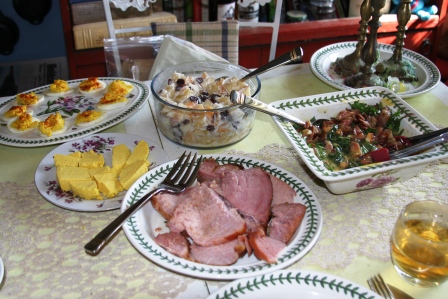
Easter Dinner 2021 Hrudka cheese is between the deviled eggs and ham slices
This is a repost from Resurrection Sunday in 2022. I don’t eat pork anymore so that protein won’t be on my table this year. I’m making my hrudka today. Hopefully there will be some for Sunday.
My family is from Eastern Europe. My mom always made this egg cheese for Easter. And I have been making this for more than 20 years. It is an easy cheese to make at home no special procedures or rennets. If you have backyard chickens the cheese will take on a wonderful orange color if you let your chickens free range. All you really need is milk and eggs with only a couple additions. The photo is from last Easter. I will make my cheese this Friday. Most of it will remain for Sunday lunch.
You will need cheese cloth and twine to complete this recipe. You can also use a leg from clean pantyhose or knee high stockings. I use cheese cloth.
12 large fresh Eggs
1 quart Whole Milk
1 Tsp Kosher Salt (use ½ Tsp if you use fine salt)
1 Tbsp Sugar
2 Tsp Vanilla
Using a heavy bottom 2 quart pot, add all ingredients and beat thoroughly. Cook slowly over low heat. Stir constantly. This will take at least 20 to 30 minutes. Don’t hurry the process. You will appreciate the end product. The egg mixture will separate into what looks like yellow cottage cheese curds and liquid whey. Keep the liquid. You can use it place of milk in waffles or pancakes.
Line a sieve or small colander with the cheese cloth. The sieve should be over a large bowl to collect the whey. Be careful to keep the edges of the cheese cloth above the lip of sieve so you don’t lose the egg curds. Gather the edges of the cheese cloth to form a ball and tie off with twine. Suspend the cheese cloth ball over the bowl and allow to drain. I tie the ball off one of my cabinets. Let it drain for about 2 hours. Wrap in cling film and refrigerate overnight. To serve, remove the cheese cloth and slice. This fresh cheese will last about a week in the fridge.
So the morning started out at 35 degrees. The afternoon is supposed to be in the upper 60’s. Morning weather demanded a soup. So I was watching a video from Vermont and reminiscing about skiing at Stowe while in college. Thought about chowders but wanted something different. Did a search and found a bean chowder recipe on the Randall beans website. So I totally stole the basic recipe and made it my own. Here’s the link to the original recipe if you would like to see what I changed. https://randallbeans.com/2015/12/17/new-england-bean-chowder/ After you open the cans of beans, just drain the liquid and set aside to use later. I did not rinse the beans. In an emergency situation, why would you drain and rinse? Nutrients are lost down the drain. I hope you like this recipe.
3 Tbsp Butter or Olive Oil
1 Onion, small dice
2 ribs Celery, small dice
3 medium Carrots, shredded
5 cups Bean Liquid and Water
2 medium potato, washed with skins on, cut in 1/2 inch cubes
1 cup Tomatoes (I had an 8oz can of sauce)
1 4 oz can Green Chilies
1 1/2 Tsp Salt
½ Tsp Pepper
1/4 tsp Cayenne Pepper
2 Tbsp Liquid Smoke (I used Apple)
2 15oz cans White Beans (I like to use White Kidney Beans/Cannellini Beans)
1 1/2 cups Milk
1 Tbsp Nutritional Yeast, optional
In a heavy bottom soup pot or Dutch Oven heat oil or butter over medium heat. Sauté onion, celery and carrots until tender. Add bean liquid/water mix, potatoes, tomatoes, green chilies, salt, pepper, cayenne and liquid smoke. Bring to a boil and reduce to a low simmer. Cook for 20 minutes.
Remove 1 cup soup, add one can of white beans and purée. Stir the milk and optional yeast gradually into the purée, then slowly stir this back into the soup pot. Add second can of white beans to soup pot.
Cook over low heat uncovered, stirring until soup thickens slightly and is heated through.
Season to taste. So good served with homemade bread.
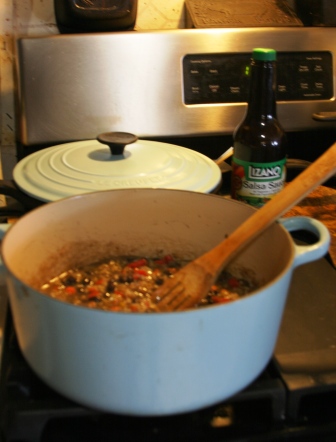
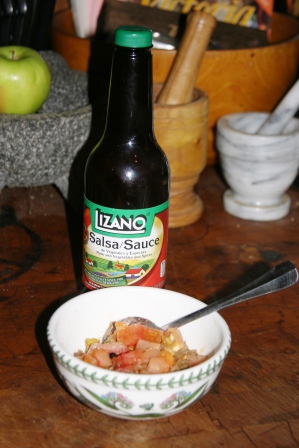
This such a delicious rice dish. Kudos and a hat tip to one of my friends back in the northeast. Almost four years I and a couple friends from up there were on a vacation in the Smoky Mountains of Tennessee. My friend made this dish for us. It was so wonderful that I needed the recipe. It is an actual Costa Rican recipe she got when on a vacation several years ago. It is so easy especially if you have leftover rice and a can of black beans. It is a complete protein with the rice and beans. It can be used as a main vegetarian main dish or it can be a side for grilled chicken or grilled fish. Both of those meat proteins would be a traditional Costa Rican meal. I do like to top with rice with taco beef and homemade Greek yogurt. I make the yogurt in my Instant Pot. If you don’t have or can’t find Lizano Salsa you can substitute Worcestershire Sauce. But try to find the Lizano. I’m sure you’ll start to use it in other dishes and as a marinade. And a bonus, this is a pantry friendly meal for emergencies. I hope you like this an much as I do.
2 cups cooked Rice
1 15 ounce can Black Beans, drained and keep the liquid
3 Tbsp Olive Oil or Coconut Oil
3 Garlic cloves peeled and pressed or fine mince
1 small Red Onion, small dice
1 Jalapeno Pepper, fine dice
2 Carrots, small dice
1 rib Celery, (or more) small dice
1 Sweet Pepper (red, orange or yellow) small dice
½ cup of liquid from canned Beans
1 ½ Tsp ground Cumin
1 Tsp ground Coriander
1 Tsp grated fresh Ginger or ½ Tsp ground Ginger
2 Tbsp Lizano Sauce
½ Tsp Liquid Smoke (I used Apple Wood this time)
Salt and Pepper to taste
1 Lime
½ cup chopped Cilantro
Optional toppings are sliced Green Onions, Sour Cream or Greek Yogurt.
Drain beans and reserve the liquid for adding to pot later. Do not rinse the beans.
In a cast iron or heavy bottom pot over medium heat warm the olive oil. Add onions and sauté for about 5 minutes. Add garlic, peppers, carrots, and celery. Sauté about 10 minutes. Add rice and beans and mix. Add bean liquid, cumin, coriander, ginger, Lizano salsa and liquid smoke. Mix well. Season with salt and pepper to taste. Reduce heat and cook for about 10 minutes.
If desired, grate some of the lime zest and add to pot or just cut in half and add the lime juice.
Serve as a main dish or a side with meat proteins.
The following is my opinion. I’m not a health practitioner. I don’t play a doctor on TV and I haven’t stayed at a Holiday Inn Express in years..
Folks, it’s salt. There are more than 30 references to salt in the Bible and countless references in secular literature common culture.
Leviticus 2:13 (The Scriptures) Season all your grain offerings with salt. Do not leave the salt of the covenant of your Elohim to be lacking from your grain offerings. With all your offerings you bring salt.
Matthew 5:13 (The Scriptures)You are salt of the earth: but if the salt becomes tasteless, how shall it be seasoned? For it is no longer of any use but to be thrown out and to be trodden down by men.
Isak Dineson, “The cure for anything is saltwater: sweat, tears or the sea.”
Salt of the earth…
Worth your salt…
Salary…
For centuries salt has been used flavoring, preserving, sterilizing, sacrificing, destroying and fertilizing.
If you are reading this post I can safely assume you have traveled around the sun more than a couple of times on this planet called Earth. I can also assume that you as have I heard all of the white noise regarding salt. “Experts say… blah, blah, blah…Low salt diets. Heart healthy diets. Eat less salt to lower your blood pressure.” Starting in the late 1970’s, government suggested guidelines advised restricting salt intake. Only now 50 years later researchers and consumers are realizing that salt is not the boogeyman threatening our health. The real white granular threat is sugar. An in-depth exploration of sugar requires a separate post.
Humans and animals crave salt. I have a small salt lick in my south pasture where the cows and wild game gather in summer. I put three different types of salt blocks in the lot where my horses are pastured. They visit the different blocks as needed. The 50 pound cubes are plain white salt, brown mineral salt and yellow/green sulfur salt. Horses instinctively know what they need. Unfortunately, most humans have had their instincts “educated” out of them and turned over their health to people with letters after their names.
Chapter two titled, We are salty folk, in Dr. DiNicolantonio’s book, “The Salt Fix” perfectly explains our need for salt. The last section in the chapter explores the salt and sex connection. He cites references of reduced birth rate and litter size, reduced mating and reproduction failure in livestock. Dr. DiNicolantonio references the book, “Aphrodite, sex and salt – from butterfly to man”, when he states, “ a low salt diet seems to act like a natural contraceptive in both animals and humans”.
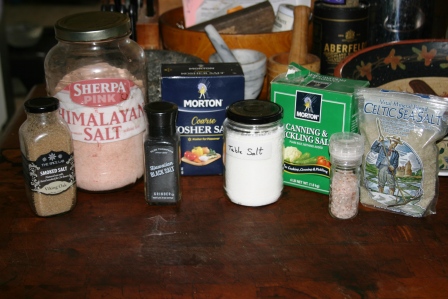
So salt is essential for metabolic processes. Now the question is refined or unrefined. Refined salt is just that refined through harsh chemical processes that remove impurities, i.e. minerals. The end product is dead lifeless substance consisting of sodium and chloride along with anti-caking chemicals and possibly iodide added. This is not a substance that I choose to ingest.
Unrefined salt has not been subjected to chemical processes so it retains the minerals and trace elements which are advantageous to the human body. Three major brands of unrefined salt are Celtic Sea Salt, Pink Himalayan Salt and Redmond Real Salt.
Celtic Sea Salt which has more than 80 minerals and trace elements is collected on the southwestern coast of France. The sea water is allowed to gently dry in the sun and the wind. I started using Celtic Grey more than 14 years ago. I would order 25 pounds at a time. Currently, I using up the remainder of my Celtic Grey. I do have concerns about micro-plastics in oceans. It may not be a valid concern but so be it. They do sell a very fine finishing salt called Flower of the Ocean that I continue to buy. As a finishing salt very little is used on any single dish. Please visit www.selinanaturally.com for more product information. I receive no compensation for any clicks or products you might make.
While I was using Celtic Sea Salt I was also using Pink Himalayan Salt. Although called Himalayan, it is actually mined in Pakistan. The salt is mined and sold in bulk to many companies and then retailed under many different brands. Some are unrefined while others may undergo a refining process and have iodide added. I looked for brands that featured the NON-GMO Project label on the package. I also have several of those Himalayan salt lamps scattered around my house. If worse comes to worst I’ll wash the dust off those and start grinding!
Currently I am using Redmond Real Salt, coarse and fine grind. It is unrefined and has more than 60 minerals and trace elements and is sold only through the Redmond Real Salt company in Utah. Their salt is mined from an ancient underground dry sea. It has none of the concerns of evaporated fresh sea water. I appreciate that they are an American company. Please visit www.redmond.life for more product information. I receive no compensation for any clicks or products you might make.
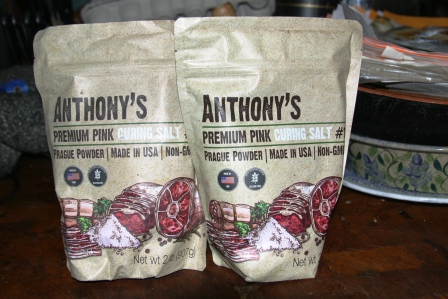
Other types of salt in my pantry are Kosher Salt, pickling salt, Black Hawaiian salt, smoked salt, and Prague Powder #2 curing salt. Kosher Salt and the curing salt are the two I use the least for differing reasons. When I first started cooking most recipes and cooking shows recommended Kosher Salt. Now setting aside the religious Torah requirements of drawing out the blood from the meat, I find the taste of commercial Kosher salt a little harsh. I’m talking Morton’s Kosher. It is an industrialized salt that is cheap to buy. That is a consideration for a restaurant’s bottom-line. I still have a small container of Kosher salt but it is not my go to anymore.
The reason that curing salt, Prague Powder #2 is one of my least used salts is because I have not done a lot of home curing meat. However, I have included a recipe for homemade beef summer sausage at the end of this post. Curing salt is a salt to treat with respect. DO NOT eat this pretty pink salt raw sprinkled on food. It can be deadly. It is used for dry curing meat. It penetrates deep into the meat to kill botulism.
On to pickling salt. If you have done any hot water bath canning of pickled “anything” you probably used pickling salt. Pickling salt should be free of any chemical addictives such as anti caking agents or iodide. These chemicals can react with the vinegar and cause bitterness or discoloration in the pickled product. I have used fine grind Redmond Real Salt in my pickled recipes with no ill effect. If you are unsure about the salt you have to use in pickled recipes, buy some Morton’s Pickling Salt.
I have not used Black Hawaiian Salt or Smoked Salt very much but they are awesome as finishing salt right before you serve your dish.
The range of flavored salts is limited only by your imagination. Dehydrated fruits, herbs spices etc can be paired with your choice of salt to add flavor to your dishes. I have made small jars of flavored salts to give as gifts.
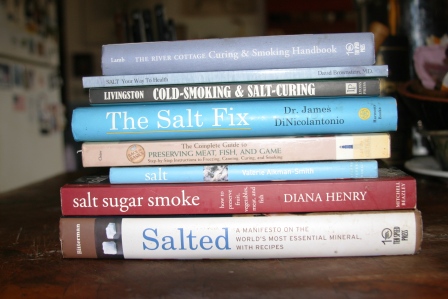
This simple post is just a first level introduction of salt and the ones I use regularly. In my opinion the book “Salted, a Manifesto on the World’s Most Essential Mineral With Recipes” by Mark Bitterman is an exhaustive tome on salt. It is my go too reference. Now I will leave you with the recipe for homemade Beef Summer Sausage. This is a two day recipe. It follows the references.
“Salt Cooking With the World’s Favorite Seasoning”, by Valerie Aikman-Smith
“Salted” by Mark Bitterman
“Salt Your Way to Health” by David Brownstone, M.D.
“The Salt Fix” by Dr. James DiNicolantonio
“Salt, Sugar, Smoke” by Diana Henry
“The River Cottage: Curing & Smoking Handbook” by Steven Lamb
“Cold –Smoking & Salt-Curing Meat, Fish & Game” by A.D. Livingston
“Preserve Meat, Fish and Game” by Ken Oster
Keto friendly, no carb homemade beef summer sausage
4 pounds very lean Ground Beef (at least 90% lean)
¼ cup Curing Salt
2 Tbsp Liquid Smoke
2 Tsp coarse ground Black Pepper
1 Tsp Garlic Salt
In a large bowl mix 4 pounds of ground beef with the curing salt. Mix well. Cover and refrigerate overnight. At least 12 hours.
The next day add liquid smoke, black pepper and garlic salt. Mix well.
Divide the meat mixture into 4 equal portions and shape into 8 inch long logs.
Set the sausage logs on a wire rack in a roasting pan or on a cooling rack in a baking sheet.
Preheat oven to 225 degrees F. Bake sausage for at least 4 hours.
These can be refrigerated for immediate use or they can be frozen.
Around the same time I was craving the apple cider from the previous recipe, I also wanted gingerbread. The traditional kind. Not the store bought commercial stuff. I found this recipe in Darina Allen’s “Irish Traditional Cooking”. Of course I swapped some items, doubled the amount of powdered ginger and added some of my own homegrown grated fresh ginger. I hope you enjoy this loaf. It is so good on a cold day with tea or coffee.
2 Tbsp Milk
½ Tsp Baking Soda
1 oz Golden Raisins (I used Black Currents)
2 ozs preserved Ginger in syrup (I used the Spice World sweetened ginger in the squeeze bottle)
1 oz dried candied Ginger, small chop
2 thumb sized knobs of fresh Ginger, grated
½ c Butter, room temp
½ c and 1 Tbsp of Dark Brown Sugar
2 Eggs
8 fluid ozs Molasses (I used Black Strap)
1 ¾ c AP Flour
2 Tsps powdered Ginger
1 oz Raisins (Black Currents)
Pre-heat oven to 325 degrees F.
Warm the milk and baking soda to 110 degrees F. Add the golden raisins/black currents, preserved ginger, candied ginger and fresh ginger to the milk. Set aside.
In the bowl of a stand mixer, cream the butter. Add the sugar and beat until light and fluffy. Add eggs, one at a time. Mix in the molasses and fruit/milk mixture. Mix until incorporated. Then add the flour, powdered ginger and remaining raisins/black currents.
Line a large loaf pan with parchment paper. Pour the mixture into the loaf pan. This batter should have an awesome raise while baking but it will cave in the middle while cooling. Bake at 325 degrees F for 1 to 1 ½ hours. Cool on wire rack. It keeps well in a tin.
So, it was a gorgeous day today on my homestead. I spent the afternoon gathering up dead twigs and Sweetie Annie stalks that was killed by our first freeze last week. I burned them a little at a time in my fire pit. All of the grass is dry and brown so I have to be extra cautious right now. No one wants to deal with a grass fire!
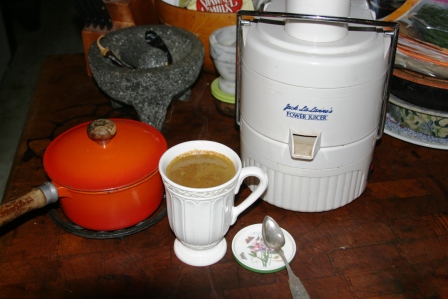
As the afternoon turned into dusk, I really craved some apple cider. I had none in my pantry. If you have followed my blog for any time (I THANK YOU!) you probably know it’s 22 miles one way into town. So a road trip was not going to happen. Then I remembered I still had about two pounds of Gala apples from the boxes of culled produce I was gifted last week.
Out came my trusty Jack Lalaine Power Juicer! That beast is 22 years old. I bought it back in that un-named Northeast state in 2005. It has served me well and has done yeoman’s work. I don’t juice regularly anymore because I have been doing keto/carnivore. But this time of year is the exception. The weather is getting cooler. The trees have that Fall color. You just need apple cider when you sit around a fire.
Now I know not everyone is a fan of pumpkin spice. I understand. It has been way over done and over the top at some coffee shops that I will leave nameless. Mostly, those phoof phoof drinks are all sugar. Anyway I hope you enjoy this. It is so tasty when warmed.
Approximately 2 pounds tart Apples, don’t peel, just quarter. Process them through your juicer. Put the apple juice in a small pot and bring to a boil. Reduce to a simmer. Add about one teaspoon of the pumpkin spice to the juice. Do a taste test to see if it suits your fancy. Add more accordingly. Simmer for about 10 minutes. You can strain the cider through a fine metal strainer if desired. Sometimes the cider may be a little gritty. Enjoy!
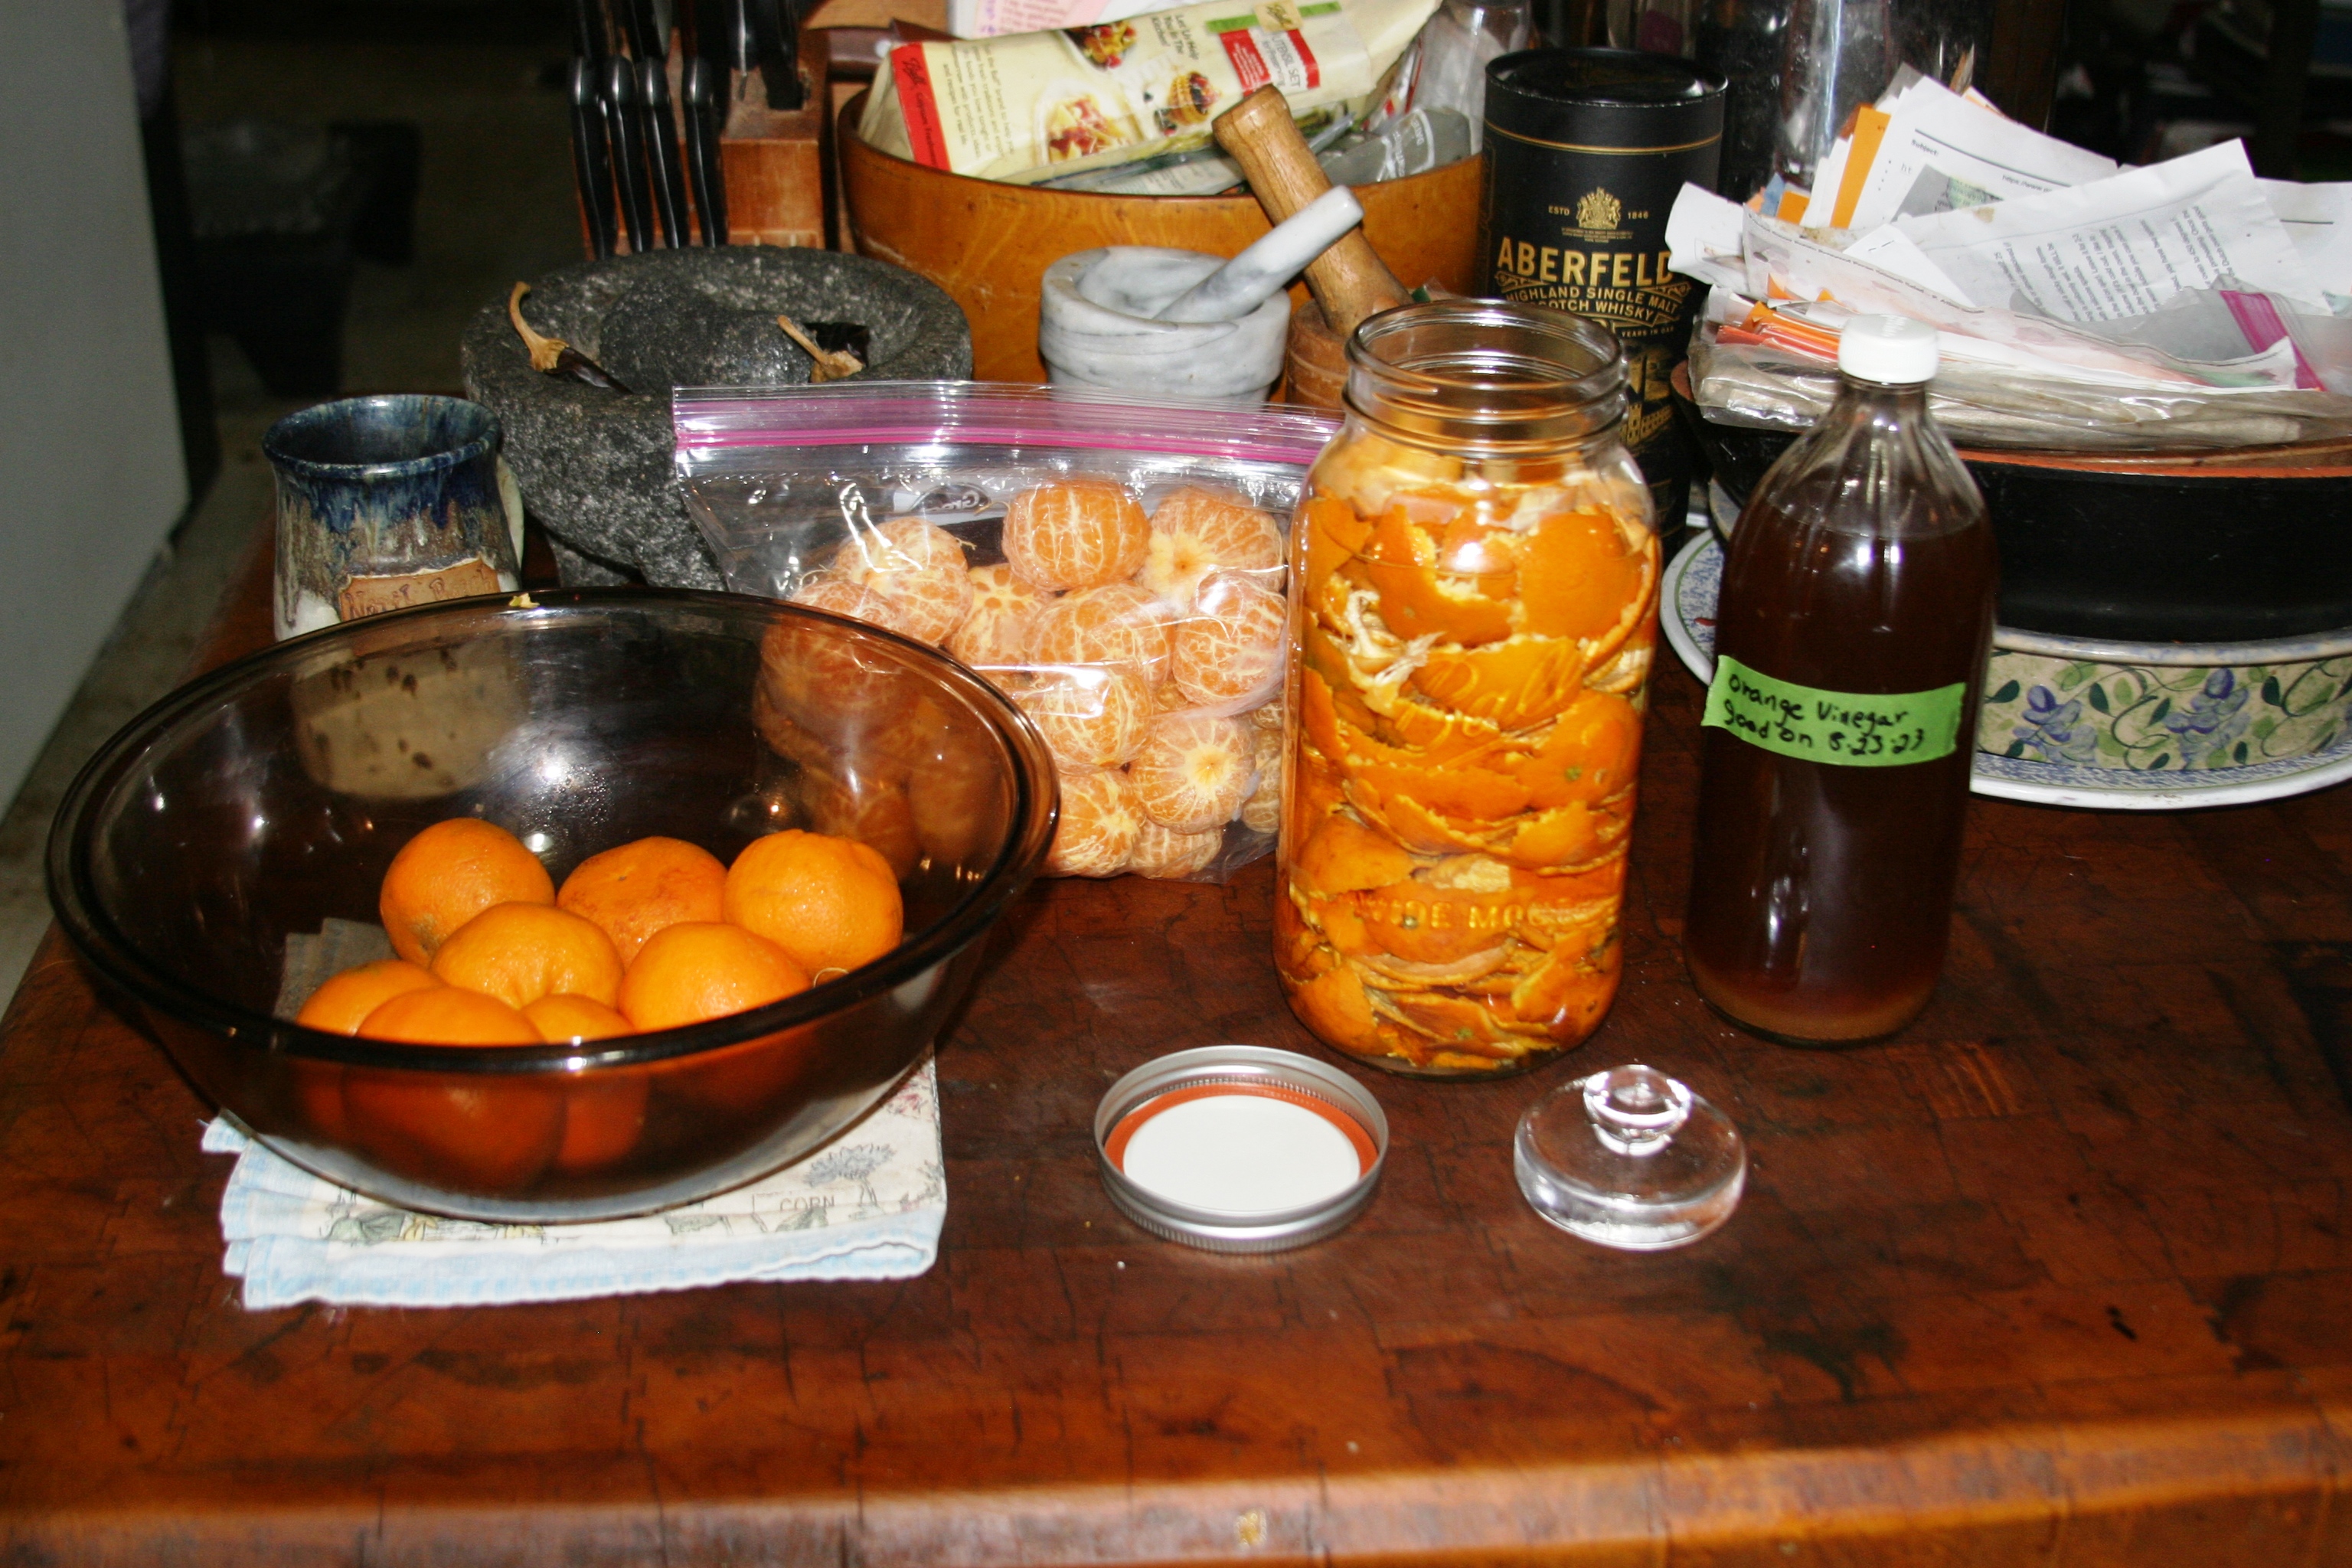
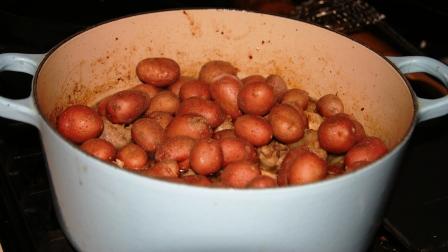
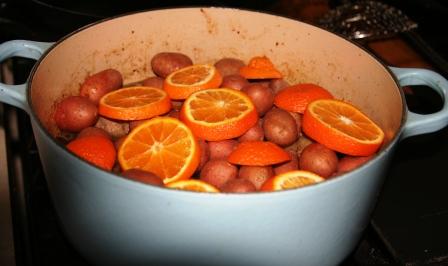
Yesterday while I was in town on errands, I was blessed with two boxes of culled produce from the locally owned grocery store. The boxes included two 3 pound bags of mandarin oranges, two bags of green grapes, a bag of romaine hearts, several bagged salads, peaches and a head of iceberg lettuce. I removed the grapes from the stems and had two gallon baggies to freeze. I love oranges but six pounds of them would be a bit much to consume. I decided to make another batch of orange peel vinegar. I made a batch in the spring and I do need more. I didn’t include in the photo was a batch of lime vinegar I was making. I use a glass fermenting weight in the mason jar to hold the peels under the top of the liquid. The remaining peels will be dehydrated then ground into orange peel zest. I am freezing the orange segments. Hat tip to @Pinball Preparedness channel on Youtube for the recipe! Any fruit or herb can be made in homemade vinegar. This is a link to Pinball’s video. https://www.youtube.com/watch?v=mFjt0O2BOw0
I used a half gallon wide mouth mason jar. Fill the jar ¾’s full with the orange peels. Add ¼ cup of sugar. Ideally, I use pure cane sugar since it is not GMO but if you have beet sugar that will work also. Fill the jar with filtered water (I use my Berkey water.) until the peels are covered. Put the lid on an shake to dissolve the sugar. Remove the lid. I use a glass fermenting weight to keep the peels under water. Cover the top of the jar with a paper towel, coffee filter, cheesecloth or pieces of an old clean tee shirt and secure with a rubber band. I like to use the tee shirt pieces because any fruit flies that may gather cannot get into the jar. Place on the kitchen counter and stir everyday with a chopstick or a wooden BBQ skewer for two weeks.
After two weeks strain out the peels and put liquid into a different jar. Cover with an appropriate lid and place in a dark cool place for six weeks. This vinegar is awesome in salads!
There are so many uses for vinegar around the home and homestead. Books have been written about them. In fact I have a small book printed in 2008 and titled “Over 100 Helpful Household Hints that use Heinz Vinegar”. Here are some for the homestead. To kill fire ants use a 1 to 1 ratio of water and vinegar. To kill weeds use one gallon of vinegar, 1 cup of salt, 2 tablespoons of Dawn dish soap. Vinegar will take rust off tools. Vinegar will clean stains off clay garden pots. To acidify garden soil you can use 1 gallon of water to 1 cup vinegar.
This is sweet annie on the side of my house. Possum, one of the outdoor cats, is keeping his eye on me. Several years ago I traveled back to that Northeast state where I was born.. When I was living there (before my move westward ho) I had a nice herb garden culinary and medicinal. One of my prized plants was sweet annie. The scent of it is intoxicating. A friend was able to find several sweet annie plants for me. I bought them back to Oklahoma. Now five years later, the plants are growing like a weed in my yard and pastures.
THE DISCLAIMER: The following is not to be considered “Medical Advice”. The author is not a “Medical Doctor” or “Health Care Professional”. Any use of this information is solely the responsibility of the Reader. (Words in quotations are legal words used by the US Federal Government.)
Okay enough of the blah, blah, blah. Back to the good stuff.
Botanical Name
Artemisia annua
Common Name
Sweet Annie, sweet wormwood
Plant Type
Annual
Mature Size
6 ft. tall, 2ft. wide
Sun Exposure
Full
Soil Type
Sandy, Well-drained
Soil pH
Neutral, Alkaline
Bloom Time
Summer
Flower Color
Yellow
Hardiness Zones
5-9, USA
Native Area
Europe, Asia
Sweet annie/sweet wormwood (Artemisia annua) should not be confused with its cousin wormwood (Artemisia absinthium) made famous because of the French liqueur absinthe. Loved by Toulouse-Lautrec, Vincent Van Gogh, Picasso and others, absinthe was addictive and toxic. Sweet annie has some of the same biological components but does not contain the toxic compounds. One of its active compounds artemisinin has been used in treating malaria.
Known in Traditional Chinese Medicine (TCM) as qing hao, sweet annie has been used to treat malaria and intestinal parasites. According to Dr. James A Duke sweet annie has been proven useful in China and at the Walter Reed Army Research Institute in Washington D.C. to treat a malarial parasite similar to the amoeba. Dr. Duke suggests using two to five teaspoons of the dried leaves to make a tea and drinking one to three a day.
Sweet Annie can also be used as a tincture. When I make a tincture I gather the lacy leaves and yellow flowers starting in September. Right now is ideal. I fill a half gallon mason jar with the plant material and fill with 100 proof vodka. Label, label, label the jar. Did I say label the jar. Yes! You might recognize the plant matter but you won’t remember when you set it aside. Information to include on the label is what plant, what the liquid is and at least the date you bottled. I also include what date it will be able to use. That is usually four to six weeks in the future. Place the jar in a dark spot. When it is ready, strain the plant matter out and label again in a different bottle. Chris Marano, a Master Herbalist who owns Clearpath Herbals in Massachusetts, suggests 10-30 drops 1-3X daily and a higher dose if addressing parasites.
During the recent disease crises I used my sweet annie tincture and was never sick. I didn’t even get a cold. I know people will say but that’s just anecdotal. Yes, but it’s my antidote. (Spelling intentional.) I have been known to put a shot of the tincture into my bourbon and seltzer.
Artemisinin also has anti-fungal and anti-viral properties. I believe there is research into treating hepatitis B and C, influenza and other viral infections. Sweet annie has also been studied in treating Lyme Disease.
Genesis 1:29 – And Elohim said, “See, I have given you every plant that yields seed which is on the face of all the earth and every tree whose fruit yields seed, to you for food.
It is getting less hot here in Oklahoma. I don’t want t say cool because it is still in the low 80s. Cool is 60s during the day. For the past several months I have been canning various vegetables that I grew. The last batch I canned was green tomato pie filling. It’s here on the blog. Link: https://reddirtcooking.com/2011/08/09/green-tomato-mince-filling/
While that was cooking the scent of warm Autumn spices filled my house. Now I want pumpkin, persimmon, apple etc. I got a craving for Shoo Fly pie. Some cooks put raisins in the mix but I like the plain style. This pie has two parts, a liquid part and the dry crumb part.
The recipe I used is from “Mennonite Community Cookbook” by Mary Emma Showalter. This cookbook was first printed in 1950. My copy was my mom’s and it is from 1975. Good memories.
Pie shell for 1 crust 9” pie plate
Liquid part –
1 C Dark Molasses
¾ C boiling Water
½ Tsp Baking Soda
Crumb part –
1 ½ C All Purpose Flour
¼ C Shortening or Butter
½ C Dark Brown Sugar
½ Tsp Cinnamon
Preheat oven to 350 degrees. Place pie crust into a shallow pie dish.
Dissolve baking soda in the hot water and add molasses. Stir to combine.
Combine sugar, flour and cinnamon. Rub or cut in shortening or butter to make loose crumbs.
Pour one-third of the liquid into the pie shell. Add one-third of the crumb mixture.
Continue alternate layers finishing with a crumb top.
Bake for 35 to 40 minutes. This will be a very loose wet bottom pie. Great with ice cream!
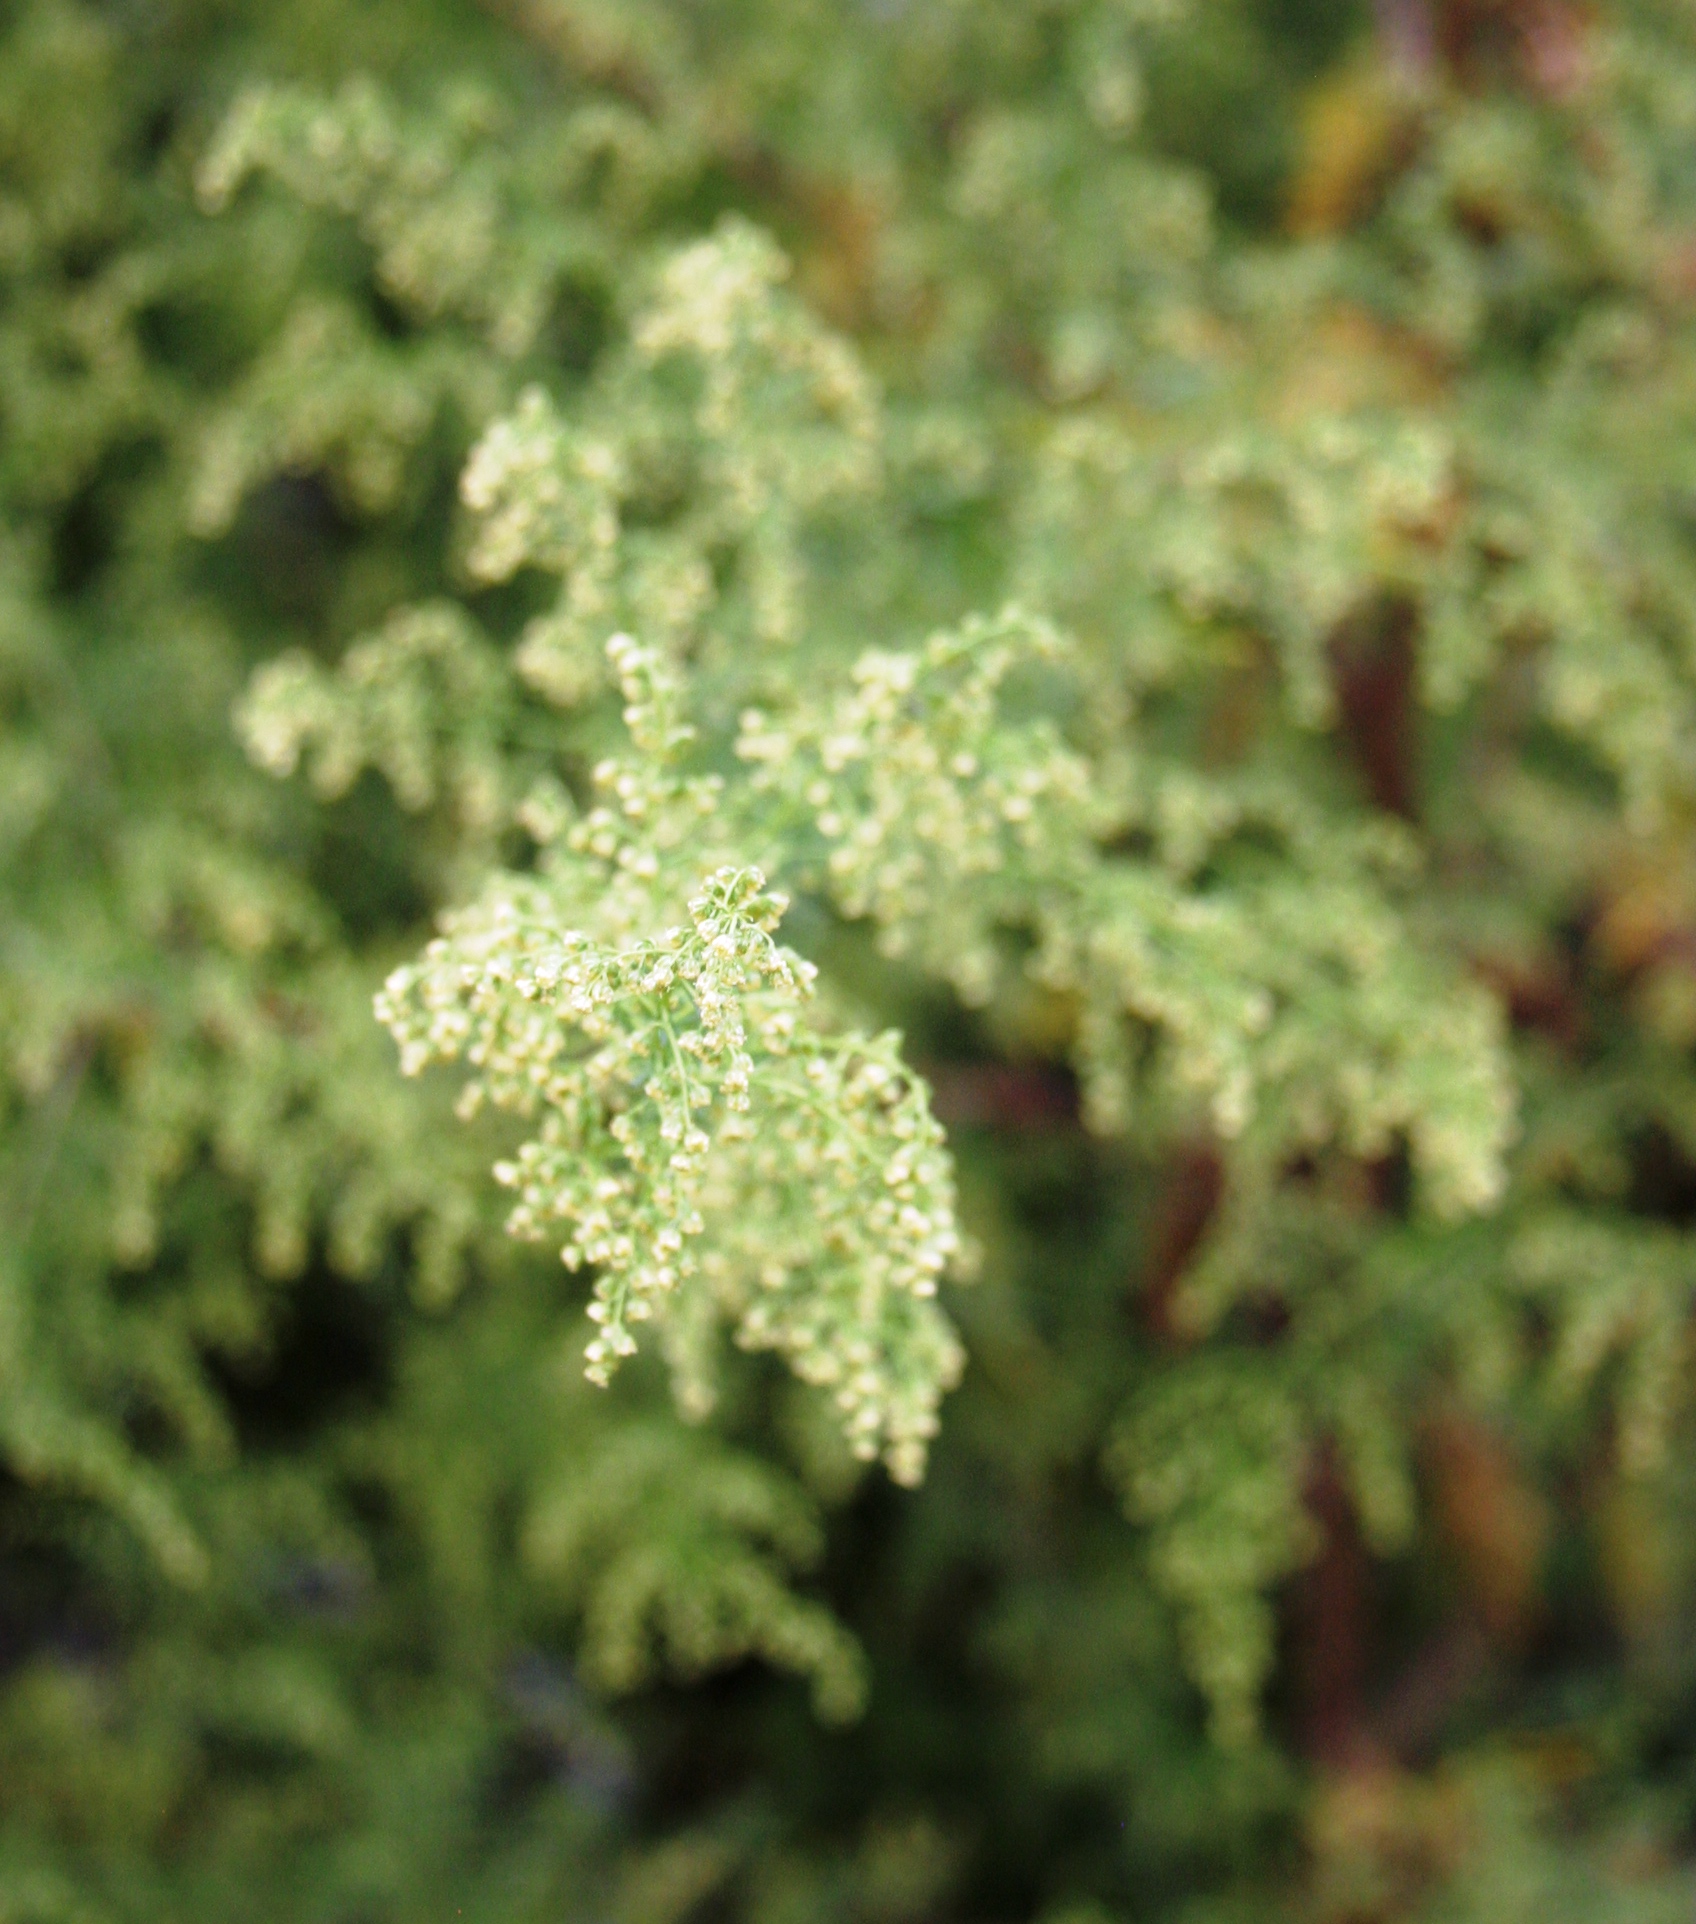
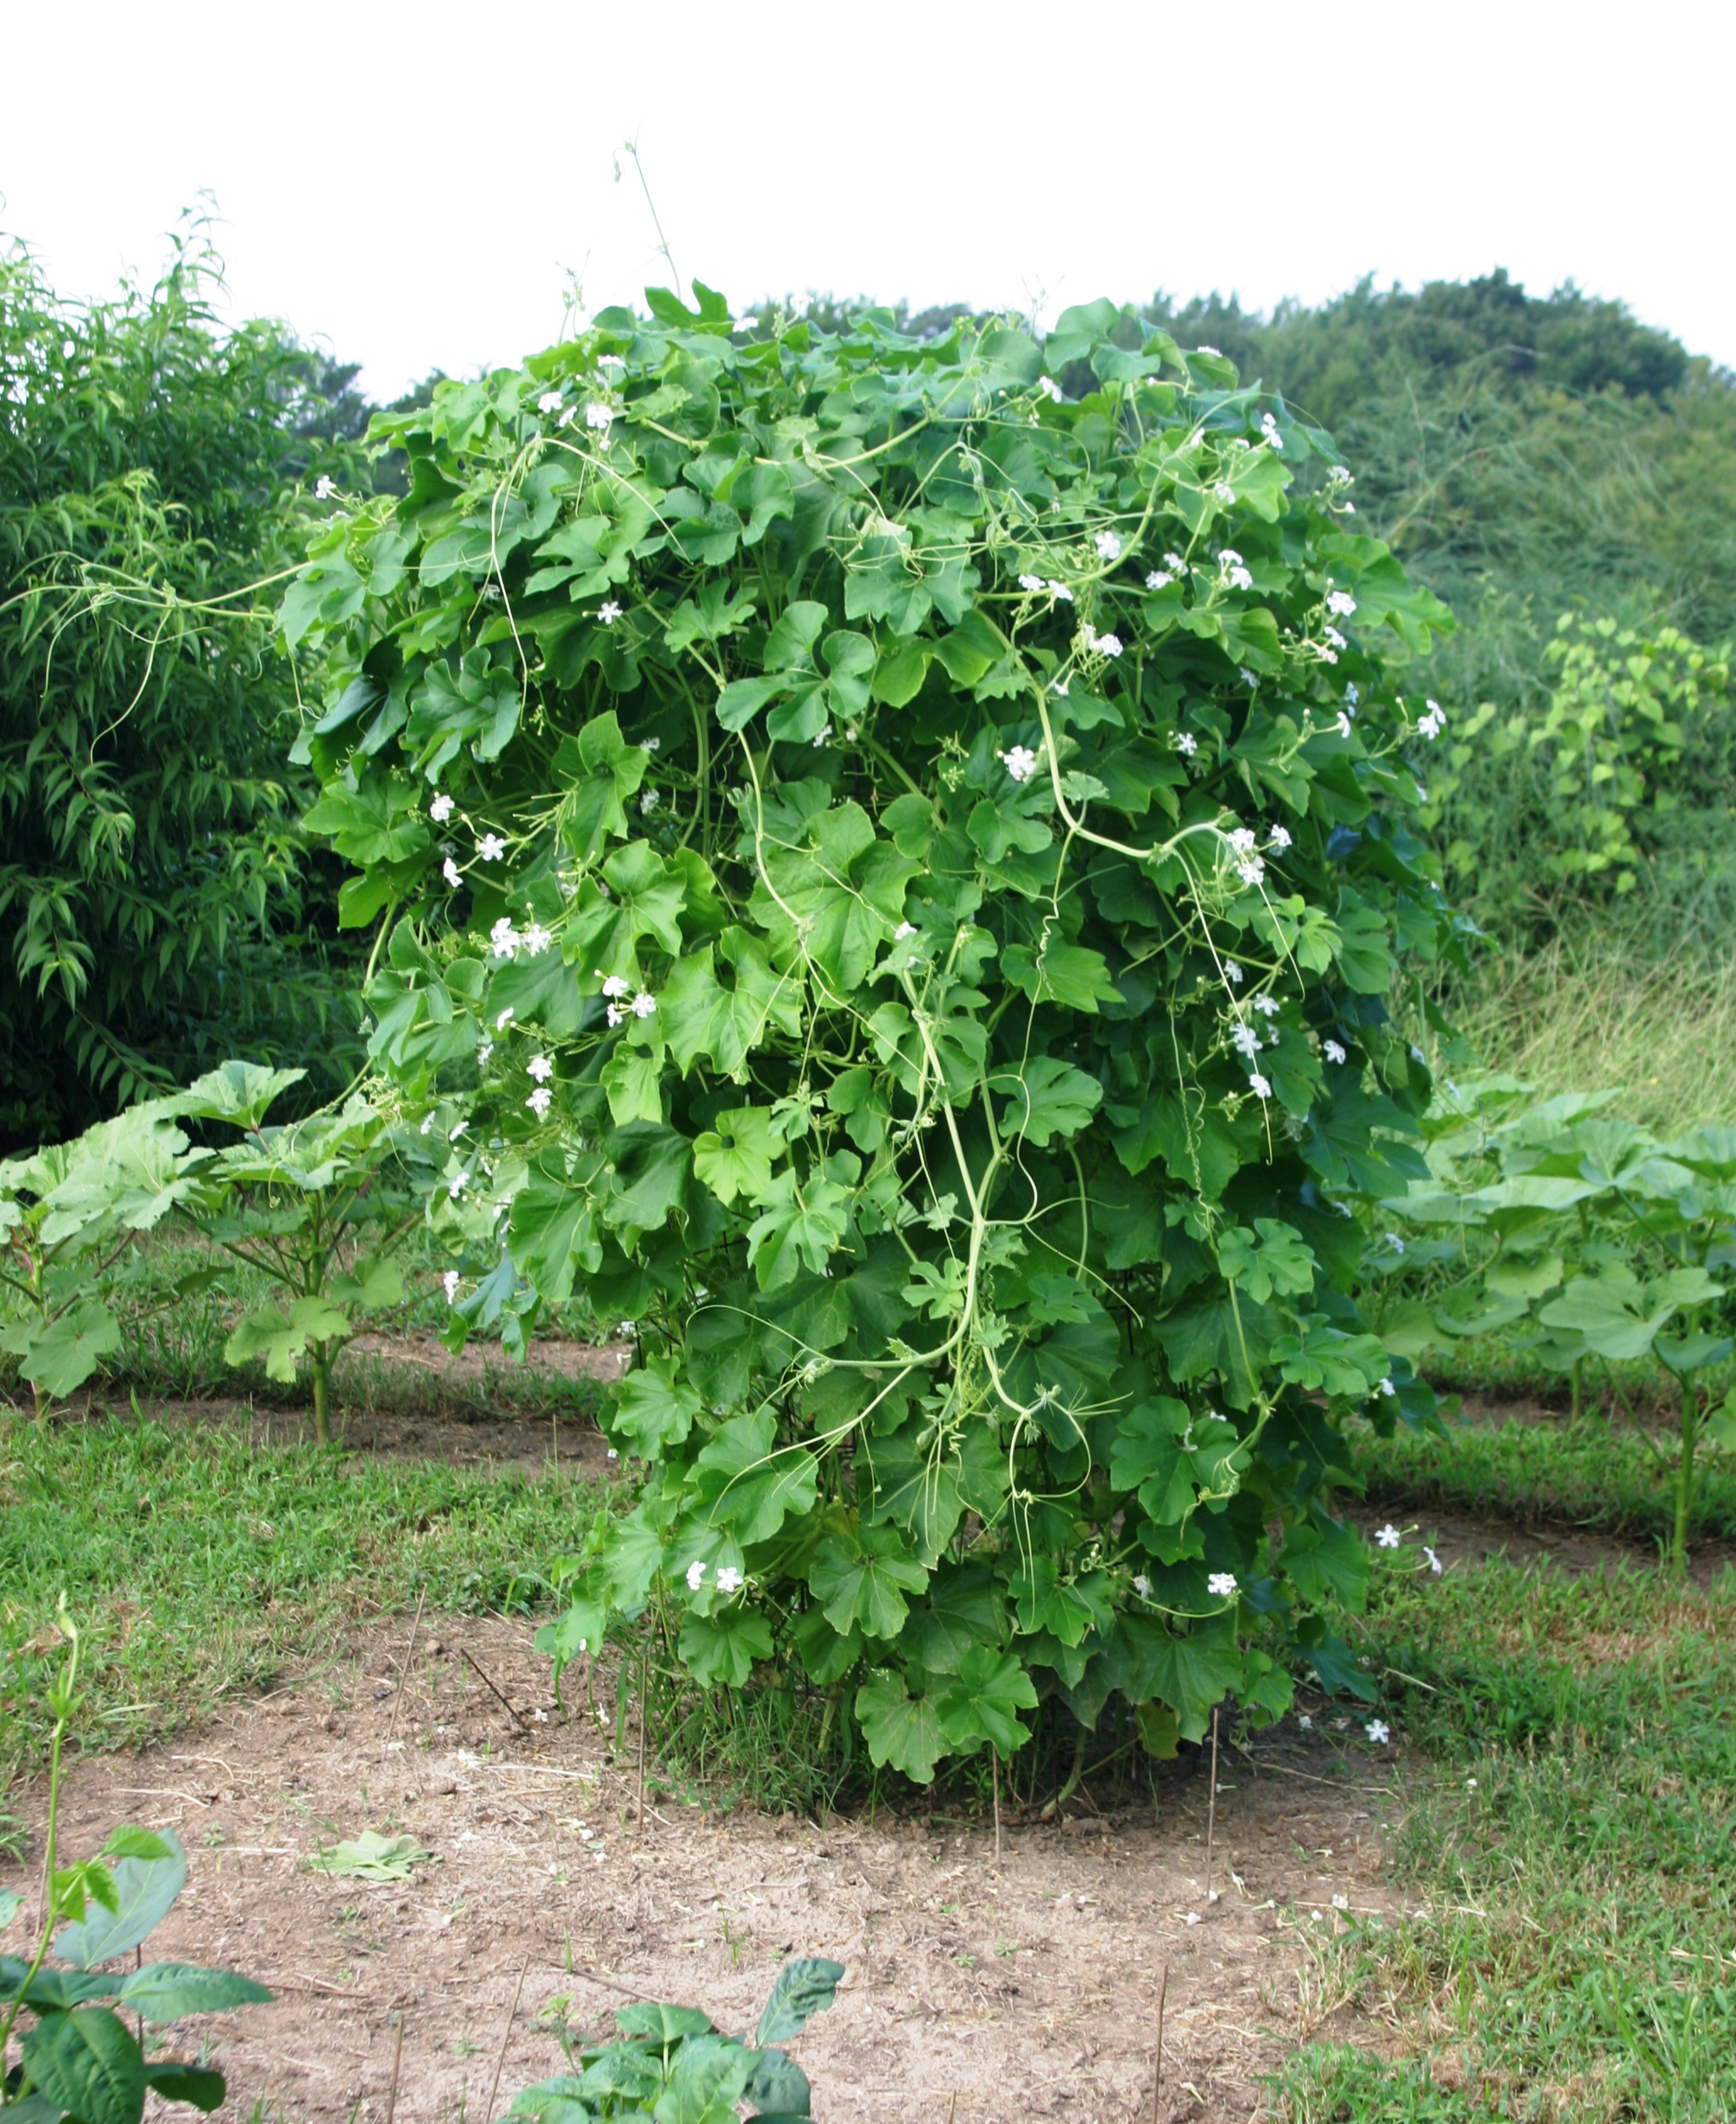
When I saw this vegetable in the Baker Creek catalog I was intrigued. It did not disappoint me.
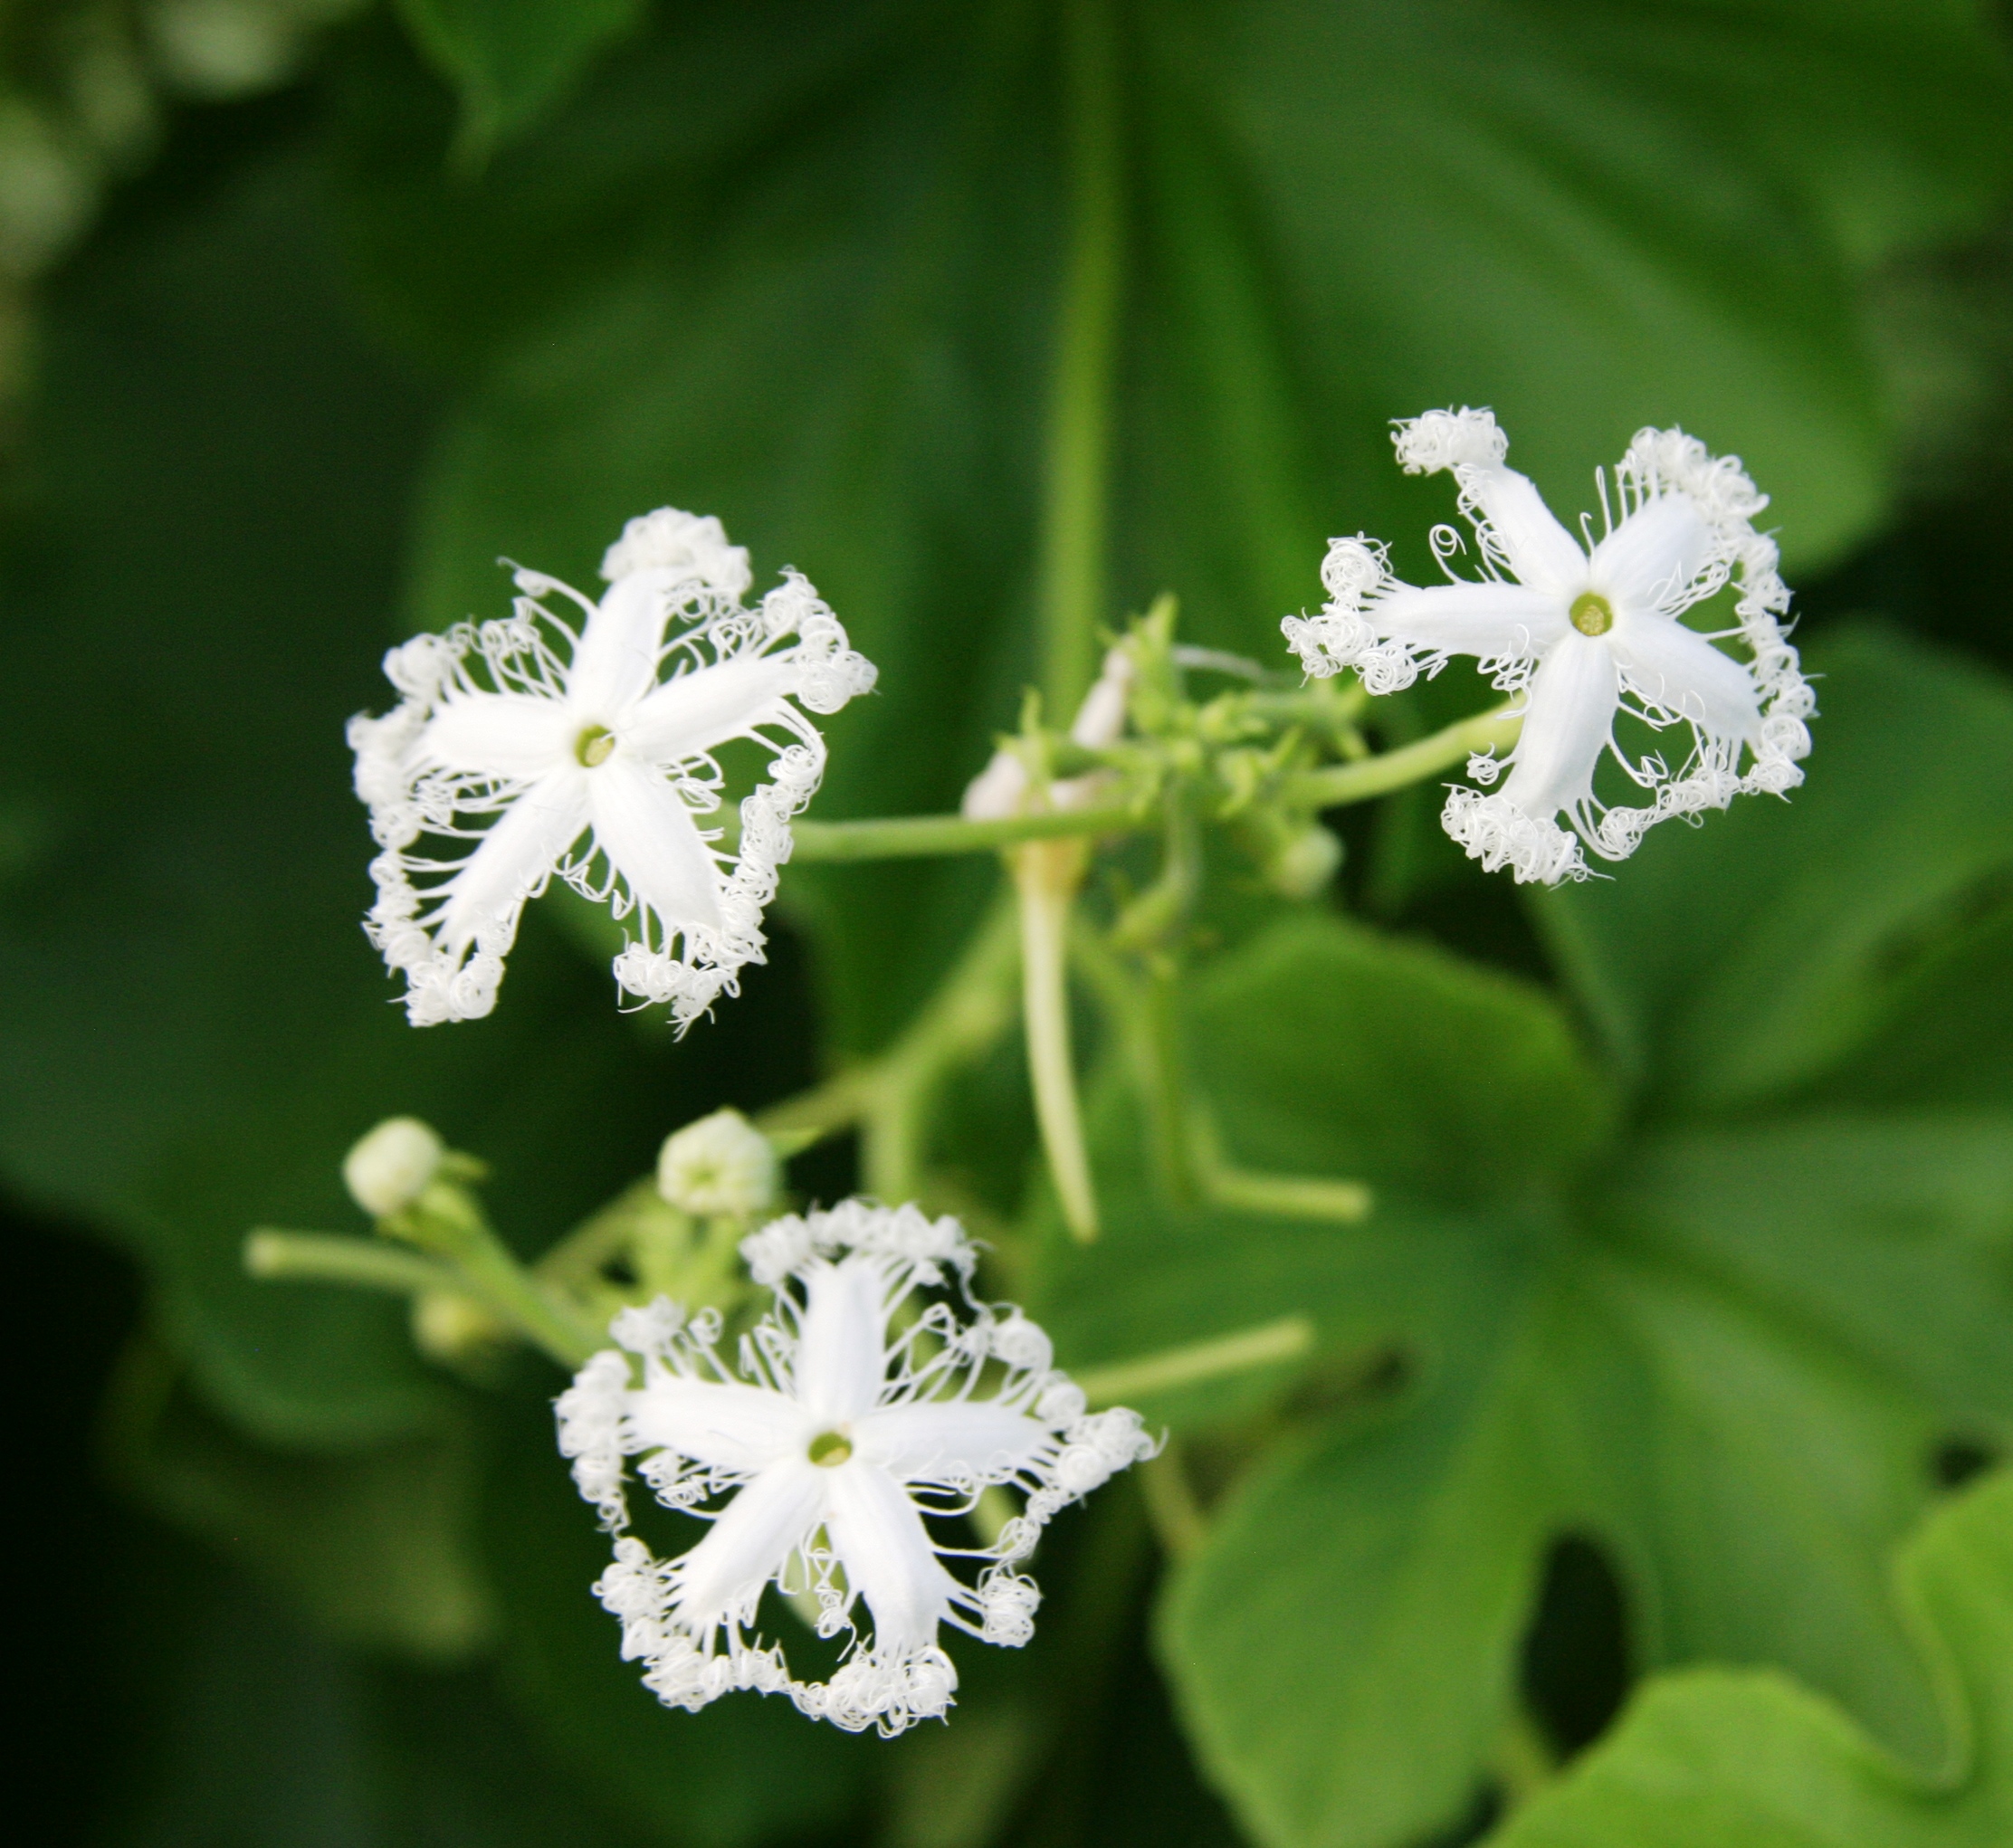
The star shaped flowers smell like a very sweet honeysuckle.
The vines and leaves have an odd aroma. I’m still not certain if I dislike it but it is not off putting to me and I’ll grow this vegetable again next year. Yesterday, I harvested the first two pods. You can see from the photo how big the pods are. It is a vigorous climber. I’m making sure it doesn’t vine over to my okra.
I sliced the pods into ¼ inch rounds and sautéed them in Kerrygold butter with ½ teaspoon of taco seasoning. So good. I served them with tenderized pork cutlets that I pan fried. All in all a great dinner last night. Two thumbs up for this new vegetable. I hope you try this vegetable.
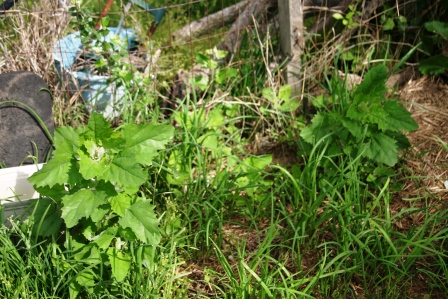
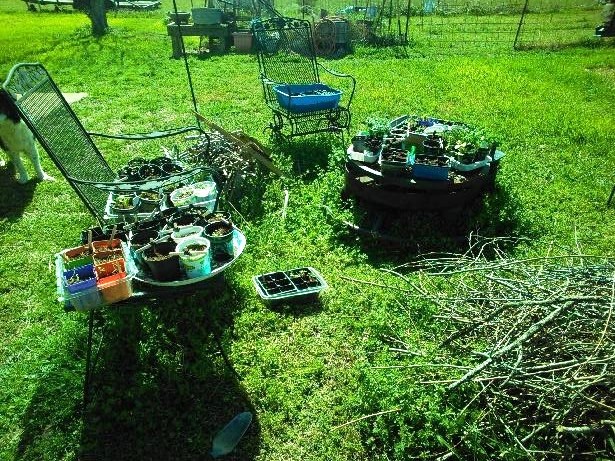
Volunteer plant in one of planters.More volunteer plants in my garden
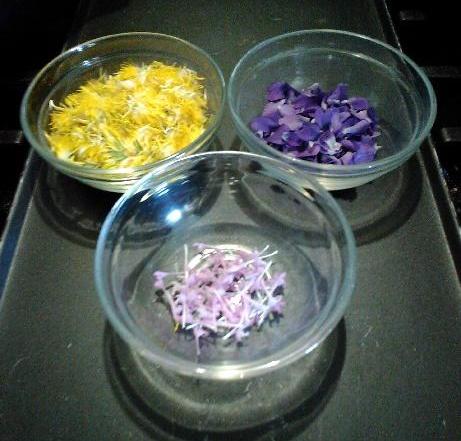
The Spring “Weeds” are here! Many people run to get the herbicide to spray the heck out of those darn weeds. I run to get my foraging basket to gather as many as I can find to make a wonderful spring tonic. But that’s just me. It’s the way I roll.
There are so many beneficial weeds/greens growing at this time of year, it was difficult to choose one to discuss today. But choose I did. And my choice is lamb’s quarters (Chenopodium album). Chenopodium comes from the Greek language and means goosefoot hence the other names it is commonly known by – goosefoot and fatfoot. Album means white and refers to the white dusty underside of the leaves. This white dusting is full of minerals from the soil. A large patch of lamb’s quarters can look very dusty since the flower clusters have a white hue also.
This annual has a mild spinach flavor and is delicious prepared in the ways of spinach and Swiss chard. Tender leaves can be eaten raw in salads, steamed, sautéed, made into a pesto or even made into a delicious soup. Recipe will follow.
Considered a bothersome weed by some people here in America, lamb’s quarters is one of the few wild greens that has been analyzed for nutritional content. It is listed in the USDA National Nutrient Database, Data Type: SR Legacy Food Category: Vegetables and Vegetable Products FDC ID: 169244 NDB Number:11244. It is exceptionally high in calcium and Vitamins A and C. Lamb’s quarter packs a huge nutritional punch. In 100 grams there is 4.2 g protein, 1.2 g iron, 116,000 IU Vitamin A, 80 g Vitamin C and 309 g calcium. This plant is appreciated in Europe as a nutritious potherb. A traveler can even find bundles for sale at local farmers markets in France.
Harvesting lamb’s quarter is best done in spring and early summer when the leaves are most tender. You can harvest during the heat of the summer but limit yourself to taking the tender new leaves at the top of stalk. You may have to pick the leaves individually. The larger mature leaves have a higher concentration of oxalic acid that is why the young leaves are better suited to eat raw. Mature stalks can reach six feet tall.
All parts of lamb’s quarter can be used roots, leaves, flowers and seeds depending upon when and what reason you are harvesting. The roots contain saponin and when mashed can be used to make soap. The mashed roots can also be used as a tea infusion to aid elimination of toxins through a laxative effect. In addition to eating the leaves straight away, they can be dehydrated and ground to a powder for use in soups, smoothies or other dishes. The flowers can be used in similar ways to the leaves. The seeds can be prepared and used like it’s cousin quinoa.
Used as a tonic lamb’s quarter is a gentle detoxifier. The high chlorophyll content will bind to the toxins and will be eliminated. The spring tonic recipe I use will follow.
Lamb’s quarter is widely distributed in zones 4 to 11 in North America, Europe and Asia . It will grow wherever it can find a niche. I had a large plant grow in a crack in my concrete apron at the front of my shop where the overhead doors are. There is no need to cultivate as it is a prolific selfseeder. If you do want to cultivate try the Magneta Spreen Lamb’s quarter sold by Baker Creek Seeds, www.rareseeds.com.
For further research into this very useful green I highly recommend all of the books by Susan N. Gillmore – “The Backyard Herbalist”. She is a certified Master Herbalist and certified Master Mittleider Gardener. Her books include, “Medicinal Weeds”, “First Aid Kit Herbs”, Making Herbal Remedies and the Healer’s Art”, and “Culinary Herbs and Spices”. These hard copy, spiral bound books are an invaluable addition to your SHTF library. She can be reached at sue@LDSPrepper.com.
My spring tonic recipe –
½ cup packed fresh Lamb’s Quarter leaves
½ cup packed fresh Dandelion leaves.
16 ozs boiled filtered Water
1 Tbsp Bragg’s Apple Cider Vinegar
Raw Honey to taste
In a quart jar pack the lamb’s quarter and dandelion leaves. Add the boiled water. Steep for 15 minutes. Remove the leaves and give to your chickens or put in the compost. Add apple cider vinegar and honey to taste. Enjoy!
The soup recipe is on page 230 of “Forage, Harvest, Feast” by Marie Viljoen, Chelsea Green Publishing, Vermont 2018. This recipe is easily doubled.
8 ozs (227 g) Lamb’s Quarters
4 cups (1 L) Chicken Stock
Salt to taste, your choice Sea, Kosher, Pink Himalayan, Redmond Real Salt
2 Tbsp Lemon Juice
2 large uncooked Egg Yolks
Fresh ground Black Pepper to taste
2-4 poached Eggs (optional)
Bacon crumbles (optional)
Blanch leaves in boiling water for 1 minute. Strain leaves out and plunge into cold water. Squeeze and rough chop. Bring stock to a simmer. Taste and add salt if needed. Add lemon juice. Add leaves and cook for 3 minutes. Stir. Cool slightly and transfer soup to a blender. Pulse briefly. Transfer by to pot and heat. Do not boil. Whisk in egg yolks and season with salt and pepper. As soon as the soup is hot, it is ready to eat. Add pre-cooked poached eggs and bacon to individual bowls. This is excellent served with Irish Soda Bread and creamy butter. Enjoy!
My asparagus patch is a hot mess right now. I’m working it.
So far I have harvested about 3 pounds of asparagus from my garden. Asparagus from the garden is so good. I was able to clear out the dewberry vines so I can now actually see the tender stalks. I may allow the remaining stalks to go to seed to ensure I have asparagus next Spring. Back in 2011 I posted an asparagus soup that was just asparagus. In this version I have added potatoes for a bit more caloric content and flavor.
1 ½ pounds Asparagus, trim off the tough ends, cut in 1 inch pieces but set aside the tips
3 or 4 medium Potatoes, peeled and cubed
1 medium Onion, diced
2 ribs Celery, trimmed and chopped
2 tablespoons unsalted Butter
1 box (32 ozs) low sodium Chicken Broth or Home-made
1 cup Milk
1/2 cup Greek Yogurt
1 1/2 tablespoon All Purpose Flour or Wondra
Sea Salt or Kosher Salt to taste
1/4 teaspoon Dill Weed, dried
White Pepper to taste
Crispy Bacon, shredded Cheese or Chives to garnish
Melt butter in a medium size soup pot. Add onions and celery and sweat over medium high heat until onions are tender but not browned. Add chicken broth and asparagus pieces. Bring to a boil and then reduce heat to simmer for about 30 minutes.
While the asparagus mixture is cooking, in a separate pot cook the potato cubes until tender. Set potatoes aside. Process asparagus mixture in a blender, food processor or puree with an immersion stick blender until smooth. Return to soup pot when blended. In a small sauce pan heat the milk and whisk in the flour to make a smooth roux. Add a bit of the warm pureed asparagus soup to the roux. Blend well. Add the roux to the soup pot. Stir constantly until well blended.
Drain potatoes and add to soup pot. Add yogurt, salt, dill weed and pepper. Mix well. Add in asparagus tips and heat for about 10 minutes until soup is thickened and tips are slightly tender. Can serve with crusty bread and creamy butter.
Hello guys! Just wanted to let everyone know that there is someone else using OkieRanchWife on Pinterest. I have never been on that site and have been using my handle since 2011. I guess this comes with the territory of being on the internet, SIGH! Okay. I did just sign up to Pinterest to get my @okieranchwife on there but I will not be pinning or posting anything.
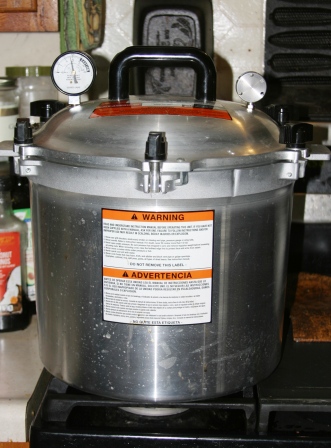
I have been pressure canning meat protein like a crazed woman. This is my 921 All American canner with ugly chicken processing. I have done chicken, bone in legs and thighs and deboned breasts, ground beef, ground pork sausage, and pulled pork butt. I have had an All American pressure canner for about three years. It was gift from a very good friend. I was afraid of it. It sat in my dining room with an accusatory attitude, like “come on, go big or go home”! With the state of the food industry and grocery food that you buy now and preserve will be a saving and money in your pocket. I don’t believe the cost of food will come down anytime soon. So I went big. I started right in on meat. Totally by passed all the veg recipes. I want shelf stable meat protein in my pantry. I have been hot water bath canning acidic foods for many years and am very comfortable with that process. Now I am confident with my pressure canner.
Since I am a newbie to pressure canning I would not presume to give directions how to do it. However, there are several YouTube channels that were invaluable to me. They are Late Bloomer Homestead (Kaye Kittrel was learning how to use her new canners) , Sutton’s Daze and North Texas Vegetable Gardening and Cooking. I also used the recipe book that came with my All American and a couple canning books that I own.
I hope you enjoy this chicken casserole that is low carb, high fat, KETO friendly recipe. And you probably have the ingredients in kitchen already!
Extra Virgin Olive Oil Spray or Coconut Oil Spray
1 quart canning jar Ugly Chicken (I pack 2 bone in legs and thighs in a quart jar) You can also use a pre-cooked deli chicken.
1 small head Cauliflower, broken into small florets and stems chopped
8 ozs Cream Cheese, sliced into cubes
12 ozs Bacon , cooked, chopped and drained (I love bacon)
8 ozs Extra Sharp Cheddar Cheese , shredded and divided
2 Tsp Sweet Paprika
Sea Salt and Black Pepper to taste
Preheat the oven to 400 F.
Spray the casserole dish with olive oil or coconut oil. A casserole dish measuring 13 x 9 inches will accommodate this recipe. Shred the chicken meat off the bones. Save the bones in the freezer for homemade bone broth.
Place the cauliflower florets in the casserole dish. Add shredded chicken, bacon and one half of the shredded cheddar cheese to the casserole dish and mix with the cauliflower. Sprinkle the mix with paprika, salt and pepper. Top with the cubed cream cheese. Sprinkle remaining shredded cheddar over top of cream cheese.
Bake, uncovered, for about 45 to 50 minutes, until the cauliflower is tender and cooked.
Ohhhh, it is a windy, blustery day here in East Central Oklahoma. In this state the wind is a physical entity! This morning one of my cats was playing with a page I tore out of a magazine. It was from Southern Living magazine from November 2015 and featured King Ranch Chicken Soup. It is a rift on the tasty Tex-Mex casserole. Bingo, I know what will be today’s main meal. I made a couple of changes to the Southern Living recipe. I didn’t have a deli roasted chicken. With a town run being a 40 mile round trip event, I used three 12.5 ounce cans of chicken. Their recipe called for a green pepper. I substituted two pablano peppers. I believe they have a more interesting flavor for a Tex-Mex dish. And instead of just putting the tortilla strips in the soup to thicken it, I reduced the amount of chicken broth and toasted the tortilla strips to use as a crispy garnish at serving. Several years ago I posted my Red Dirt Cooking version of that famous casserole. It was messy but good. I hope you like this soup and of course make it your own.
2 Tbsp Butter
1 cup chopped Yellow Onion
2 Pablano Peppers chopped
1 Garlic Clove minced
2 (10.5 oz) cans diced Tomatoes with Green Chiles
1 (10.5 oz) can Cream of Mushroom Soup
1 (10.5 oz) can Cream of Chicken Soup
4 cups Chicken Broth
1 whole deli roasted Chicken, skin removed, de-boned and shredded (or 3 (12.5 oz) canned Chicken don’t drain)
2 Tsp dried Oregano
2 Tsp Ground Cumin
2 Tsp Chili Powder (I used Spice Hunter New Mexico Red Chili Pepper Powder)
8 ozs Shredded Cheese of your choice
8 six inch Tortillas (corn or flour), cut into ½ inch strips cut in half (use soft or toast in oven until crispy)
Salt and Pepper to taste
Optional Garnishes Sour Cream, Cilantro Leaves, Green Onions
Melt butter in a large Dutch Oven over medium heat. Add onions and peppers. Sauté for 6 or 7 minutes. Add garlic. Sauté for about 2 minutes. Stir in diced tomatoes and both soups. Mix completely. Add chicken and spices. Mix until thoroughly. Bring to a boil, reduce heat and simmer for 10 minutes. If you are using the soft tortilla strips, add them now with the shredded cheese. Season to taste and simmer for two minutes. Remove from heat, serve into bowls and add your garnishes. If using crispy tortilla strips garnish on top.
This dish started with a 2.5 pound package of Earl Campbells smoked kielbasa I found at the local grocery store. Normally $8.75, I bought it for $3.00 as a quick sale. I love these great buys. And the meal prep can’t be any easier. Everything else was in my pantry. I do apologize for the messy bowl. I wanted to get the photo and eat quick!
2 lbs Smoked Polish Kielbasa, sliced in ½ inch rounds or you can quarter the slices to stretch the bits of meat (Think peasant cooking)
½ cup Dark Brown Sugar (I used Goya Mexican Piloncillo Sugar)
¼ cup Spicy Brown Mustard
¼ cup Koops Arizona Heat Mustard
1 medium Onion, small dice
2 Tbsp Hot Sauce
1 TBsp Liquid Smoke (I like mesquite or hickory)
Your choice of cooked rice for serving
Mix all ingredients in a slow cooker. Stir to coat kielbasa. Cook on low for 2 ½ to 3 hours. Can be served over rice as a meal or a party snack.
As usual in Oklahoma the weather has been changeable. Right now it is seasonally cold and windy. It’s a great day for a big pot of yummy soup. I had some quick sale cauliflower, potatoes and a package of bacon. They were my starting point. I decided to go all in with the bacon. Most soup recipes use 6 slices of bacon used as garnish. Not me! I had a 12 ounce package. That is one serving in my book. LOL.
I have seen several recipes where the vegetables were roasted. That’s what I did with the cauliflower and carrots. That step added a wonderful and rich flavor to the finished soup. Also I have started to use Redmond Real Salt mined in Utah. The Redmond Salt adds a distinct flavor to dishes. The salt comes from an ancient sea salt deposit and has a great taste. This soup would pair well with sour dough bread. I hope you enjoy this recipe.
1 pound (approx.) Cauliflower broken into florets
3 small Carrots, peeled and sliced into 1 inch rounds
1 Tbsp Olive Oil or Coconut Oil
1 cup Milk
12 ozs Smoked Bacon
1 cup chopped Yellow Onion
6 Green Onions, sliced
4 cloves Garlic, peeled and pressed
1 pound Russet Potatoes, peeled and diced into ½ inch pieces
1 pound Gold Yukon or Red Potatoes, peeled and diced into ½ inch pieces
4 cups Chicken Broth or Stock, homemade or store bought
6 sprigs fresh Thyme or 1 Tbsp dried
2 Bay Leaves
Salt and fresh ground Black Pepper to taste
8 ozs softened Cream Cheese
Optional toppings – Green Onions, Chives or grated Cheese of your choice
Preheat oven to 400F. In a mixing bowl toss cauliflower and carrots in the oil and scoop into a parchment lined rimmed baking sheet. Sprinkle cauliflower with salt. Roast for 40 minutes. Let cool, place into a blender and puree with the milk. Set aside.
Cut the bacon into bite sized pieces. Over medium low heat cook the bacon in a large Dutch Oven until crispy. Leave the bacon in the Dutch Oven. Remove some of the bacon grease or leave the entire amount in the pot. Add the yellow and green onions to the Dutch Oven. Sauté for 5 minutes and add the garlic. Sauté for an additional 5 minutes. Add the potatoes, thyme and bay leaves to the Dutch Oven. Pour in the chicken stock. Bring to a boil. Reduce to a simmer and cover. Simmer for 20 minutes or until the potatoes are tender. Reduce heat to low. Add the cream cheese to the Dutch Oven. Mix in to mix and melt. Add the cauliflower/carrot puree to the Dutch Oven. Stir until the soup is mixed and warm. Serve in bowls with your choice of toppings and bread.
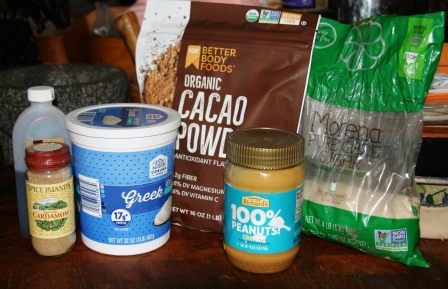
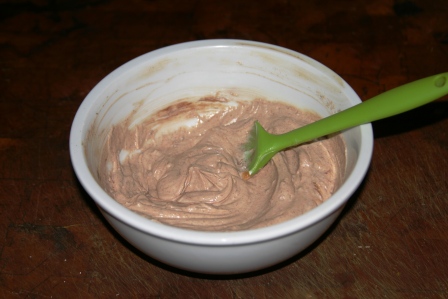
I really love Greek Yogurt. I regularly substitute Greek Yogurt in place of sour cream in recipes and people do not notice. Even the ones who say they HATE Greek yogurt. I recently bought an instant pot and I will be making yogurt in it. Just this morning as I was eating my Dave’s Killer 21 Whole Grains and Seed Bread with peanut butter (I know, I should be eating my own multi-seed bread) I noticed my peanut butter next to the Greek Yogurt container. I immediately thought yogurt and peanut butter. Don’t know why I never thought about that combination before. I did a quick recipe search and found many recipes using peanut butter powder. I am not a big fan of the powder just because it is expensive and just one extra thing to buy. Also I am not concerned about the fat content in regular peanut butter. Sooo I moved ahead using the peanut butter I had. This is a starter recipe that can have many variations. Use your imagination. I try to use products featuring the “non-GMO project” label.
1 cup unflavored Greek Yogurt I prefer full fat yogurt but I had nonfat in my fridge
2 Tbsp Peanut Butter, creamy or crunchy
1 Tsp Cocoa Powder
1 Tsp Sugar
½ Tsp Vanilla Extract
¼ Tsp ground Cardamom
Mix all ingredients together. Use a hand mixer if the peanut butter is a little difficult to whip into the yogurt. To serve, spoon into bowls, sprinkle a little pink Himalayan Salt and add any toppings such as berries, bananas, chocolate bits or nuts. Enjoy!
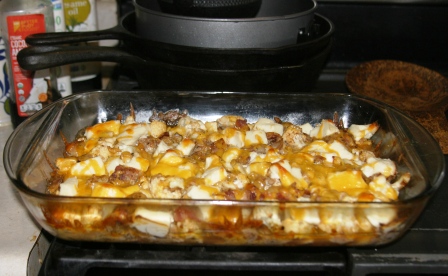
No joke. The grocery prices are in the stratosphere. So I went shopping in my deep freezer for lunch again. I adapted this recipe from the book, “A New Way to Bake” by Martha Stewart. I didn’t have a loaf of artisan bread but I did have 10 ounces of croutons I made from quick sale everything bagels. I found a pound of home style sausage in the deep freeze and a hunk of manchego cheese I bought in June 2020. It is still wonderful. I added 2 teaspoons of rubbed sage to the sausage as I browned it. I do love sage sausage. The onions and the greens are the first harvest from my garden. Yes!!! Eggs are from my hens. The yolks are so orange. I thought about adding mushrooms but didn’t. Maybe next time. You can use ham instead of sausage. Then skip the browning process. Make this strata your own!
Preheat oven to 375 degrees F. Select a 13 X 9 baking dish.
In a heavy skillet (I use cast iron) brown the sausage over medium heat. Season with sage, salt and pepper. Cook time will vary from 5 to 10 minutes. Remove sausage from skillet and place into the baking dish. Add onions and stems to the skillet. Cook until the onions are translucent about 3 minutes. Add the greens to the skillet and allow them to wilt, stirring occasionally for about 4 minutes. Add a small amount of water and scrape the bottom of skillet. Stir and season to taste. Place the onion mixture into the baking dish and mix with the sausage. Spread this mixture out and top with the croutons or bread.
In a large bowl mix beaten eggs and milk. Pour evenly across the top of croutons or bread. Top with grated cheese. Cover and chill in fridge for 10 minutes to allow the bread to absorb some milk. At this point it can be refrigerated overnight to bake for a breakfast meal. Just allow the dish to come to room temp before you put it in the hot oven.
Bake for 45 to 60 minutes, checking to make sure the strata is set in the middle.
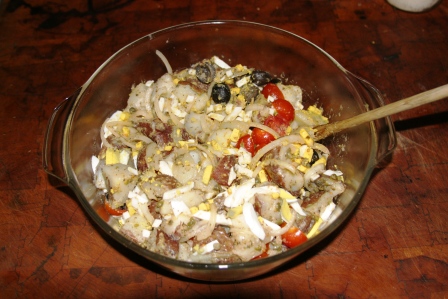
This recipe started with my quick sale purchases, as most of my recent recipes do. I found the base recipe over at Epicurious but I made it my way.
2 ½ pounds medium size Red Potatoes
5 Tbsp Extra Virgin Olive Oil
10 oz Cherry Tomatoes, halved
1 Red or Sweet Onion, very thinly sliced
24 Black Olives, halved
¼ cup chiffonade Basil
2 Tbsp drained Capers
3 Tbsp White Wine Vinegar
½ Tsp dried Oregano
3 hard boiled Eggs, diced
Cook whole potatoes in boiling salted water for 30 minutes or until tender. Drain and cool. Peel (or not) and cut into 1 inch pieces. Place in a large mixing bowl. Add oil and toss to coat potatoes. Add remaining ingredients and mix well. Chill for 30 minutes and serve.
Right after I graduated from college, I made this salad quite often because it is very economical. Also I was a terrible cook then. I have redeemed myself on that score. Now I make this dish because it is something quick to eat if I am spending a lot of time in my garden. And it’s economical. I used to make the salad with Newman’s Own Italian. Now I make my own dressings. The store bought ones, even the more expensive ones, are filled with soybean oil, vegetable or canola. All of those oils are terrible for your health. I don’t even buy the individual packets to which you add oil, water and vinegar. The ingredient list on those packets is like reading a chemistry lesson. Citric Acid, xanthan gum, guar gum, maltodextrin, sugar. I don’t want those things in my salad dressing. Naturally occurring citric acid does come from the peel of citrus fruits, but more commonly it is produced from black mold or corn. This type is cheaper to manufacture. Most companies will use the cheapest ingredients. The store bought salad dressings also may contain GMO or bio engineered ingredients. I don’t want to consume those either.
This is my mix recipe. Feel free to tweak it to your taste. You can also use more black pepper or cayenne for a zesty version.
Italian Dressing Mix
2 tsps Garlic Powder
1 tbsp Onion Powder
1 tbsp Italian Seasoning
1 tbsp dried Parsley
2 tsp Sea Salt
2 tsp Black Pepper
½ tsp dehydrated Red Bell Pepper powder or flakes
¼ tsp Thyme
½ tsp dried Celery Flakes or Celery Seeds
Mix together and store in a jar. To make the dressing put .7 ounce of the dry mix into a jar. Add ¼ white vinegar or apple cider vinegar, 3 tablespoons water and ½ cup oil. I use extra light olive oil. St aside to allow the flavors to meld.
Tuna Salad
1 12 oz can Tuna packed in water, drained
1 15 oz can Chickpeas, drained (I freeze the bean liquid to use in my vegetable soups)
1 15 oz can Dark Red Kidney beans, drained
2 Carrots, peeled and shredded
1 medium Red Onion small dice
2 Celery ribs, small dice
Mix together in a large bowl. Add the Italian dressing. Place in a storage container and chill for at least an hour. Make a double batch. This is devoured quickly.
This soup came about, as usual, from my quick sale produce. I bought two 10 pound bags of russet potatoes for $1.00 each and a head of cauliflower for $2.00. The cauliflower was a bit more expensive than usual but I bought it anyway. I cooked and mashed the cauliflower as a side for some mini meatloaves several days ago. I used the leftover mash in the soup. I had a gallon bag of chicken bones and skin in my freezer that I would simmer to make a chicken stock as the soup base. Yesterday was a little cool. A perfect day for a big pot of soup.
6 cups Chicken Stock, store bought or homemade
6 ozs Bacon, cooked and crumbled
1 large Onion, chopped
3 ribs Celery, diced
5 cups peeled, cubed Potatoes
½ head Cauliflower broken into bite size florets
Salt and Pepper to taste
8 ozs softened Cream Cheese
1 cup Whole Milk, Half and Half or Heavy Cream
¼ cup All Purpose Flour
Shredded Cheese, chives or sliced Green Onions to garnish
In a Dutch Oven or heavy bottom soup pot cook the bacon until well crisped. Remove from pot and crumble. Set aside in a large bowl. In the same pot add onions and celery and sauté over medium low heat for about 10 minutes. Allow the mix to slightly brown. Remove from pot and add to the bowl with the bacon.
Add the chicken stock to the pot. Leave any fond in the pot. It will dissolve in the chicken stock and add more flavor. Season with salt and add potatoes and cauliflower. Bring to a boil and reduce to a simmer for 20 minutes. When the potatoes are fork tender add the onion celery and bacon mixture, cream cheese and milk. Stir to melt the cream cheese.
Put the AP flour into a soup bowl and add ½ cup soup liquid to the bowl. Whisk the flour into the soup liquid. Set aside. When the cream cheese is melted add the flour mixture to the soup pot. Simmer for 10 minutes to cook the flour and thicken soup. Season to taste.
Serve and garnish with cheese, chives or green onions.
This recipe came about because I harvested asparagus from my neglected asparagus patch. I had a quick sale crumbled Chevre goat cheese in the fridge. I had a package of bacon in the deep freezer and today I scored a small package of quick sale button mushrooms. Yup, today was the day to go into town. To date I only spent $30 in diesel for the month. I am driving a one ton dually diesel. I try to only go into town once a week since it is a 44 mile round trip. I would try to go into bi-weekly but I do have to pick up mail at the post office. The pie edge is not perfect but it will eat good! Anyway….I hope you enjoy the recipe. It is yummbly.
1 store bought or homemade Pie Shell
4 slices Bacon, sliced into one inch pieces
8 ozs Asparagus sliced on a diagonal into one inch pieces
4 ozs Mushrooms, quartered
8 Eggs, beaten
2 ozs crumbled Chevre Cheese
2 ozs your choice Cheese, grated
Salt and Pepper to taste
Pre-heat oven to 375 degrees F. Place the pie shell in a deep dish 9” pie dish. Set aside. Cook sliced bacon in a heavy bottom skillet for 3 minutes. Add mushrooms and asparagus. Cook until the bacon is browned and crumbly. Salt and pepper to taste, but remember if you are using Chevere cheese it is salty. As is the bacon. Spoon the mushroom mixture into the pie shell. In a medium mixing bowl beat the eggs. Add the Chevre cheese to the beaten eggs. Pour the egg and cheese mixture into the pie shell. Top with grated cheese. Bake for 35 minutes. Allow to cool for 10 minutes before serving.
Wow, have you seen the headlines regarding food scarcity, food production facility accidents, lack of fertilizer? Not only have they been in the alternative media, but also they have gone mainstream. Tucker Carlson and Dan Bongino have talked about it. Azure Standard HQ, one of the largest organic food distributors was destroyed by a fire. The Honeyville Company has more out of stock than in stock items. Now just this weekend Indonesia has banned the sale of edible oils i.e., palm oil and probably coconut oils to foreign countries. It is concerning. Not in a hair on fire, what am I going to do fear filled way? But in a calm quiet I am going to get even more self reliant way. OHH and bonus I have little tender lambsquarters coming up. More foraged salads!
Now that I am retired and I have loads of time to work my garden I have decided to expand my garden. Right now it measures 20 feet by 50 feet. It will be 50 feet by 50 feet when I have enclosed the additional ground. As usual, I went shopping in my outbuildings. I found a roll of four foot high wire fence. It must have been leftover from the first garden fence 12 years ago. Thankfully, it was out of weather and is in great shape. Other than dirt dabber nests which are easily washed off when I unroll the wire, it is in perfect condition. I also found several T posts to support the new length of fence that will run east/west. I will reuse the existing fence and T posts that currently run north/south. I found wire clips from our barb wire fence fixing activities. I’ll use them to attach the wire to the T post.
We had rain all day yesterday so the next couple of days will be the best time to get the T posts out of the soft ground. That is on my To Do list for this week. I am also able to use rainy days more efficiently since I know I will be at home on the sunny week days to get outdoor chores complete. Just yesterday when it was rainy and cold, I sewed new curtains for my living room. I had that fabric for about six months. The new curtains are hanging and the old curtains are on the west window in my bedroom. Yea! I finally have curtains on that window. It wasn’t a real concern. The closest neighbor is a mile away.
Onion and garlic rows one month ago
I have been working the existing part of my garden for about a month already. I am trying to push the season. A 10 foot row of garlic plants are about 7 inches tall. Twenty feet of sweet onions are taller since I bought onion starts instead of just bulbs. The onions are planted four across. Fingers crossed, I will have a lot of onions in the fall. Currently I am hardening off my seed starts on my back porch. It faces south and it is warm for the starts snuggled up against the house. Last Saturday I weeded 32 feet of welded wire cattle panels I use for pole beans. The yard long green beans and yard long Chinese red noodle do really well on the panels. I top dressed that row with donkey poop (Gomez makes a lot for me), crushed egg shells and Epsom salts. The rain on Sunday did a nice job of watering the additions into the soil. I don’t till the soil. Rather I loosen the ground with a pitch fork and pull the weeds. I haven’t committed to no till yet. I am reading up on that technique. I have 10 feet weeded for my okra plants but I won’t put them in the ground until the end of May or mid June. I need to weed 10 more feet for the okra. Gumbo, fried okra and pickled will be in my future. Okra like very warm soil to flourish. White and blue potatoes are pushing a lot of leaves. I have three 20” pots three fifty pound horse feed sacks with white and blue potatoes. I add more soil to the pots and sacks as the leaves grow up. Some sweet potato slips are on the kitchen window sill growing roots. I should have enough in a couple weeks to get them in the ground.
The asparagus patch needs some of my love. I harvested enough to make a quiche. That is an accomplishment because I have neglect that patch for the past two years. Now I have to put on overalls and denim jacket to cut down the dewberry vines. Ohhhh, I hate those sticker vines. I let a mound of them grow along my driveway. I do like the berries in pies. Unfortunately, they will take over wherever they can.
Two books I have been reading are “Gaia’s Garden, 2nd edition” by Toby Hemenway dealing with permaculture and “Biodynamic Gardening” by Monty Waldin. I also blew the dust off “The Edible Flower Garden” by Rosalind Creasy. I have no connections to any of these authors and I do not have any affiliate links on my blog.
My front porch where I relax and read gardening books. My late husband’s cow dog keeps me company
I will keep you updated on my progress. My gardening activities has had a negative influence on my cooking and posting recipes but it will work out in the end.
Flowers from dandelion, violet and henbit for my salad.Wild Onion Grass that grows my my front porch.
Food is freedom. Control the food, control the people.
Wild onion grass, violets and Dandelions! It is Spring in Oklahoma.
And my hens are producing more eggs since the daylight lasts longer. I have 10 dozen in my fridge right now. When I was working I would take eggs for my co-workers, now that I am retired I use a lot of eggs. They are a great protein to add to breakfast frittatas or quiches and when hardboiled, they are a quick snack. But back to my yard.
Even though we had a mild winter a Spring tonic salad is just what the herbalist ordered to get your body cleaned out.
I don’t spray anything on my yard so everything I forage is pesticide free. When I am gathering for my salad I use a plastic veggie bag from the grocery store. I fill it with a variety of large and small dandelion leaves some blossoms, violet leaves and violet flowers. I have cleaned wild onion grass in my fridge so no need to gather more. Unfortunately, I have not seen any lambs quarters yet. There is a lot of henbit taking over parts of my yard, but the leaves are a little too old for a salad now but I can probably use some flowers for color. I will make this salad again for Easter Sunday lunch.
After I have washed and dried the greens I toss them with the chopped wild onion grass, flowers and dandelion petals in a large bowl. I posted a recipe for PA Dutch hot bacon dressing back in August 2011. It was one of first blog posts. I’ll summarize the recipe here. This is a wonderful dressing for a slightly bitter Spring salad.
3 slices of Bacon (or more to your taste) well cooked and crumbled
1 Tbsp all Purpose Flour or Wondra
1 whole Egg, beaten
1 Tbsp Sugar
¼ cup Apple Cider Vinegar or White Wine Vinegar
1 cup Water
Cook bacon and remove from skillet and set aside. Keep the bacon fat in the skillet. I like to use a cast iron skillet for this recipe. In a small mixing bowl mix the dry ingredients together. Add beaten egg, vinegar and water. Whisk until well blended. Cook in bacon drippings until the liquid thickens. Pour over your salad. This is a great dressing to use for crisper greens like frisee, radicchio and dandelions. Serve while still warm. It can be reheated in the microwave but is best fresh.
I do hope you have food in your yard! Happy foraging.
Easter Dinner 2021 Hrudka cheese is between the deviled eggs and ham slices
This is a repost from Resurrection Sunday in 2022. I don’t eat pork anymore so that protein won’t be on my table this year. I’m making my hrudka today. Hopefully there will be some for Sunday.
My family is from Eastern Europe. My mom always made this egg cheese for Easter. And I have been making this for more than 20 years. It is an easy cheese to make at home no special procedures or rennets. If you have backyard chickens the cheese will take on a wonderful orange color if you let your chickens free range. All you really need is milk and eggs with only a couple additions. The photo is from last Easter. I will make my cheese this Friday. Most of it will remain for Sunday lunch.
You will need cheese cloth and twine to complete this recipe. You can also use a leg from clean pantyhose or knee high stockings. I use cheese cloth.
12 large fresh Eggs
1 quart Whole Milk
1 Tsp Kosher Salt (use ½ Tsp if you use fine salt)
1 Tbsp Sugar
2 Tsp Vanilla
Using a heavy bottom 2 quart pot, add all ingredients and beat thoroughly. Cook slowly over low heat. Stir constantly. This will take at least 20 to 30 minutes. Don’t hurry the process. You will appreciate the end product. The egg mixture will separate into what looks like yellow cottage cheese curds and liquid whey. Keep the liquid. You can use it place of milk in waffles or pancakes.
Line a sieve or small colander with the cheese cloth. The sieve should be over a large bowl to collect the whey. Be careful to keep the edges of the cheese cloth above the lip of sieve so you don’t lose the egg curds. Gather the edges of the cheese cloth to form a ball and tie off with twine. Suspend the cheese cloth ball over the bowl and allow to drain. I tie the ball off one of my cabinets. Let it drain for about 2 hours. Wrap in cling film and refrigerate overnight. To serve, remove the cheese cloth and slice. This fresh cheese will last about a week in the fridge.
So I had a lot of leftover basmati rice from a previous meal. Since I never want to waste anything, I went shopping in my deep freezer this morning. We are having a cool rainy day and I thought soup would be great. I found a gallon baggie of chicken leg quarters I bought in July 2021 for $5.99 for 10 pounds of chicken. A baggie of quick sale grape tomatoes. Don’t know when I froze them because I didn’t put the date on the veggies. Six homegrown sweet banana peppers from the deep freeze. Frozen in September 2021. A baggy from the deep freeze of my own home grown yard long green beans. Freeze date August 2021. I had a half head of green cabbage and a baggy of baby carrots from quick sale veggie tray in my crisper drawer. Just the other day I bought 10 ounces of baby spinach for 39 cents. I love an inexpensive meal and this one was made for pennies.
4 Chicken Leg quarters, skin on and bone in (or a whole chicken)
Water or Chicken Stock to cover the chicken
1 small Onion, diced
3 Celery Ribs, diced
1 cup Grape Tomatoes, sliced in half
2 cups fine sliced Green or Red Cabbage
2 cups Green Beans, sliced into bite size
1 cup Carrots, sliced in rounds
6 Sweet Banana Peppers, seeded and sliced
10 ozs Spinach
3 cups cooked Rice
Salt and Pepper to taste
Using a large stock pot, put the chicken leg quarters or whole in the pot. Add water or stock to the pot so it covers the chicken by at least an inch. Bring to a boil then reduce to a simmer. Simmer for about an hour. Remove chicken from the pot and set aside to cool.
Add the ingredient except the spinach and rice. Season to taste. When the chicken is cool, shred the meat off the bones and add meat to the soup. I keep the bones and skin in the freezer to make stock. After I cook the all of the saved bones and skin, I give what is left to my barn cats. They do love it.
Let the soup simmer for 30 to 45 minutes. Then add the spinach and rice. Simmer until the rice is heated. I served the soups with croutons I dehydrated from everything bagels. So good.
I found two quick sale family packs of boneless pork chops during one of my recent grocery runs into town. I used both packs for this meal but it will stretch over several days. I do like to cook in bulk and eat leftovers. I have a Zojirushi rice cooker that I love. I rinse the rice in the rice pot add that appropriate amount of water for the amount of rice I use. Hit the cook switch and forget about it until I need the cooked rice for my recipe. It automatically switches to keep warm setting when the rice is cooked. So much easier than stove top.
3.5 pounds Pork chopped in bite size pieces
2 tbsp unsalted Butter
2 tbsp Olive Oil
3 Garlic cloves, minced or peeled and pressed
Salt and Pepper to taste
1 tsp chopped fresh Rosemary
1 tsp dried Thyme
2 cups Chicken Broth, homemade or store bought
½ cup Balsamic Vinegar, dark or light
4 cups cooked Rice, I like long grain Basmatti
Fresh thyme or parsley for garnish optional
Cook rice according to your preferred method.
Heat the butter and olive oil in a heavy Dutch oven. I like an enameled cast iron one for this recipe because of the acidic balsamic vinegar. Brown the pork bites in batches. Set each batch aside. Season with salt and pepper to taste as needed. Return browned pork bites to the Dutch oven. Add the garlic, rosemary and thyme to the pork. Mix well. Add the chicken broth and balsamic. Simmer over medium low heat until the liquid reduces by one quarter approximately six to ten minutes.
Serve over rice and garnish fresh thyme or parsley as an option.
This is such as easy dish to make on a Sunday because it will keep wonderfully in the fridge and can be used as leftovers for the rest of the week. I didn’t have fresh mushrooms but I had dehydrated sliced mushrooms from my quick sale purchases. I grabbed two handfuls of the dehydrated ‘shrooms, (yeah, precise I know) I put them in hot water and let them hydrate for at least an hour.
8 ozs Bacon, cut into ½ inch pieces
1 medium Sweet Onion, diced
4 ozs sliced Mushrooms, white button or Baby Bellas
1 sweet Bell Pepper, diced, use red, yellow or orange
4 Garlic cloves, minced or peeled and pressed
1 tsp dried Thyme
Salt and Pepper to taste
One 16 oz package of Spaghetti, break in half when it goes into the boiling water
2 tbsp unsalted Butter
2 tbsp of All Purpose Flour or Wondra
2 cups of reserved Pasta water
½ cup Half and Half
8 ozs of grated Cheese that melts easily ( I had 4 ozs of Colby Jack, 2 ozs of crumbled Blue Cheese and about 4 ozs of Garlic Dill Feta left over from a cheese board)
½ cup dry White Wine
In a heavy cast iron skillet, cook bacon, onion and bell pepper over medium heat until the bacon is crispy about 10 minutes. Add garlic, thyme and salt and pepper. Turn off heat. In a large soup pot cook pasta. Cook about two minutes less than package directions. The pasta will finish cooking with the residual heat from the cheese sauce. Drain, but keep two cups of the pasta water. Put pasta in a large bowl.
Using the soup pot, melt the butter over medium heat. When melted whisk in the flour. Whisk until smooth. This is actually making a blond roux. Whisk in half and half and ½ cup of the pasta water. Simmer and stir until smooth. Add the cheese. Stir until melted. Add the remaining pasta water and stir until smooth. Turn off the heat. Stir in the spaghetti. Mix until the pasta in covered in the cheese sauce.
Reheat the mushroom mixture in the skillet over medium high heat. The mixture should start to sizzle. Heat the mixture for about 3 to 4 minutes but don’t let the mixture burn. Add the dry white wine to deglaze the skillet. It might smoke a little. That’s okay. Stir the wine to deglaze the fond from the bottom of the skillet. Take off the heat. Stir in the mushroom wine mixture into the pasta and cheese sauce. Mix thoroughly making sure the pasta is not clumped together. You can garnish with fresh or dried parsley when serving. Enjoy!
By peasant cooking I do not mean porridge gruel three times a day. I mean thoughtfully using ingredients to stretch meals. Many home cooks do this instinctually to feed the family.
I am certain that everyone has experienced sticker shock at the grocery store lately. Meat prices across the board have increased. Also fresh produce prices are crazy. My local stores still have mostly stocked shelves. What I have noticed during my grocery and sundries runs are the lack of choice in sizes of various items. While not a food product, I looked for the small three ounce bottle of contact lens solution that I use. Nope. Nothing. I had to buy the vastly more expensive 12 ounce bottle. That’s enough to last me a whole year. I suppose in the end I saved money. SIGH.
To continue my grocery odyssey. I was blessed with a very productive garden last year. My two deep freezers are stuffed with my own home grown produce. I do shop quick sales in the meat department so I have meat protein in the freezers. And I want to stretch that meat as far as I can. Several years ago I may have made individual steaks. Now I would forgo the steaks and grind up a couple sirloins to make a large pot of chili. Where I would have one meal for two people, now I have three, four or more meals per person depending on the amount of other ingredients. I use a grinder attachment for my KitchenAide mixer but I don’t always grind. I also cut meat into chunks or shred the meat after cooking it. It all adds to increase the amount of meat available to feed a crowd. Recently, my meals have been a great New England Clam Chowder and yesterday I made a wonderful spicy Taco Soup. I will post those recipes soon.
I have 160 acres that I call home. I forage, garden and keep chickens right now. Presently I do not hunt but if the SHTF I would to feed us. My chickens live out their natural lives. When they do not continue to lay eggs they just keep on pecking on my property.
Anyway three books on peasant cooking in my library are “Peasant Cooking of Many Lands” by Coralie Castle, “European Peasant Cookery” and “The Old World Kitchen” by Elizabeth Luard. I also learned peasant cooking from my mom and my Baba (grandmother) in the Northern Blue Mountains of the Northeast.
Way back in the Fall of 2015 I posted a peanut butter dog treat recipe. That is still one of the most viewed posts. It is still a good recipe but I wanted to change it up a little. I am still using the basic ingredients but exchanging and adding a couple of items.
Almond butter takes the place of peanut butter. I am a label reader. I noticed more brands are adding high fructose corn syrup and soy or canola oils. I don’t eat those frankenfoods, so I don’t want to feed them to my dogs. I also added fresh ground black pepper because the pepperdine works synergistically with the curcumin in the turmeric.
2 1/2 cups Oat Flour (grind Regular Oats in a blender or food processor.)
2 Eggs, beaten (I have chickens so I use my fresh eggs)
1/2 cup Pumpkin, use 100% pumpkin, not the pumpkin pie filling if you are using store bought
2 tbsp Almond Butter
1 tbsp Turmeric
1 tbsp Flaxseed Meal
1 tsp Ground Cinnamon
1/2 tsp Kosher or Sea Salt
1/2 tsp fresh Ground Black Pepper, needs to be fresh ground
Preheat oven to 325 degrees Fahrenheit or 163 Celsius.
Mix all ingredients together in a medium mixing bowl. Add a bit of water as necessary to make a workable dough. It will be dry and stiff like a cracker dough. Spread some oat flour on your counter top or cutting board so the dough will not stick. Roll out to about 1/4 inch to 1/2 inch thickness. Cut into size appropriate pieces for your dog. I have an Irish Wolfhound so his pieces would be too big for a mini dog. You can also use seasonal cookie cutters for a bit of whimsy. The dogs don’t care but I think they are cute.
Bake for about 30 to 35 minutes or until hard and dry. Remove from oven, let cool and store in an air tight container. As for quantity, your mileage will vary. I hope your furry friends enjoy these.
This so easy and quick. I had everything in my pantry when I decided to make this for dinner last night. Earlier in the day I went to town on grocery and mail run. I found some quick sale cuts of beef. I used my Kitchen Aide meat grinder attachment to grind a pound of the beef. I do not buy pre-ground meat from the store. The rest of the cuts went into my deep freeze. For the oil, I use a mixture for four cooking oils, coconut, extra virgin olive oil, extra virgin sesame oil and avocado oil. I mix my own Taco seasoning because that nasty gunk from soy ingredients formed in the back of my throat after I ate the store bought packages.
When I add the chopped fresh tomatoes as a garnish I also drizzle a Costa Rican salsa condiment called Lizano salsa/sauce. It adds just a different and unique taste to the dish. No problem if you don’t have. I recently bought some after I tasted a friend’s Costa Rican rice casserole. I will have to post that. It is yummy.
1 tbsp Oil
1 pound Ground Beef, Venison or Bison
1 Red Onion, diced
2 cloves Garlic, minced or pressed
1.25 ounces Taco mix or one store bought package
1 cup uncooked Rice (I use a long grain Basmatti)
One 15 ounce can of Black Beans, don’t drain the liquid
one 10 ounce can of diced Tomatoes and Green chilies, undrained
1 cup Corn, frozen, fresh or canned
1 tsp Chili Powder
1 tsp Ground Cumin
Salt and fresh ground Pepper to taste
Zest and juice of 1 Lime
2 tbsp of chopped fresh Cilantro Leaves, optional
2 cups shredded Cheese of your choice, Pepper Jack, Cheddar, Monterey Jack, etc
1 Tomato, diced
Green Onions sliced
drizzle of Lizano Sauce, if you have it
Heat oil over medium high heat in a large heavy cast iron skillet, at least a 12 inch one, or Dutch Oven. Add the ground beef and cook for about 5 minutes. Add the onion and garlic and continue cooking for another 5 minutes. Add the taco seasoning and mix to combine.
Stir in rice, beans, canned tomatoes and green chilies, chili powder, cumin, salt and pepper to taste. Bring to a boil, reduce to a simmer and cover. Simmer until the rice is cooked about 18 minutes. Stir occasionally so it doesn’t burn. Remove from heat and stir in cilantro, lime zest and juice.
Top with cheese and cover until it melts. Serve and garnish with chopped fresh tomatoes, green onions and Lizano Sauce.
I made this dish with a black-eye Pea Salad for New Year’s dinner. The salad is a Carla Hall recipe. Here in the sort-of South people eat black-eye peas on New Year’s day for luck, health and prosperity. These pork bites are so easy to make. And bonus, one pot meal. Don’t fret if the country ribs have a lot of fat. It will render out when you brown the pork. The fat will also make the finished product juicy and not tough or dry. I do not cook low fat dishes. I try to follow a low carb meal plan.
3 -4 pounds boneless Country Style Pork Ribs, cut into 1 inch pieces
1 large Onion, sliced root to tip so they keep their shape while cooking
Two 12 ounce bottles Crabbies Orange Spiced Ginger beer
tiny Potatoes enough to cover the pork
2 Cutie Oranges, sliced
Sea Salt, Kosher or Himalayan and Pepper to taste (I use a 4 color pepper mix I that grind fresh)
Preheat oven to 375 degrees F.
Over medium to medium high heat brown the pork in batches in a heavy bottom Dutch Oven. I use an enameled cast iron one. Don’t crowd the pot so the pieces brown. Season with salt and pepper for each batch. During the browning process fond will accumulate on the bottom and even sides of the pot. That is great this will be flavor for the finished dish. Set the browned pork aside in bowl.
Add onions to the dutch oven. Sauté the onions in the remaining pork drippings until translucent about 5 to 7 minutes. More fond will accumulate. Remove onions from pot and mix with browned pork bites. Turn up the heat for one or two minutes. Stay at the stove because the pot can easily burn if not watched.
Add one bottle of the ginger beer to deglaze the pot. Scrap the fond from the bottom and the sides of the pot. Reduce the heat so the liquid simmers. Add the second bottle of ginger beer and simmer until the liquid is reduced by half.
Add pork and onion mixture to the dutch oven. Cover the mixture with a layer of tiny potatoes. Season to taste. Top the potatoes with the sliced oranges.
Single layer of tiny potatoesTop with orange slices, cover place in oven
Place the lid on the dutch oven and cook in the oven for 45 minutes. Check the tenderness of the potatoes and pork. Remove from oven and let cool for about 10 minutes. Remove oranges slices to eat or to add to the compost pile. Enjoy!
This a quick and easy recipe for breakfast, brunch, lunch or even breakfast for dinner. You can use a variety of greens in this quiche. Use what you have on hand. I had blanched kale and mustard greens in my deep freeze. They are part of my garden harvest.
One deep dish Pie Crust, store bought or homemade
1 Red, Yellow or Orange Pepper, diced
1 medium Onion, diced
10 or 12 Cherry or Grape Tomatoes, cut in half
8 to 10 ounces Garden Greens, (baby spinach, kale chard etc) cut into chiffonade ribbons
1/4 tsp Garlic Powder
1/4 tsp Turmeric
6 Eggs (my girls are still producing so I have really fresh eggs)
1/2 cup Heavy Whipping Cream
4 ounces shredded Cheese of your choice, I used extra sharp Cheddar Sea Salt and Pepper to your taste
Directions
Preheat oven to 375 degrees F.
Place pie crust in a deep dish pie dish. Dock the bottom of the crust with a fork.
In a heavy bottom skillet, cast iron if you have it, heat a tablespoon of Olive Oil over medium low heat. add red pepper and onions into the pan. Sauté until peppers are soft and onions are translucent. You don’t want to brown them. Add garlic powder, turmeric, salt and pepper. Add the ribbons of greens in batches and sauté until soft. Add tomatoes, mix into the greens and remove from heat.
In a separate bowl, beat the eggs until smooth and add heavy cream. Season egg mixture to taste.
Add the greens mixture into the pie dish in an even layer. Top with shredded cheese. Pour the egg mixture on top of the cheese. Bake in the oven for 35 to 40 minutes. The top should be puffed and golden brown. As it cools the top will collapse.
Remove from oven and cool for 5 to 10 minutes. Enjoy!
Christmas is just about a week away. I am planning to go shopping in my two deep freezers for the Christmas meal just like I did for Thanksgiving lunch. Inflation is crazy. I was in town a couple days ago because I needed to go to the feed store. Wow, the creep feed that I buy for the horses and my chickens has gone up three dollars in six months for a 50 pound bag.
My menu planning includes a whole roaster chicken ($2.00 quick sale), orange zest cranberry sauce (.99 cent bag of whole cranberries bargain from last Christmas sale), English pea salad (canned peas from the pantry and my own pasture raised chicken eggs), chicken liver pate (a one pound container of livers from my deep freeze), three pounds of homegrown sweet potatoes ( my harvest was six and a half pounds from one pot. I used half for Thanksgiving.) and a persimmon pecan pie (foraged native persimmons from my property and quick sale pecans from last Christmas sales).
I thought I was going to pay full price for the two oranges I need for the cranberry sauce, however, I found two oranges on quick sale for .39 cents. YES! Sorry, saving money makes me very happy. I also found four sleeves of reduced celery for .50 cents each. Reduced sweet onions priced at .79 cents for two large onions.
I admit I will need to buy some brandy or cognac for the chicken liver pate. I also need a nice bottle of Merlot for mulled wine. Oh and a nice bottle of a dry white for the meal. Only my brother and I will be at the Christmas meal, but that’s okay. It will be nice and quiet.
I will post all of the recipes in the lead up to Christmas so you can try them.
I am giving you a break from zucchini recipes, but not to worry, I still have a few that I have not posted! Just fair warning. LOL! I found this recipe in one of my mom’s cookbooks. It was an American Heritage, circa 1976, cookbook from Better Homes and Gardens. Some of the dishes are a little dated. I would have to bump up the spices in most of them, but I left this one alone, well mostly. I increased the pounds of green tomatoes to give it a more deep dish look and added ground Allspice. And oh yeah halved the amount of sugar. This tastes like a spicy apple pie.
2 ½ pounds Green Tomatoes
½ cup Sugar
4 tablespoons All Purpose Flour or Wondra Flour
1 ½ teaspoon ground Cinnamon
1 teaspoon grated Lemon Zest
½ teaspoon ground Nutmeg
½ teaspoon ground Allspice
½ teaspoon Sea Salt or Kosher Salt
2 tablespoons Butter
Pastry for 2 crust 9 inch pie, homemade or store bought (I cheat and use store bought)
Sugar
Preheat oven to 400 degrees.
Dunk green tomatoes in boiling water for 1 minute. Peel and remove core. Cut into ¼ inch slices. In a medium saucepan combine with ¼ cup water. Bring to a boil and reduce heat to simmer. Simmer for 5 minutes. Remove slices from liquid and set aside. Mix sugar, flour, cinnamon, zest, nutmeg, allspice and salt into the liquid in the saucepan. Cook and stir until just boiling. Remove from heat. Add butter. Mix. Gently stir the slices. Cool for 10 minutes. While tomato mix is cooling line the pie plate with one prepared pie crust. Spoon in the tomato mixture. Place top crust over the tomatoes and adjust. Seal, crimp edges, cut slits to allow steam to escape from the baking pie. Sprinkle with additional sugar if wanted. Bake for about 40 to 45 minutes.
This week I was going through my vegetarian soup and chowder recipes. I normally don’t cook vegetarian meals because I usually follow a carnivore/keto lifespan. This was listed as a copycat recipe of Panera Bread’s Corn Chowder. I think I had this at a Panera restaurant years and years ago. I like my version much better. I added two pints of my home canned ugly chicken breast meat. So good. The last two ingredients sounded iffy to me at first. But a taste test before and after I added sealed the deal. In my opinion the acid from the lime juice and white wine vinegar is needed to fill out the flavor profile. I hope you like this.
4 Tbsp unsalted Butter
1 small Red Bell Pepper, diced
1 small Green Bell Pepper, diced
4 Garlic Cloves, minced or peeled and pressed
1 medium Onion, diced
1 Jalapeno Pepper, seeded and fine diced
1 four oz can Diced Green Chilies
1/3 c All Purpose Flour
4 c Vegetable Broth (I used the liquid from canned corn, my pints of ugly chicken, diced tomatoes and green chilies. Then added water to make 4 cups)
1 ½ c Heavy Cream (I used a 12 oz can of evaporated milk)
1 large Russet Potato, peeled and diced
2 (15 oz) cans of Whole Corn
1 (10 oz) can Rotel type diced tomatoes
2 Tsp Salt
1 Tsp Smoked Paprika
½ Tsp Black Pepper
1 Tbsp Lime Juice
1 Tbsp White wine Vinegar (I used a white wine vinegar that I soaked Thai Chiles in)
Melt butter in a large, heavy bottom soup pot over medium heat. Add red pepper, green pepper, garlic, onion, jalapeno pepper and green chilies. Sauté until tender about 7 minutes. Add AP flour and stir until for about one minute, until thickened.
Stir in broth, heavy cream, corn, potato, diced tomatoes, salt, black pepper and smoked paprika. Bring chowder to a gentle simmer; cover and cook for 20 minutes.
And lime juice and white wine vinegar. Simmer for 5 minutes and serve. Great with home baked bread.